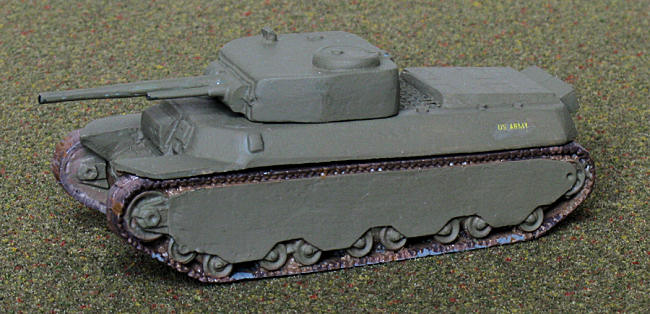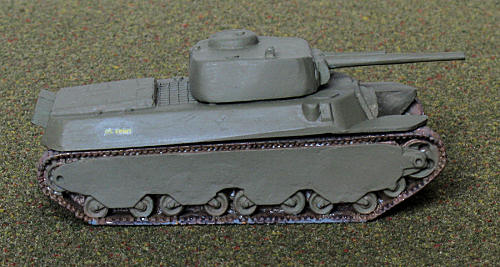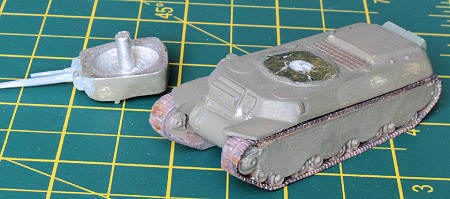
| KIT #: | 6001 |
| PRICE: | $11.00 MSRP in 2005 |
| DECALS: | None provided with the kit. |
| REVIEWER: | Jeff Simpson |
| NOTES: | I-94 US Army decals used |

| HISTORY |
 its accelerated development from a 36 ton project into a 55 tonne
tank, the British Churchill early versions, 38 tonnes, were in production.
As it happens the M6 was elbowed out of American production plans by the M4 Sherman which seemed to be able to do the job and, at half the weight, could be produced and shipped in vast numbers. The M6 addressed many issues in a sensible manner, it used the proven vertical volute suspension as used in other American tanks, it had a massively powerful engine and a transmission capable of handling the power was developed in time for the prototype unveiling. The frontal and side armour was sloped and offered better ballistics than Tiger or Churchill. On the other hand it would require significant effort to develop and production was stopped after only 40 units had been made.
| THE KIT |
 Quality
Castings make a series of “15mm” scale wargame kits. Their interpretation of
this “scale” results in models averaging about 1:100 scale. An advantage of this
scale is the vast number of different types of soldiers and vehicles and
buildings that are kitted. The M6 kit is a bit small, scaling out at 1:108 on
length, the height and width looks to be in proportion. The kit is simple: 4
metal castings, comprising a turret including guns, hull and two separate track
assemblies. I don’t have a photo of the parts, just the partly assembled model.
Straightaway we hit a problem: the hull is supplied with the external exhaust
system of the early prototype, the turret however has the low cupola of the
production tank. My guess is that this casting is based on the WW2 recognition
models produced by Comet. In fairness I should note that this sort of problem is
not typical of all of the tank kits made by Quality Castings.
The next problem is the gun barrels are straight sided, whereas the 3” gun in particular has a noticeable taper.
| CONSTRUCTION |
 The
first decision I made was to model the production M6 tank, so I chopped the
exhaust pipes off and filled the damage to the hull, I also applied big blobs of
filler to the hull and pressed the track units in, to make good seat to glue
them to, and adjusted the amount of filler so that the track units looked even.
I
filled and smoothed the rear engine deck, accepting that it is a bit too high,
one of the problems with metal kits is filing down large areas takes a lot of
effort if you are using hand tools, as I am. I put a flat plasticard plate over
the exhaust at the rear.
I
scribed hatch details in the deck, cut out two disks of plasticard to represent
the crew hatches. I also found a piece of Photo-etch mesh to represent the
engine intake grille. All these bits were glued to the hull and smoothed.
It then
turned out that the turret was too close to the hull top and so used bits of
plasticard glued to the turret ring to lift it up high enough to rotate. This
was not a neat job, but it d oesn’t have to be since it is hidden by the turret.
I made
up boxes out of square-section plastic rod to represent the rear storage on the
tank.
I
painted the tracks and underneath the hull sides and then glued the tracks to
the prepared filler seats. However you can see from the photos that I missed one
or two recesses in the tracks that now catch the light and glint to show what a
bad painter I am.
| COLORS & MARKINGS |
Most of
the photos of these tanks have no visible markings, others have a number on hull
and turret like
903 or 12, some are emblazoned with lettering saying something
like “ordnance department test operation”. I decided to go for overall faded
olive drab, with a yellow "US Army" decal applied either side. I used
Aeromodeller acrylic applied with a brush, and an I-94 decal sheet for US 15mm
vehicles.
I
painted the tracks with a mix of grey, and various rust browns, although I
didn’t manage to cover all of the white metal, as given away in the photos.
Having a few high spots show through as bare metal looks plausible to me, but
next time I would be sure to force dark coloured paint into all the recesses to
prevent the unwanted “glint”.
The “3
tanks” photo
 I
thought it would be fun to re-create the publicity photos that were released in
late 1941 showing the M6 dominating its smaller brothers the M3 Medium and M3
light tanks. As it happens this is difficult to do. The M3 Medium is such a tall
tank that the photographer must have got down on the ground and photographed
upwards to fake the impression of the M6 towering over everything else. The
closest I could get was shooting more or less along the table top, which gives a
more realistic impression of the relative sizes of the tanks.
| CONCLUSIONS |
The kit
castings were a bit of a disappointment, I assume it is probably an old master.
However it responded to persistence, it is nice to have an M6 in the collection,
one of WW2’s “what-ifs”.
There
is quite a lot of information about this tank and it would be possible to make a
more accurate model than I have done.
There
are a several possible variations: the prototype, the T1E1 with electric drive,
a version with 90mm gun.
| REFERENCES |
Bellona
Military Vehicle Prints No. 19, 1969
RP
Hunnicutt, “Firepower”, 1988 Presidio Press ISBN 0-89141-304-9
Wikipedia.org
wwiivehicles.com
March 2009
Copyright ModelingMadness.com
If you would like your product reviewed fairly and quickly, please contact the editor or see other details in the Note to Contributors.