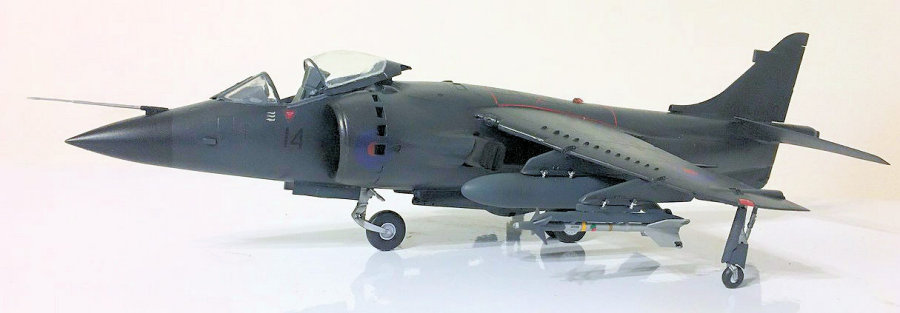
| KIT #: | K48035 |
| PRICE: | $42.99 |
| DECALS: | Yes |
| REVIEWER: | Shanee Cowland |
| NOTES: |

| HISTORY |
The Harrier was developed by Hawker Siddeley in the 1960’s and was designed and developed as a VTOL/VSTOL (Vertical Take Off Landing/Short Take Off Landing) aircraft. Originally, Harriers were procured by both the Royal Air Force and by the US Marines. In the 1970s a navy variant, the Sea Harrier was developed for the Royal Navy and was exported to the Indian Navy. The FRS1 was the first naval variant. It was replaced by the upgraded FA2. The Sea Harrier saw service in the Falklands Conflict in 1982 and in the Balkans in the Early 1990s.
The Falklands Conflict
 In 1982 the Military Junta in Argentina were highly
unpopular at home. Facing riots and protests, military leaders sought to unite
their people against a common enemy by invading the British Falkland Islands.
Argentina had (and still does) long claimed that the Falklands Islands are
Argentine territory. On the 19th of March of that year a group of Argentine
scrap metal merchants (and reportedly Argentine Marines) landed on South Georgia
Island, raising an Argentine Flag. On 2nd April of that year, this was followed
by a large-scale invasion of the Falkland Islands. This proved to be very
popular in Buenos Aires and protests became celebrations.
The conflict (from invasion to surrender) lasted around two and a half months and involved soldiers, navies and air forces of both countries. Air support from Britain was primarily limited to Sea Harriers, Harriers and helicopters launched from HMS Invincible and HMS Hermes. Bombing of the Falklands only paved runway forced Argentine Air support to be based on the Argentine mainland. A total of twenty-eight Sea Harriers and ten GR. 3 Harriers went to the Falklands during the conflict flying over sixteen hundred sorties between them. Six sea harriers and four GR. 3’s were lost during the conflict but notably, none were lost in air-to-air combat. During the same period, Sea Harrier pilots scored twenty-one hits against Argentine Aircraft (most of them Sky Hawk, Mirage III and IAI Daggers).
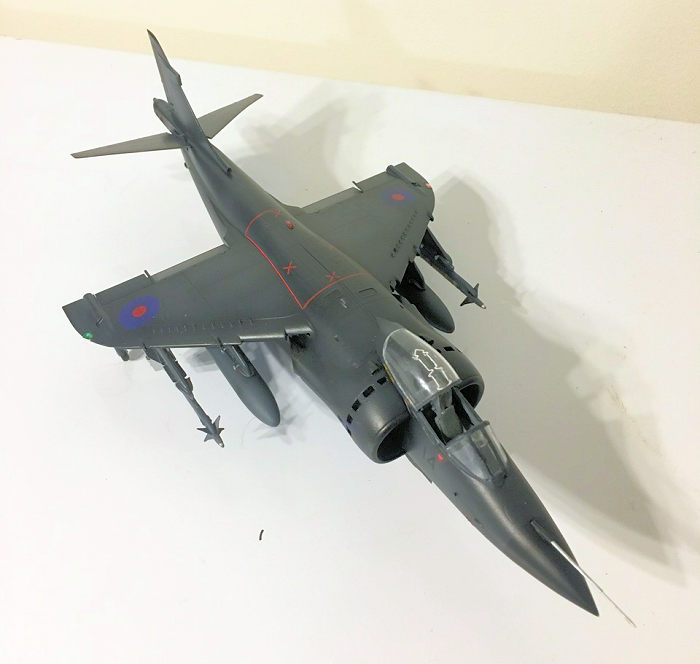
The Aircraft I built was XZ457. It was flown from HMS Hermes by Lieutenant Clive Morrel and by Lieutenant-Commander Andy Auld. It displays three kill marks, One A4 Skyhawk and two IAI Daggers.
| THE KIT |
 Kinetic did a great job with this kit. It is well
engineered, detailed and has enough armament variations and decals to bolster
any stash. The kit comes with eight light grey sprues (two armament sprues), a
clear sprue and a small photo etch. It includes wings for both the FRS. 1 and
the FA. 2 as well as both nose cones and armament options. The instruction
manual is twenty-three pages long and is printed in black and white. Half of the
manual is dedicated to the different color and marking schemes that can be
built.
The decal sheet is about the same size as the instruction booklet (about 8.5” x 11”) and includes red, white and blue roundels, red and blue roundels, high and low visibility options and the roundels for the Indian navy. It also comes with numbering of different sizes and different colors. It would not surprise me to learn that you could build any FRS 1 in the world.
| CONSTRUCTION |
Like most kits, this one began with the cockpit. It
went together pretty nicely although I was a little put out that there was not
an option to include the pilot. Having some of the Hasegawa US Naval Aviators, I
 compared helmets and kit and determined that they would be a sufficient match
and proceeded to fit a pilot into the cockpit. Unfortunately I am not a
sufficiently good model maker (or surgeon) to be able to make that work. I tried
sanding them down, amputating limbs, and even sawing them in half at the waist,
only to find that there was one or another issue preventing the fit. In the end,
I gave up on installing the pilot. The cockpit tub detail is what I would
consider to be a good level so I didn’t bother purchasing additional photo-etch.
The cockpit tub attached to the forward wheel well and the engine fan/intake. These went together without incident but fitting them into the fuselage was fiddly and took me several attempts. In addition to fitting the cockpit tub, the mechanism that operates the rotating exhausts and rear wheel well also needed to be fitted into the fuselage halves at the same time. Kinetic did some clever engineering by placing the exhausts on axles and then connecting the axles with a bar so that all four would rotate in situ. Unfortunately this was too fiddly for my clumsy fingers and I ended up breaking the connecting bar so I left the exhausts on their axles. Having left and right exhausts aligned together was ‘good enough’ for me.
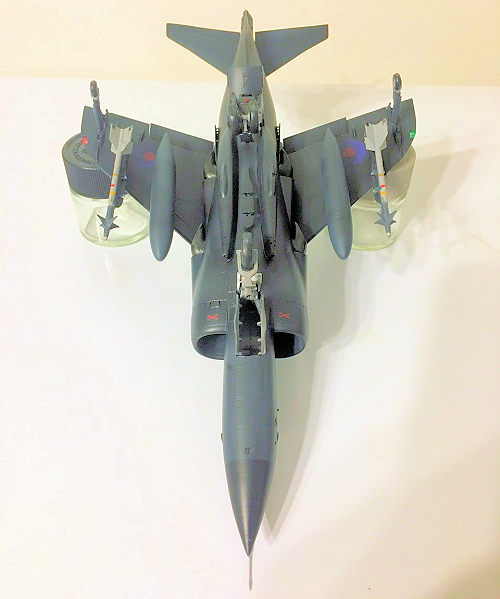 After the exhausts were added, it was time to add the
wings. When I first attached them I forgot to dry fit and found that there was a
small step where the fuselage met the wings. I could have ignored it but to me
it was more like a cliff than a half-millimeter misalignment and removed the
wing, adjusting the lip on which it sat until it looked much better.
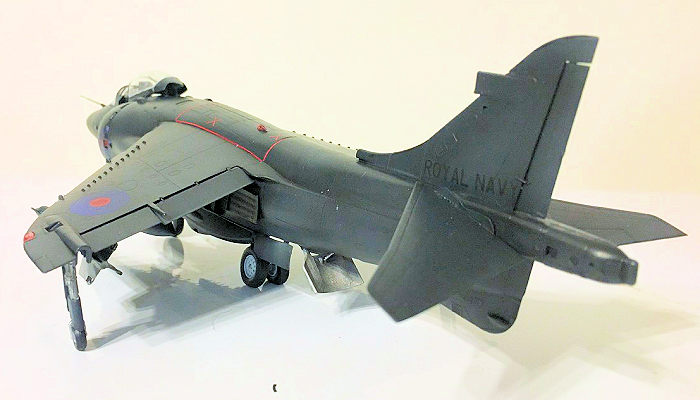
At this point the model began to look like it’s subject and I started several sub assemblies such as wheels, landing gear, hard-points, fuel tanks and missiles. Although the landing gear went together well, I did find the points where the landing gear fit the wheel wells to be a little vague and during the build I did need to remove the main landing gear and reseat it as the wheels were not making contact with the base. This issue with landing gear alignment is something that I understand is a common issue with a number of Harrier kits as there are five wheels that should all be making contact with the base.
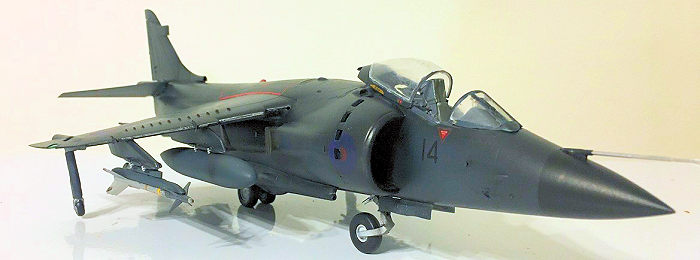
The inside of the main canopy part includes a raised portion for the detonation chord (for which a decal is provided). The decal sheet actually includes two sets of detonation chords; one for the FR.1, and one for the FA2. They are not positioned together and I unwittingly chose the incorrect one (which of course did not align with the canopy). Ultimately, I elected to paint the detonation chord with white oil paint. It took two or three attempts but I am reasonably pleased with the result.
Canopy drama did not end there and on removing the masking, I found that the front and main parts of the canopy had both been compromised and that they did not close well. Ultimately, they were removed, wet sanded, polished and repositioned. Most of my models have a pilot and a closed canopy but for the Harrier, I elected the path of least pain and repositioned my canopy open. As it was an after thought, my cockpit tub is relatively basic, devoid of harness and other photo-etch extras.
| COLORS & MARKINGS |
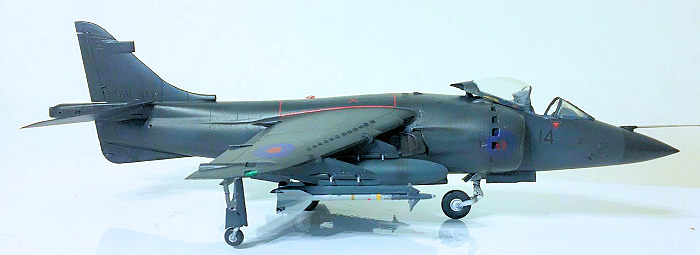 The instruction booklet provides color references in
Humbrol, Mr. Color, Italeri, Tamiya, Ammo Mig and Vallejo. Unfortunately, the
color required for my selected aircraft was a Tamiya rattle can (AS 4). I wanted
to use Tamiya Acrylics so I used the instructions on the Tamiya Sea Harrier
(found on ScaleMates.com) for my reference. Based on that I mixed Tamiya XF 24
(Dark Grey), XF 17 (Sea Blue) and XF 8 (Flat Blue) at a ratio of 6:1:1 to give
my main color.
Weathering was added with a light dusting of the flat black and smoke and then I used a brush to add oil paints to reflect rust and heat on and around the exhausts and I used the provided decals, as they were more than sufficient for the build.
| CONCLUSIONS |
This was a challenging but enjoyable build. There were a few issues along the way, most to do with the unique nature of the ‘Harrier Jump Jet’. There were also one or two alignment issues. From what I have seen built and read, Kinetic look to have the best Harrier in 1/48 scale and I hope that they further develop the line by adding the GR1 and GR3 harriers.
| REFERENCES |
https://www.aircraftresourcecenter.com/Gal14/13901-14000/gal13950-Harrier-Buick/00.shtm
http://www.boscombedownaviationcollection.co.uk/index_files/Page2625.htm
http://www.naval-history.net/NAVAL1982FALKLANDS.htm
https://en.wikipedia.org/wiki/Falklands_War
https://www.britannica.com/event/Falkland-Islands-War
https://www.scalemates.com/kits/idea-ap029-sea-harrier-frs1--1104979
https://www.scalemates.com/kits/kinetic-k48035-frs1--967167
Shanee Cowland
21 July 2020
Copyright ModelingMadness.com
If you would like your product reviewed fairly and fairly quickly, please contact the editor or see other details in the Note to Contributors.
Back to the Main Page Back to the Review Index Page Back to the Previews Index Page