
Testor’s 1/32nd scale YF-22A
| KIT #: | 7569 |
| PRICE: | $45.00 MSRP |
| DECALS: | One Option |
| REVIEWER: | Greg Ewald |
| NOTES: |
notorious putty monster |

| HISTORY |
The Raptor is either loved or hated by aeriophiles.
It is ridiculously expensive, each production jet costing almost 200
million USD, and that does not take into account the expense over-rides and
research/development bucks that were thrown into the ring. With that kind of
cost, you would expect to have something perfect.
Well, the 22 is just about perfect, as far as a jet fighter can be. Initially, I
hated the “craptor”, but the more you learn about this
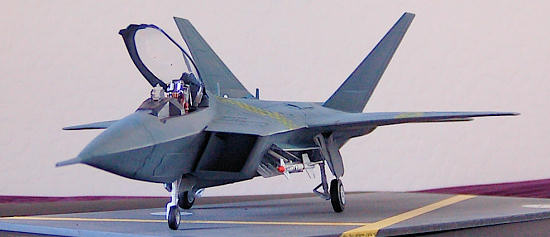 versatile
craft, the more impressed you become.
With a radar cross-section the size of a penny, the Raptor can streak
through the skies at blistering speeds of more
than 2000 kilometers per hour (mach 2 +), and carry an amazing amount of
missiles and bombs in the four internal belly bays.
Watching the F-22 fire a weapon is amazing, as the bay doors open in the blink
of an eye, the missile is launched and the door is firmly shut. In less than one
second ! It also has the standard
USAF Vulcan 20mm cannon mounted in the starboard wing , in case of a dogfight.
With thrust vectoring, and an inherent instability created by the fluid design, the 22 is as maneuverable as anything flying (except for the aliens, of course) , and in recent tests, was able to solely knock out up to 6 F-15’s without being detected at all. In real combat, the F-22 would be almost unstoppable.
| THE KIT |
This was a “trial by fire” for me, as the kit came bagged from a fellow modeler
(thanks Ron!) without any instructions. I have built this kit before, I was one
of those people who pre-ordered it back in the day, what 20 years or so ago?
Well, I like putting together puzzles, so I thought this shouldn’t be to
hard to do. Ooooh boy.
| CONSTRUCTION |
Trying to figure out what part went where was a bit of a struggle, especially in
the cockpit. Luckily, there aren’t too many fiddly bits, and if you watch
“Kelly’s Hero’s” a few times, you will probably be able to match up what goes
where. I did add on some scratchbuilt seatbelts, and a new ejection pull, as
mine was short-shot. I did detail
paint the inside of the fuselage and the pit itself
 prior
to assembly, using glow in the dark additive to the dial paint just for ha-ha’s,
and a lot of silver sharpie pen. Hey, it looks neat to me!
The kit parts actually fit together fairly well, but the seams are…well, let’s
not call it a “rose by any other name”, shall we? After using a slow setting gel
super-glue, and letting the main halves dry for a few days, it was time to start
on the psr. (putty, sand, repeat) I
heavily recommend having another project handy, as even painting the living room
in your spouse’s favourite new colour will seem fun compared to what you are
going to experience getting the finish on this bugger done.
Oy Vey !
If you think the fuselage was tough, get ready for the intakes and the tail.
Yikes ! Be sure to build up your putty surfaces in small increments, don’t try
to fill the gaps (some of them1/8”) all at once. I sanded down the tail fins to
try to fit as much as possible, and kept on repeating Oddball’s mantra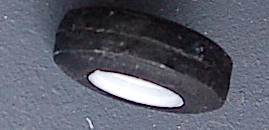 “it’ll be groovy, baby”. Four sanding sticks were used in this process, as well
as two sheets of 120 grit paper, one sheet of 200, and one sheet of 600. I
should have also bought stock in Bondo, as I ended buying more than I figured
would be necessary.
With the fuselage now smooth and seamless as a baby’s bottom (well, almost) it
was time to start on the legs.
Luckily, the main gear struts fit snugly into the allocated spots, though it did
take me a while of looking at walk-arounds to see just how the dang things
worked. I am still not quite sure if I got it right, but hey.
The canopy is a nightmare of its own. The clear part was cast with pigment in
the mid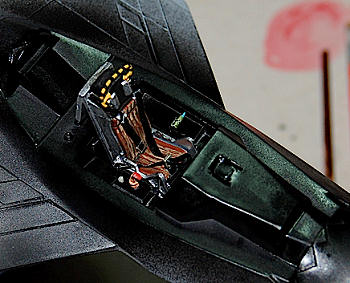 dle
of it, I tried sanding it out and could not. It is also out of shape for the
canopy frame, and you need to be very creative on attaching it. I glued one
little bit on at a time, set it aside for a day, and then repeat the process,
clamping or taping as you go. It took one week to attach the canopy.
I scratched up the canopy supports after looking at some internet photos
(of the plane, get your mind out of the gutter), and they look the part, at
least from two feet.
The weapons loadout is sparse, just two missiles, and they were both short shot in the fins, that Sparrow would have wobbled like crazy! Break out the razor saw and buy another sanding stick, because you will need to replace the finnage. Using some sheet styrene, I came up with my own versions of what the guidance fins should look like, because I can. I used some champagne (ok, sparkling wine, are you happy now?) bottle foil to make the attachment bands. If you are going to build this bird with the legs up, obtain more putty, the doors don’t fit worth a tinker’s d***.
| COLORS & MARKINGS |
 The
F-22 is in constant progression, and the colouration is very speculative. I do
happen to know that there is a program that involves an electro-stimulated
“skin” under development, enabling a craft to basically mirror its surroundings,
using a heck of a lot of digital camera sensors.
Chase planes for the 22 have reported its uncanny ability to mimic the
surrounding skies, so I decided to push this just a little farther down the path
of my insanity: the F-22 M (mimic)
I started off with the basic light grey, then used India ink to airbrush in some
panel lines. I love this stuff, it does not need to be thinned, and will not
bleed through acrylic.
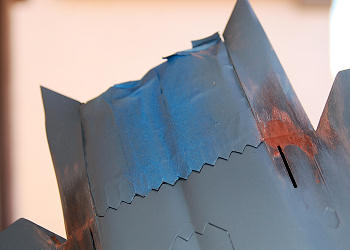
Testor’s did a nice job of molding the exhaust system separately from the rest
of the craft, so it is easy enough to paint it a flat aluminium, wait a day, and
then
 come
back with some oil based wood stain to give it that “used” look that I love so
well. After it is dry, go ahead and glue it onto the fuselage. You will need to
do some more filling here too.
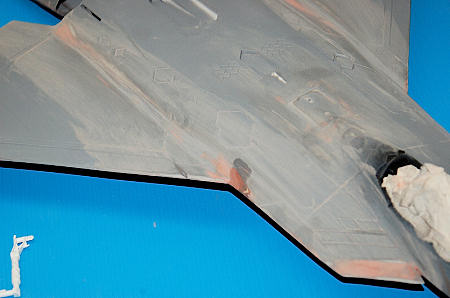
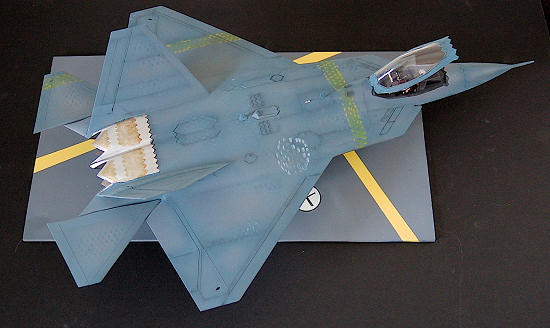
Overcoat with a mixture of Testor’s Light Blue and Neutral Gray, and viola ! A plane that is plain is a pain. I hate boring grey aircraft, and one night, after being smacked awake by my wife (I hope it was her) for snoring, I had the brilliant idea to mount the beastie on tarmac, with lots of colourful squiggles. The mimic concept would work out just perfectly! Using an old sanding pad (the ones with the hex pattern) I sprayed on another coat, this time with a bit of dark gray added to it, the effect is subtle, but distinctive. Just hold the pad down on the model, and lightly airbrush the slightly darker colour on, it is an easy mask to use.
| FINAL BITS |
 I used a bit of hardboard, painted grey. Masking off some sections, I
sprayed on a flat yellow for the guide strips, and a white circle for a tie-down
location. Mounting the craft was easy. I drill a small hole into the wheel, and
glue in a steel peg (nail) to the base. The front wheel is then glued to the
base, instead of being glued to the nose landing gear. You can now just slide
the landing gear into the firmly affixed wheel, and your plane will sit steadily
on the base, without any need for nose weights.
Once the jet was in it’s final resting position, I carefully marked out the
areas that were to be coloured to match the tarmac, and began filling in the
hexes made by the mask with a close colour (yellow and white) so as to make the
aircraft be somewhat chameleon like. I did not want to match it exactly, as the
science has not quite perfected the new skins yet…at least, as far as we know.
Hmmm.
| CONCLUSIONS |
This kit is a real knuckle-duster. The fit is terrible, but the concept is
great, and if you take your time, you will be left with a very, very, very
impressive aircraft model. Or,
you’ll throw it away.
| REFERENCES |
http://en.wikipedia.org/wiki/F-22_Raptor
Watching them fly out of the nearby airforce base !
Greg Ewald
March 2009
Copyright ModelingMadness.com. All rights reserved. No reproduction in part or in whole without express permission.
If you would like your product reviewed fairly and quickly , please contact the editor or see other details in the Note to Contributors.