AMT 1/72 F-117A
| KIT #: | 31777 |
| PRICE: | €5 |
| DECALS: | One option |
| REVIEWER: | Spiros Pendedekas |
| NOTES: | Stand model – Ultra quick build - Shape issues |

| HISTORY |
The Lockheed F-117
Nighthawk is a semi-retired American single-seat, twin-engine stealth attack
aircraft that was developed by Lockheed's secretive Skunk Works division and
operated solely by the USAF. It was the first operational aircraft to be
designed around stealth technology and, though it was commonly referred to
as the "Stealth Fighter", it was strictly a ground-attack aircraft.
 Its
design is regarded to be based on the theory that the strength of a radar
return is not related to the object's size, but instead to its edge
configuration. Of interest is that the F-117 was made entirely of flat
surfaces, because it is admitted that 1970s era computers didn not have
enough power to calculate the radar cross-section of curved surfaces.
Based on the Have Blue technology demonstrator, the Nighthawk’s maiden
flight took place in 1981 at Groom Lake, Nevada, achieving initial operating
capability status in 1983 and shrouded in absolute secrecy until revealed to
the public in 1988. Of the 64 F-117s built, 59 were production versions,
with the other 5 being prototypes.
The F-117 was widely publicized for its role in the Persian Gulf War of
1991, later taking part in the conflict in Yugoslavia, where one was shot
down and another damaged by surface-to-air missiles. The USAF retired the
F-117 in April 2008, primarily due to the fielding of the F-22 Raptor, but a
portion of the fleet has been kept in airworthy condition, with Nighthawks
having been observed flying as late as in 2020.
| THE KIT |
This kit was introduced in
1989 and reboxed another three times till 2002, never reissued since then. My
copy is that final rebox, coming in a sealed, medium sized, top opening flimsy
box, the attractive box art depicting a Nighthawk with a green radar screen as
background.
Upon opening the box, the eye is caught by the two impressive, sealed together,
up and down light gray styrene halves. These essentially (sans the fins), form
the whole plane. Rest of the parts are molded in two medium sized sprues that
are also sealed together. Cockpit con sists
of a tub with molded-in side consoles, an acceptable looking seat, stick, and
instrument panel. Three good looking instrument decals are provided.
Landing gear looks simplistic, with some “ribbing” detail molded onto the otherwise bland bay walls. The intakes and exhausts, though exhibiting some detail, are unrealistic shape-wise. There are also two mesh looking panels of weird shape that seem to go nowhere… Two different kinds of good looking bombs are provided. General molding is very good with practically no flash, however the flat surfaces sport a kind of roughness, dictating a light sanding prior to painting
Canopy glazing is provided as a thick but clear and
well molded single part that has to be attached from the inside of the fuselage.
Since the actual glass was tinted, the modeler may wish to tint it with some
suitable technique. Instructions for this seemingly simple construction are nice
and clear, printed as a double-sided pamphlet. Only one decal option is
provided, with the decals looking well printed.
Despite the initial positive impression of being a simple, solid and well molded
kit, it is obvious, even before attempting to build it, that there are
significant shape and size issues compared to the actual plane. This is
especially true, upon seeing such finished models standing on their landing
gear: they look unrealistically short, kind of “matted down”. The root cause of
those issues is, of course, that this kit was rushed into production in 1989,
with the only source of info being a couple of actual plane "generalized" pics.
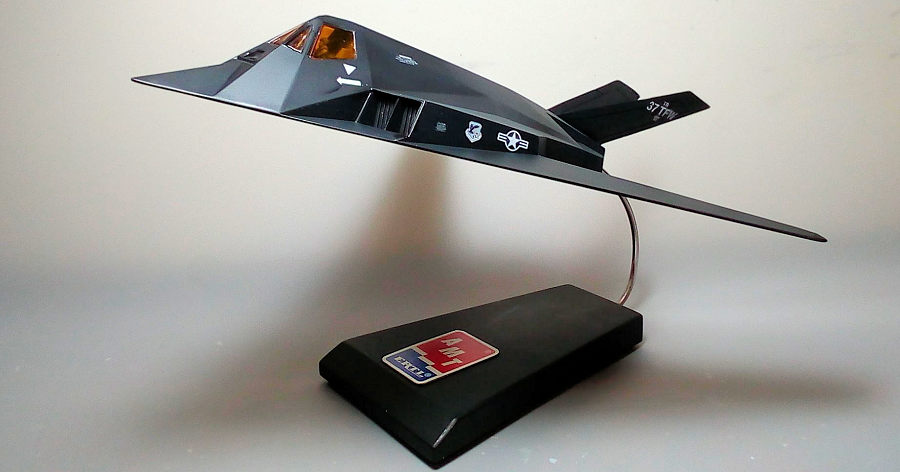
Nevertheless, I thought "wheels-up" might look more believable, and this was my
choice.
| CONSTRUCTION |
 I started by
attaching the seat, stick and instrument panel at the cockpit tub. Basic cockpit
color was a medium gray, the seat had green cushions and black headrest and the
stick had black grip. A leftover pilot, painted accordingly, was placed onto the
seat. The canopy glazing had its innards “tinted” by hand painting Humbrol clear
orange and was subsequently attached from the inside of the top fuselage part,
followed by the assembled cockpit tub.
The intake screens and exhausts, all 2-piece affairs, were similarly attached
from the inside, then the two main halves were joined together, followed by the
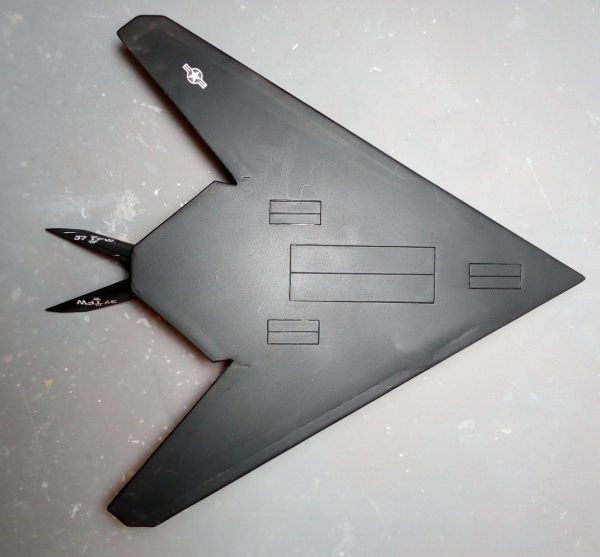
gear and bomb doors attachment in “closed” position. General fit was positive,
with the gaps (mainly arising at the underside joints) initially treated with
liquefied styrene. After an initial coarse sanding, the sensitive fins were
attached.
The whole model was then filled and sanded smooth. I masked the cockpit
transparencies with masking tape and headed (with one of my quickest - if not
the quickest – builds) to the paint shop!
| COLORS & MARKINGS |
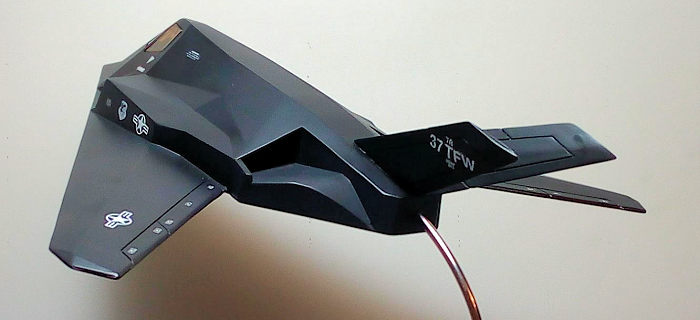
I sprayed the whole model Hu33 black, which laid
onto the surfaces nicely. After a coat of Future, I went on and applied the
decals. Despite their age, they behaved well, exhibiting excellent opacity, with
only some silvering taking place, which might have very well been my fault. A
coat of Future sealed them.
 The visible
turbine disks were dry brushed with silver and the rest of the exhaust area was
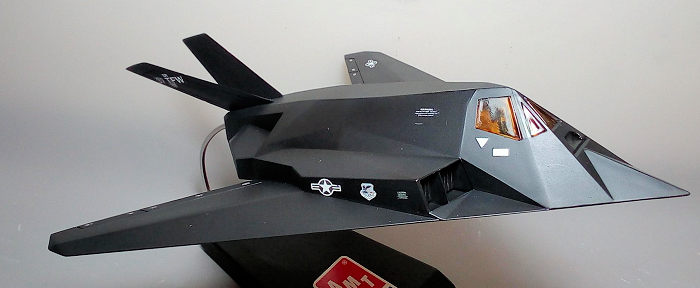
lightly weathered with dry pastels. Since this would be a stand/office model, I
refrained from adding the otherwise characteristic four pitot tubes (oh well,
the model is so inaccurate anyway!). I did, though, fill with Clearfix the
totally uninspiring front nose recession, in order to represent the FLIR glass.
I made an appropriate hole at the back of the model, press fitted it in a very
nice looking leftover black base, posed it in a dynamic, banking position and
called it done!
| CONCLUSIONS |
This kit is definitely
inaccurate regarding its external shape and various details, only vaguely
resembling an F-117. That said, this was an extremely quick and very pleasant
build. Fit was very good, wheels-up construction and all-black painting were
simple tasks and decals were good. It took me less than four hours (split in
three days) to finish the model, the whole process strongly reminiscent of our
“good old” modeling days, where models would be built at a snap.
Shape inaccuracies might explain the fact that this kit has not been reissued
since 2002 (and it is consequently highly unlikely to see it reboxed again). All
the same, since the molds exist and are superb, it might not be a bad idea to
reissue this kit as a what-if plane with what-if markings, at a super low price.
Due to its un-complexity, it would make a perfect candidate for a beginner’s
first model, with “allowance” for a free-chosen camo.
Happy modeling!
5 July 2022
Copyright ModelingMadness.com. All rights reserved. No reproduction in part or in whole without express permission.
If you would like your product reviewed fairly and fairly quickly, please contact the editor or see other details in the Note to Contributors.