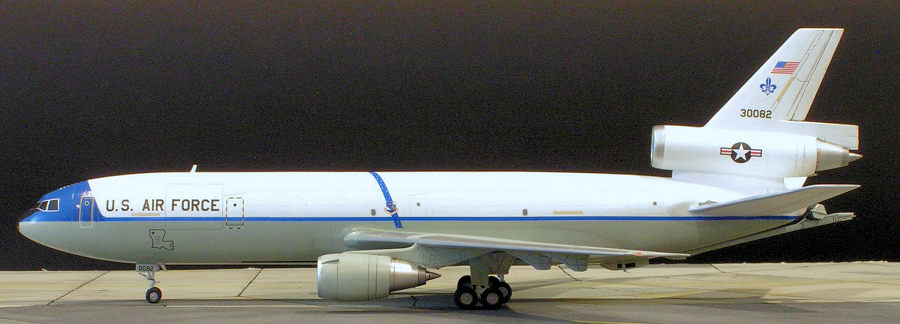
AMP/MikroMir 1/144 KC-10A
| KIT #: | 144-004 |
| PRICE: | $85.00 or so |
| DECALS: | Three options |
| REVIEWER: | Bob Leonard |
| NOTES: | Caracal 144016 decals |

| HISTORY |
 The
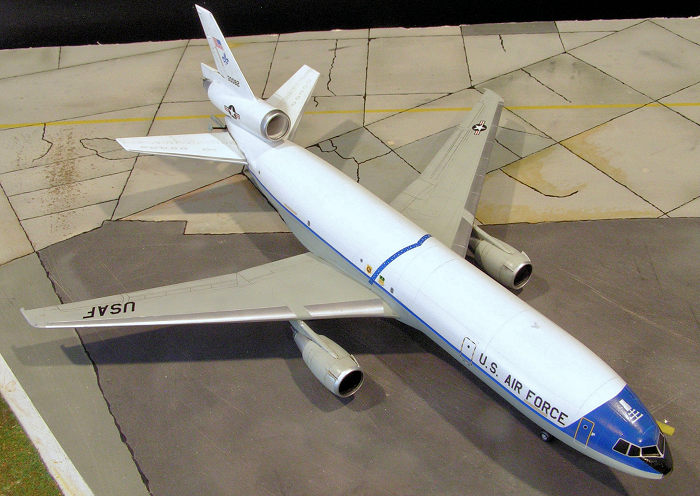
McDonnell Douglas KC-10 Extender was a tanker and cargo aircraft operated by the
USAF. A military version of the three-engine DC-10 airliner/freighter, the KC-10
was developed from the Advanced Tanker Cargo Aircraft Program. It incorporated
military-specific equipment for its primary roles of aerial refueling and
transport. It was developed to supplement and provide greater capabilities than
the KC-135 Stratotanker following experiences in Southeast Asia and the Middle
East. Sixty KC-10s were built in Long Beach, CA for the USAF.
The Royal Netherlands Air Force operated two similar tankers designated KDC-10. In June 1992, two former Martin Air DC-10s airliners were converted into tanker aircraft for the RNLAF and in November 2019 they were delivered to Omega Air as civilian air refueling aircraft.
The KC-10 played a vital role in the mobilization of US military assets for over 30 years. Extenders performed airlift and aerial refueling during the 1986 bombing of Libya, the 1990–91 Gulf War with Iraq, the NATO bombing of Yugoslavia, the War in Afghanistan, and Iraq War. The first KC-10 was delivered to the Air Force's Strategic Air Command (SAC) in March 1981 at Barksdale AFB. In January 2023 the USAF announced all KC-10s would be retired by 30 September 2024
| THE KIT |
 In 2019
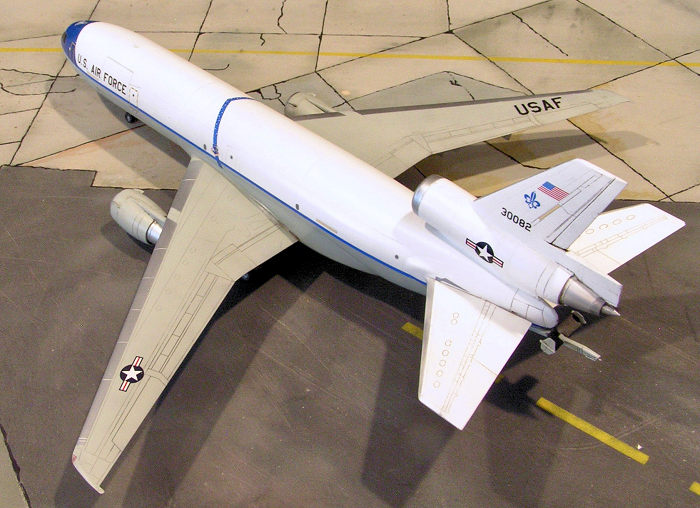
Eastern Express (EE) released a 1/144 DC-10-30, this kit is a re-boxing of the
kit with decals for five USAF KC-10 and two KDC-10 of the Royal Netherlands Air
Force machines. Also included are specific air fueling parts, both the boom and
refueling pods on the wing. The entire kit is plastic, no resin or metal parts.
The kit’s decal schemes include the white/blue/gray of the delivery KC-10s, the
Shamu scheme and the overall gray. The kit has fine engraved panel lines for
this scale and clear parts for the cockpit and wingtip lights, flight deck with
four-place crew stations, flight controls, instrument panel/consoles, navigator
console. Instrument panel and console details provided on decals. Masks are
provided for cockpit windows, which I did not use, preferring the shape of the
windshield decals on the Caracal sheet. Detailed CF6 engines, landing gear and
wheel wells are in the box as well.
| CONSTRUCTION |
The number one complaint about this kit, which many builders harp on, is the way they tooled all the flight surfaces. To keep the trailing edge thin, which is commendable, EE tooled the upper and lower flight surfaces, so the seams cross the flaps. To remove these seams, you must fill them. I used Starbond Black Medium-Thick CA and then had to re-scribe the flight controls I obliterated during the sanding. Very tedious. I think I would have accepted marginally thicker trailing edges to avoid all this work. Or have the seams follow the flight controls. Also, due to EE’s tooling limitations (or to allow as many configurations, i.e. MD-11, as possible), the tail section is separate. I attached the tail to the fuselage BEFORE assembling the halves to ensure as good a fit as possible. Nevertheless, every seam needed attention with black super glue and then re-scribing; the best way to think of this kit is to consider it the world’s greatest vacuform kit.
Other tips:
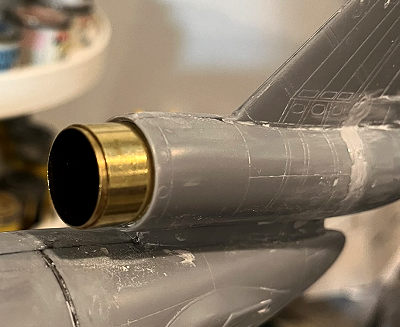 I
found a K&S brass tube that perfectly fit the number two engine intake (the
one in the tail.) This saved some fun sanding time.
I used sections of sprue to spread the upper fuselage to match the lower fuselage pan so ensure as good a fit as possible.
The fit of the major components was quite good with extensive test fitting. Attaching the wings to the fuselage and engines to the wings fit went very well, and I used only a couple of applications of Mr. Surfacer 500 to address the seams. I would let Mr. Surfacer 500 dry and the use a Q-Tip dipped in Mr. Color Levelling Thinner to smooth out gaps. I also used this method to address seams in interior of the engine cowls mounted to the wing. On my next kit, the MD-11, I will see if using Mr. Surfacer 500 will work on the seams on the flight surfaces. I primed the entire kit with Mr. Finishing Surfacer 1500 Gray with my airbrush and attended to any flaws and re-scribing necessary.
The number two complaint of this kit are the unclear instructions regarding the landing gear. Be certain to carefully consult the KC-10 walkaround at Airlinercafe.com to see how the landing gear is assembled. The instructions have you install the front landing gear early on. Don’t. I snapped mine off.
| COLORS & MARKINGS |
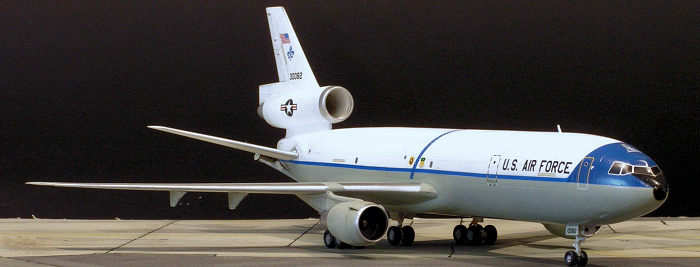 The
delivery paint scheme of the SAC KC-10 is one of the sharpest ever worn by an
operational USAF machine, so there was no question how I would paint my KC-10.
For the white, I used my favorite, Tamiya Liquid Surface Primer. For the gray,
the late great Testors Model Masters enamel FS16473 was used. For the blue, I
used Xtracolor FS15102/ANA 501 True Blue gloss enamel. This blue matches the
cheatlines on the Caracal Decals KC-10 sheet, 144-016, perfectly. I did not like
the colors on the AMP KC-10 decal sheet and preferred the Caracal sheet,
specifically the blue of the AMP decal sheet’s USAF national insignia was way
too light.
| CONCLUSIONS |
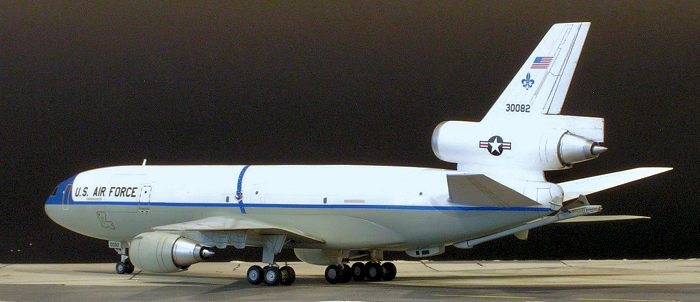 If you
want a 1/144 KC-10 this is the way and I recommend it. I won’t build another
KC-10, but I like it enough to plan on building a Delta MD-11, which is based on
this EE kit with appropriate changes. Revell in 1972 issued a DC-10 and eleven
years later, added parts for a KC-10 with a F-15. Until the AMP kit, this was
the only way to get a KC-10. I have one unbuilt and the nose of the KC-10 is a
bit mishappened (as are all Revell DC-10s). The detail and shape of the AMP kit
are very good.
| REFERENCES |
I found airliners.net and invaluable source of photos for the delivery KC-10. Airlinercafe.com has a great walkaround for all gray KC-10s. The Aerofax Series, McDonnell Douglas DC-10 and KC-10: Wide-Body Workhorses was also helpful.
Bob Leonard
13 August 2024
Copyright ModelingMadness.com. All rights reserved. No reproduction in part or in whole without express permission from the editor.
If you would like your product reviewed fairly and fairly quickly, please contact the editor or see other details in the Note to Contributors.