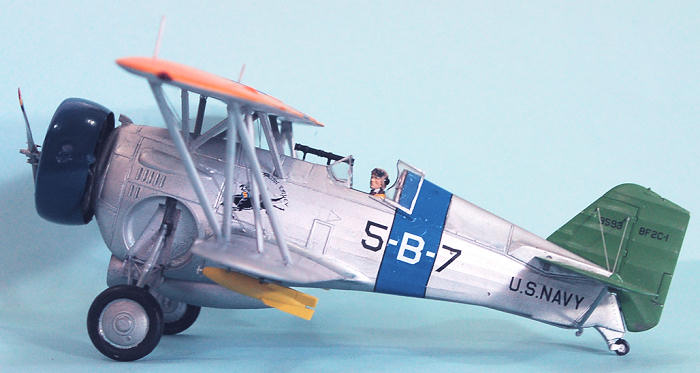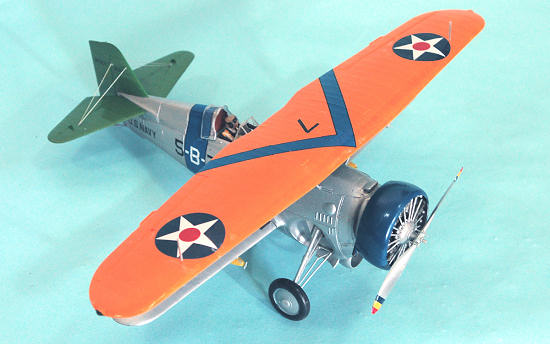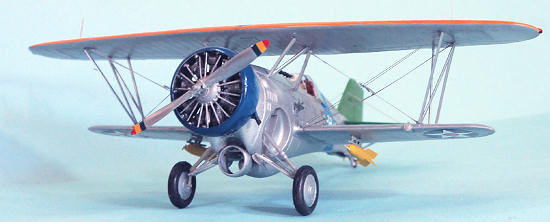
| KIT #: | 51814 |
| PRICE: | $Currently out of production |
| DECALS: | Several options |
| REVIEWER: | Tom Cleaver |
| NOTES: |
Yellow Wings 32-008 “Curtiss BF2C-1 Hawk” used. |

| HISTORY |
 advancing
the state of the art, and neither had any difficulty abandoning a proven design
if some new development held the promise of superior performance.
The Curtiss "Hawk" first appeared in 1925 as the P‑1 for
the Army Air Corps, and shortly thereafter as the F6C‑1 for the Navy. While the
Army used the in‑line liquid‑cooled engine, the Navy opted for the new radial
air‑cooled engine, which was both lighter and more reliable than the current
liquid‑cooled powerplants, an important consideration for an aircraft with
wheels flying over large bodies of water. Curtiss was able to turn the
radial‑engined naval fighters that came after this decision into a successful
line of export fighters under the "Hawk" designation, selling the aircraft in
By 1935, Grumman had replaced Boeing as Curtiss' chief
competitor for Navy contracts, with its FF‑1 and F2F‑1, and the coming F3F‑1 ‑
all of which were biplanes with retractable landing gear. In an attempt to
compete with these more modern designs, Curtiss modified its F11C‑2 as the
XF11C‑3, with a deepened forward fuselage that allowed for retractable landing
gear of the kind used by Grumman; the open cockpit was soon replaced by a
heightened turtledeck on the rear fuselage and a half‑canopy, which was almost
always left slid back in the open position. While Curtiss found foreign orders
for the design as the Hawk
 lifespan
of any Naval aircraft of the period. This was due to the fact that in an attempt
to modernize a ten year old design Curtiss had exchanged the traditional wooden
wing structure for metal wings. Unfortunately the vibration frequency of this
was in harmony with the engine at cruising speed. In flight, the airplane seemed
to be shaking itself to pieces, no matter the fixes tried by Curtiss and the
Navy. Curtiss' final solution was an offer to re‑equip the airplanes with the
wooden wing of the successful export variant, the Hawk
| THE KIT |
 and P-26A
kits, this Hawk set a new standard at the time, and is still acceptable as a
kit, other than the problem of the very poor decals.
| CONSTRUCTION |
Back when this kit was first released, plastic mold
technology was such that it was not possible to make upper and lower wing parts
with a sufficiently-thin trailing edge to look really right.
Hasegawa solved this by keeping the entire trailing edge
as part of the upper wing half, with the lower wing part ending about 3/16 inch
from the trailing edge.
If you are not careful in assembling the wings, this will leave a noticeable gap that will be hard to fill without
losing a lot of detail, particularly in the ailerons.
I solved the problem by applying a lot of Tenax to the
upper wing rear joint, then attaching the lower wing at the rear first,
squeezing the parts together to get some of the melted plastic to ooze up.
I then finished assembling the wing and sliced off this
excess with an X-acto blade.
This filled the gap without losing detail.
Turning to the fuselage, there is little detail in the
cockpit.
While the cockpit of the real thing didn’t have a lot of detail, there
was more than was found here, but I didn’t have photos to guide a detailed
scratchbuild.
I solved the problem by installing a pilot figure, using one from
a Hasegawa P-47 kit.
I am informed that Mike West at Lone Star Models may do
a resin cockpit for this kit, as he has recently done for the P-12/F4B kits.
Using something like that would definitely be the way to
go if one is not interested in scratchbuilding the cockpit.
The engine went together without problem after I
pre-painted all the parts before assembly.
Given the way the model would be painted, I left it in
sub-assemblies of fuselage, upper wing, lower wings, and kept the fin and
stabilizers off.
| COLORS & MARKINGS |
 The upper wing was painted with Gunze-Sangyo
“Orange-Yellow.”
The rest of the model was then painted with Tamiya “Flat
Aluminum.”
I masked that off and painted the metal areas of the fuselage
with Talon “Aluminum.”
Doing this gave the look of aluminum dope on the fabric
surfaces and aluminum lacquer on the metal areas.
I mixed “
| FINAL CONSTRUCTION |
| CONCLUSIONS |
The BF2C-1 might not have been the most successful naval
fighter of the period, but it is one of the most interesting-looking airplanes
with its mix of old and new details.
The Hasegawa kit makes up into an excellent model, and
the Yellow Wings decals insure a great final look.
If you have one of these in your stash, getting these
decals and proceeding to build it will provide a very nice addition to your
collection.
June 2011
If you would like your product reviewed fairly and fairly quickly, please contact the editor or see other details in the Note to Contributors.