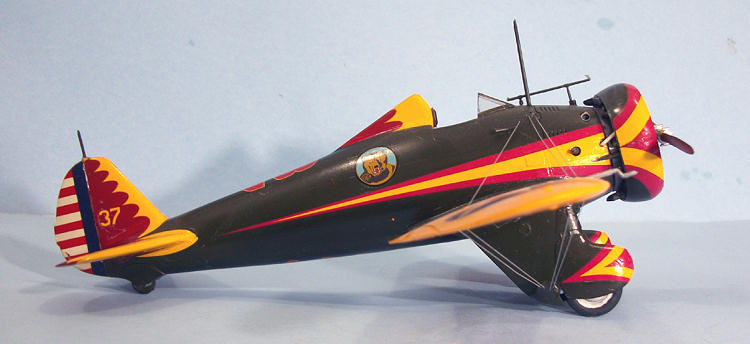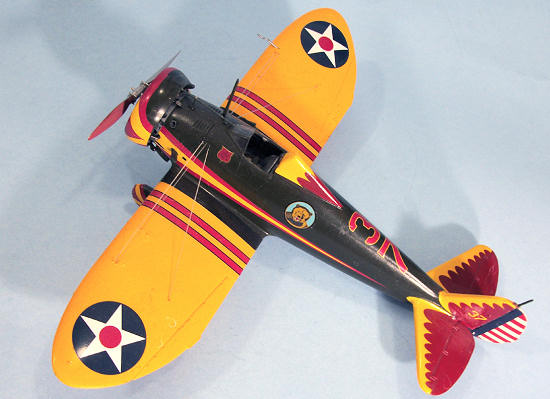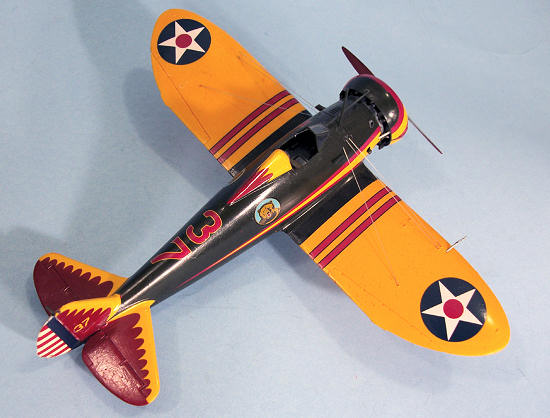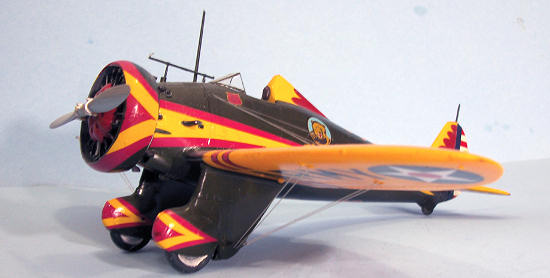
Hasegawa 1/32 P-26A
| KIT #: | ? |
| PRICE: | Long OOP |
| DECALS: | One option |
| REVIEWER: | Tom Cleaver |
| NOTES: | Yellow Wings 32-033 decals used |

| HISTORY |
Billed for publicity purposes as the “revolutionary Boeing
fighter,” the Boeing P-26A was a mixture of old and new. The first
all-metal monoplane fighter to serve with the Air Corps, it was also the
last USAAC fighter with externally-braced wings, an open cockpit, and
fixed undercarriage. It was also the last Boeing-designed fighter,
bringing to an end the company’s 15 year domination of the fighter
market for both the Army and Navy.
Faced with a new generation of monoplane bombers that were faster
than its biplane fighters in the early 1930s, the USAAC approached
Boeing with a requirement for a monoplane fighter that would be faster
than any bombers flying at the time. Boeing began the work privately
that month, with the project designated Model 248. On
Construction of the Model 248 began in January 1932. The design
was a compromise between the advanced ideas of Boeing and the
conservative, cautious approach favored by the USAAC. The Model 248
(XP-936) was an all-metal low-wing monoplane with wire-braced wings of
low aspect ratio with a thin section - a cantilever wing was rejected as
not being strong enough for a fighter. The use of external wire bracing
for the wing might seem at first sight to have been a retrograde step,
however such bracing allowed a lighter wing structure. The horizontal
tailplane was fully cantilever construction.
 The fixed undercarriage did add extra drag, but it had an
advantage in reducing weight and structural complexity and provided a
structurally-efficient low anchor point for the flying wires. The rear
portion of each undercarriage unit consisted of an inverted tubular
bipod fastened to the front and rear wing spars. The flying wires were
attached to the apex, and the wheel pivoted about the apex on an arm,
with the landing loads being absorbed through a shock absorber strut
connecting the wheel axle to the front spar.
The gear being separately sprung could allow the airplane to
start rolling from side to side when taxying over uneven ground, and the
P-26A acquired the nickname “Limber Legs” in service.
Pilots soon learned not to advance the throttle too quickly on
takeoff, as the increased torque could compress the left main gear to
the point that the left horizontal stabilizer touched the ground, which
could result in a ground loop on takeoff.
The fuselage was of a semi-monocoque type with aluminum bulkheads
and the powerplant was the proven Pratt and Whitney R-1340-9
nine-cylinder air-cooled radial. A Townend drag ring was fitted around
the engine and armament was either one 0.50 caliber M2 and one 0.30
caliber M1 machine guns, or two 0.30 caliber M1 machine guns, mounted in
the sides on the cockpit floor and firing through the engine cylinder
banks.
Demonstrating how different aircraft development was 70 years
ago, the P-26 project progressed from drawing board to first flight in
only 9 weeks, when the first XP-936 was flown on March 20, 1932, by test
pilot Les Tower.
Manufacturer’s trials progressed so quickly that only 35 days later the
prototype was sent to Wright Field for Army evaluation on April 25.
Comparing the performance of the XP-936 with the P-12F biplane,
which was still in production when the XP-936 was delivered, the XP-936
had a later version of the same engine used by the P-12F, which gave the
XP-936 only a 20 hp advantage over the P-12F, and was also 39 lbs
heavier than the P-12F.
Proving the superiority of the monoplane, it was 27 mph faster and
outclimbed the P-12F by 476 ft/min. Though the XP-936 outperformed many
contemporary Air Corps warplanes, it was
slower than the expected performance of the Martin B-10.
The three XP-936s were assigned the designation XP-26 when
purchased by the Air Corps, then changed to the service test designation
Y1P-26, and finally to plain P-26. On
The first P-26A flew on
On February 22, 1934, Lt. Frederick I. Patrick of the 20th
Pursuit Group made a forced landing during a routine flight.
The aircraft flipped
over on its back, inflicting only minimum damage to the aircraft while
Lt. Patrick died from a broken neck. As a result, the headrest height
was increased by eight inches, which delayed further deliveries until
this modification was completed.
After a short period of service, the Army decided to incorporate
landing flaps that reduced landing speed from a relatively high 82.5 mph
to 73 mph. Boeing retrofitted all P-26As in service and added flaps to
the P-26Bs and Cs still in the factory.
 P-26s initially equipped the 20th Pursuit Group at
Barksdale Field, Louisiana, the 17th Pursuit Group at March
Field, California, and the 1st Pursuit Group at Selfridge
Field, Michigan. After a
year’s service, the 17th Pursuit Group became an attack
group, and their aircraft were passed on to the 20th and 1st
Pursuit Groups. When the 1st
equipped with the P-35 and P-36 in 1938, their P-26s were transferred to
the 16th Pursuit Group in the Panama Canal Zone and the 18th
Pursuit Group in
Other than the six P-26s of the Philippine Air Force that saw
combat on December 12, 1941, when a group of six P-26s led by Capt.
Jesus Villamor shot down one bomber and two Zeros with the loss of three
P-26s - the only other P-26s to see combat were the
export version of the P-26A, 11 Model 281s sold to China in 1934
that were delivered between September 1934 and January 1936, and were
operational when the Japanese attacked Nanking in August 1937. The
Chinese squadron operating the Model 281 had considerable combat
success. On
The second Model 281 demonstrator went to
Following the U.S. entry into the war, the nine airworthy P-26s
in the Panama Canal Zone were replaced by P-40s in June, 1942. That
November, the Fuerza Aerea de Guatemala expressed interest in
buying these P-26s. At the time, Congressional rules forbade export of
fighters to all Latin American nations other than
Several Guatemalan P-26s were still in use as trainers as late as
1957. In 1958, Ed Maloney obtained one of these for the
Planes of
| THE KIT |
The P-26 has been popular with kit manufacturers since the airplane
first appeared. I remember
building a Guillow’s stick-and-paper P-26 with my Dad at an early age, a
model that lasted about a week in the hands of an active 7-year old.
A few years later,
 In 1/72 scale, Revell released a good P-26 model in the late 1960s
that can still be found. Tom’s
Modelworks released a 1/48 vacuform in the late 1980s that made up into a
nice model, but the definitive kit in 1/48 - and perhaps the best kit of the
P-26 of all - is the Hobbycraft kit released 12 years ago in three different
versions. This kit is
well-detailed, and there are aftermarket sets by Eduard to make it even
better.
Hasegawa released their 1/32 P-26A 30 years ago, along with the
P-12E, F4B-4 and BF2C-1. These
were the best 1/32 kits available at the time, and are still the only kits
in this scale of these airplanes ever released. They were accurate and
well-detailed, with several markings choices available in the different
releases over the following 10 years (other than the BF2C-1, which only ever
flew with VB-5B). The kits have
been unavailable in commercial release for several years, so it was nice to
discover this summer that Hasegawa had done this limited release with
markings for P-26s of the 20th Pursuit Group.
The kit is produced with the brittle plastic used by Hasegawa up to
the late 1980s, which leads me to wonder if they produced all these kits 30
years ago, put them in storage and released them over the years.
The raised surface detail is very petite, and accurate for the P-26,
since the panels were lapped on the real thing.
The cockpit has adequate detail, but in this scale a modeler can put
some effort into superdetailing this area to good effect.
The engine is a jewel, making up into a very good-looking Pratt &
Whitney Hornet.
Overall, fit is excellent, with the only bad thing being a sink mark in the upper surface of the wingtips, due to the strange production method Hasegawa chose, with an inset lower wing half in this area. I had forgotten that this was endemic to the kit until reminded by a friend. This time, I filled that, sanded it smooth, and replaced the lost surface detail by rescribing the rivets with a pounce wheel. The truth is, this is not a really-apparent sink mark, and it would be virtually invisible under paint, unless viewed under light at the right angle. Were I doing it again I would leave it alone, and that is my advice to you.
| CONSTRUCTION |
 The kit is so well-engineered that - other than the mistaken filling
of the wingtip sink mark - I only used Mr. Surfacer on the centerline seam
of the fuselage and the seams where the two halves of the cowling are glued
together.
I assembled the engine and cowling, the fuselage, the wings and the
landing gear as separate sub-assemblies.
I left the cockpit as is, other than to add Cutting Edge posable
resin seatbelts - remember that in the 1930s, American airplanes did not
feature shoulder harnesses.
Using a”hot” glue, in this case Ambroid Pro-Weld, the small gaps in the wing
and horizontal stabilizer joints were filled with melted plastic and then
lightly rescribed.
The kit provides only the very early tail wheel, which was a fitting
that led to ground-looping. I
scratchbuilt the later tail wheel mount.
The engine was painted and the cowling attached to it before
painting. With that done, the
kit came together over a weekend and was ready for paint.
| COLORS & MARKINGS |
 the factory in this scheme; the Air Corps Blue was an
in-service repaint. All P26As
of the 17th Pursuit Group were in Olive Drab according to my good
friend aviation artist Robert Karr, who put considerable time into
researching this topic. When
the 17th Pursuit Group became the 17th Attack Group
and passed its airplanes on to the 1st and 20th
Pursuit Groups, the airplanes received their blue repaint about 90 days
after leaving the 17th.
Fortunately for those of us who have access to this kit, Wayne Tevlin
of Yellow Wings Decals has produced three sheets that allow you to do each
of the three squadrons - the 34th PS “Thunderbirds,” 95th
PS “Kicking Mules” and the 73rd PS “Grizzlies.”
These are excellent decals that go on without any problem under
Micro-Sol.
Rigging was easy since the kit was produced with holes in the right
places to the model could be rigged with thread.
I used RB Productions stainless steel 4BA “raf wire” for this model.
| FINAL PARTS |
| CONCLUSIONS |
Review kit courtesy of good old M2
supporter Steve Towle. Decals
courtesy
Yellow Wings decals. Order
yours direct from the link.
If you would like your product reviewed fairly and quickly, please contact me or see other details in the Note to Contributors.