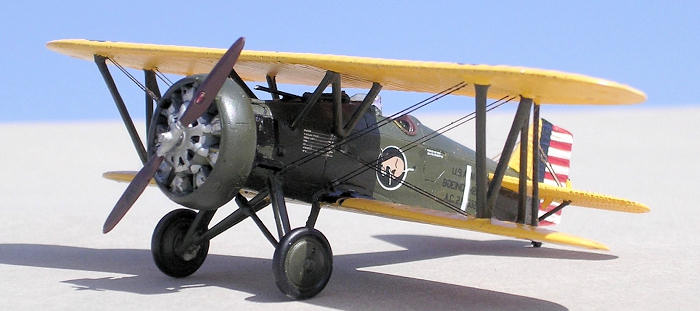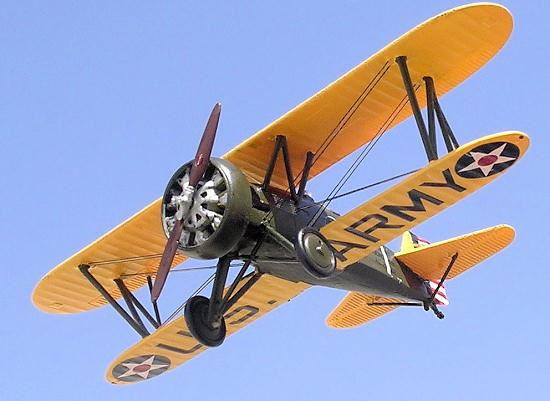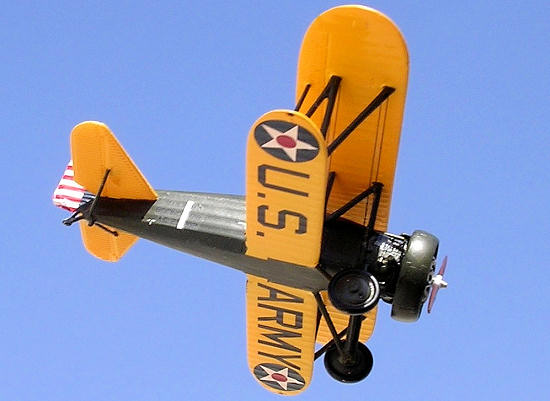
Pro Resin 1/72 Boeing P-12B/D™
| KIT #: | R72-030 |
| PRICE: | about $25.00 or so |
| DECALS: | Two Options |
| REVIEWER: | Carmel J. Attard |
| NOTES: | Resin with photo-etch parts |

| HISTORY |
 The
Boeing P-12B/D is a land based fighter, a type that was built as the Boeing
Model 102 and was essentially identical to the US Navy’s F4B1 apart from its
naval equipment. The P-12B had larger wheels and tyres than its predecessor
XP-12A and the cylinder head fairings of the earlier P-12 and F4B-1 were deleted
to improve cylinder head cooling. The power plant remained the Pratt & Whitney
R-1340-Wasp Radial rated at 450HP. There was an initial order of 90 P-12Bs. The
kit represents a P-12B in later service life which had the engine cowling ring.
The aircraft had the lower wing smaller than the upper wing. These were largely
fabric covered and of mixed metal and wood construction. The engine was
installed under a full light alloy cowling which drove a two bladed metal
Curtiss Reed tractor propeller. The type made the first flight on
The
Boeing P-12B/D is a land based fighter, a type that was built as the Boeing
Model 102 and was essentially identical to the US Navy’s F4B1 apart from its
naval equipment. The P-12B had larger wheels and tyres than its predecessor
XP-12A and the cylinder head fairings of the earlier P-12 and F4B-1 were deleted
to improve cylinder head cooling. The power plant remained the Pratt & Whitney
R-1340-Wasp Radial rated at 450HP. There was an initial order of 90 P-12Bs. The
kit represents a P-12B in later service life which had the engine cowling ring.
The aircraft had the lower wing smaller than the upper wing. These were largely
fabric covered and of mixed metal and wood construction. The engine was
installed under a full light alloy cowling which drove a two bladed metal
Curtiss Reed tractor propeller. The type made the first flight on
| THE KIT |
| CONSTRUCTION |
 There
are five stages of construction with the first two dealing with assembly of the
instruments and cockpit interior. Instruction was easy to follow with excellent
exploded views to simplify reference to it as one goes along with assembly. As
this is a resin kit I used super glue to fix parts together.
The trailing edges of wing parts and tail unit are commendably thin with excellent surface ribbing to all parts. These were sanded smooth at their periphery using fine wet and dry prior to assembly. The fuselage is well shaped with canvass ribbing at the rear half. Therefore during construction care is taken not to spoil the surfaces with unintended superglue smears or prints. The radial engine is also accurately produced with separate resin pipe ducts detail parts that are attached to the rear of the engine part. There is a ‘Y’shaped exhaust pipe at the port side of the fuselage that I extended by a further 1/8 inches in length at the exhaust end to conform to the length of pipe shown on the side views. I also added a semi circular exhaust manifold to the starboard side of the fuselage just aft of the engine. This is made from stretch sprue and is bent to the diameter of the fuselage using a round former and bent accordingly. This manifold is also shown in black on the side view starboard side.
The
control panel consists of a resin panel, acetate piece with black printed dials
to fit and a front detail brass etch to complete the panel. A cockpit floor is
provided on which are fixed the control stick, foot rudder pedals and pilot seat
with brass etch seat belts. I have found that in order to have the seat in line
with the cockpit opening the whole floor needs to be shifted forward a little.
Interior is painted yellow while detail instruments to the side of fuselage are
black and grey. A two blade propeller is well shaped but it contained flash that
required care to remove. The only defect that I encountered during the
construction was fine porosity located at the leading edges of both the main
planes and tail planes. Having built several resin kits in the past I have now
to start to accept the presence of a certain amount of tiny bubbles with these
kits in spite that this defect is more commonly trapped at thin sections and
renders it difficult to attend to. The remedial action is to fill these tiny
bubbles with super glue, followed by careful sanding when dry.
 Caution
is needed when separating the delicate undercarriage struts from the runner. A
gun sight is provided and is best fixed in front of the cockpit before the upper
wing is lowered on the wing struts. Two gun barrels in solid resin are provided
which will fit to inserts on upper side of nose. I have replaced these with
metal hollow tubes of equal diameter and cut to same length. I have also
replaced the struts fitted under the tailplanes with a thinner replacement items
using Contrail thin struts. Two types of undercarriage struts are provided for
the two versions given. Apart from the decal sheet the two types of struts seems
to be the difference between the B and the D version of the P-12. An accurate
belly fuel tank that is externally fitted comes complete with a filling pipe
that is attached to its side but I have preferred to leave this out as most of
the pictures I have seen of the early P-12 did not have this fitted.
The sequence of fitting the wings is first fix the lower wings to side of fuselage in place, then secure the outer struts in marked position, the wings are joined together. When this is set firm the two control struts that fits inner of the main struts are fixed in place and finally the inner fuselage struts are simply fixed sideways at their respective place. With all the kit parts assembled and set then came the delicate of slowly drilling the 0.4mm diameter twin rigging holes at the various locations on the upper and lower wings using a hand drill. A rigging drawing is available on the instruction which is accurate as well as helpful. There is also rigging to the fin which joins the tail planes. Invisible thread was used for rigging and again secured in place using super glue.
| COLORS & MARKINGS |
 With all
the parts fixed in place the kit turns into a good and impressive detailed P-12
with very close resemblance to the real thing.
For the fuselage I
have used Tamiya color XF-62 olive drab while the wings and tailplanes and fin
were in Humbrol gloss yellow No69 with a few drops of red added to it. I started
with the wings which were first given a semi matt white undercoat and after a
few hours airbrushed in the yellow mix. The instructions clearly indicate that
the lower wings centre section should also be painted yellow when in fact this
is part of the fuselage that should be retained olive drab. The box art also
shows that this mid section should be olive drab as also indicates photos
published in Air Enthusiast No9 which has an article on the P-12, and also
reference to SAM Vol 20,No 10 ‘Aircraft in detail drawing’ on P487.
| CONCLUSIONS |
December 2008
If you would like your product reviewed fairly and quickly, please contact me or see other details in the Note to Contributors.