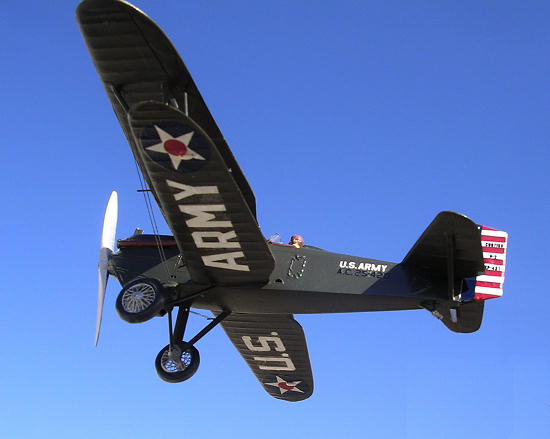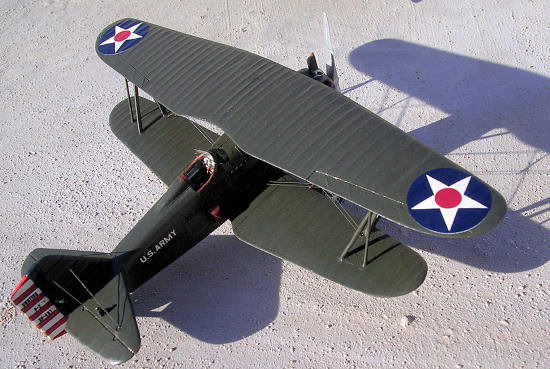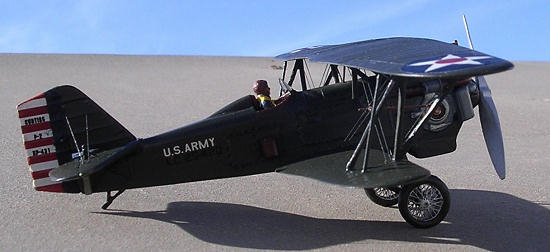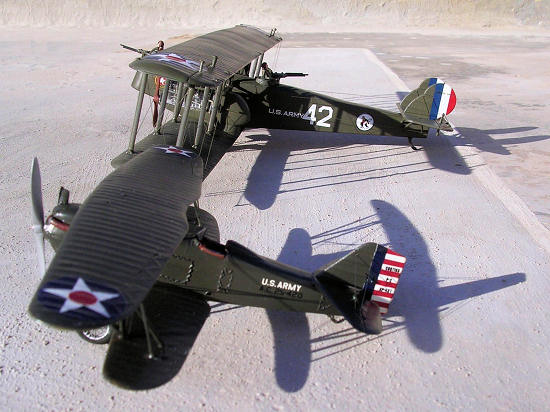
Olimp 1/72 Curtiss P-2 Hawk
| KIT #: | R72-023 |
| PRICE: |
£19.40 |
| DECALS: | One option |
| REVIEWER: | Carmel J. Attard |
| NOTES: |
Resin with etched metal and acetate parts. |

| HISTORY |
 The
designation P-2 of the Hawk aircraft it represents was the Army designation for
the last five P-1 Hawks (aerial numbers 25-420 through 25-424). These were
modified with a 500hp Curtiss V-1400 engine with an exhaust-driven
turbo-charger. The first flight of the P-2 took place n December 1925. The
increased power provided to the P-2 with new engine resulted in an improvement
over the ‘standard’ P-1 Hawk. The maximum speed at sea level was 172 mph and
151mph at 15,000 ft. The service sealing was 22,950 ft and a range of 400 miles.
The P-2 was armed with a pair of 0.30in. Machine guns installed in the upper
engine cowling, synchronised to fire through the propeller arc. The new engine
however proved unsatisfactory in service and in less than a year of operation
the Army converted three P-2s with Curtiss D-12, V-1150. A fourth P-2 was re-engined
with a Curtiss V-1570 “Conqueror” and became the XP-6A. Only serial No 25-420
remained, a P-2 that temporarily became XP-2 when tested with turbo-supercharged
Curtiss V-1400. The speed was almost 180 mph but the basic shortcomings of the
V-1400 engine precluded any further development.
The
designation P-2 of the Hawk aircraft it represents was the Army designation for
the last five P-1 Hawks (aerial numbers 25-420 through 25-424). These were
modified with a 500hp Curtiss V-1400 engine with an exhaust-driven
turbo-charger. The first flight of the P-2 took place n December 1925. The
increased power provided to the P-2 with new engine resulted in an improvement
over the ‘standard’ P-1 Hawk. The maximum speed at sea level was 172 mph and
151mph at 15,000 ft. The service sealing was 22,950 ft and a range of 400 miles.
The P-2 was armed with a pair of 0.30in. Machine guns installed in the upper
engine cowling, synchronised to fire through the propeller arc. The new engine
however proved unsatisfactory in service and in less than a year of operation
the Army converted three P-2s with Curtiss D-12, V-1150. A fourth P-2 was re-engined
with a Curtiss V-1570 “Conqueror” and became the XP-6A. Only serial No 25-420
remained, a P-2 that temporarily became XP-2 when tested with turbo-supercharged
Curtiss V-1400. The speed was almost 180 mph but the basic shortcomings of the
V-1400 engine precluded any further development.
| THE KIT |
This is
another kit by Pro Resin depicting a  lear acetate items one of which is the windshield and the
rest contain printed instruments. The resin parts have surface detail engraved
and flash was minimal and was only encountered around fitting areas at front of
fuselage halves where the rectangular radiator fits and at the cavity where the
round turbo supercharger is inserted.
The fuselage halves are beautifully represented showing detail of fabric seams and there is structural detail on the interior. There is fine surface texture to the main and tail planes with accurate ribbing. The exhaust driven supercharger that is mounted on the starboard side of the fuselage is made up of six intricate parts which when assembled and fitted in place add authenticity to the overall appearance of the aircraft. This needed dry fitting and a small amount of filing to the insert area where it fits. The lub oil tank, which fits right over an insert located at the top of the front fuselage, is also a separate item. To the front of the tank at the top of the engine cowling there are two machine guns. These are cast in the resin itself and complete with a hollow opening.
| CONSTRUCTION |
The
assembly starts by first cleaning the two fuselage halves. These are painted
silver on the inside. The radiator fits at the front and requires a dry fit
before glued in place. Stage 1 and 2 of the instructions are devoted to the
detailing of the cockpit canopy. This has floor, seat, control column and also
brass etch straps, rudder pedals and instruments. The supercharger is then
fitted in place followed by the exhaust pipes which go on both sides of the
cowling. The lower wings are then inserted into lugs. These are fitted at a
dihedral of 6 degrees as indicated on a scrap front view. The tailplane needed
some adjustment before it is centred at its place and fixed.
One has to ensure this is at the correct straight level to the fuselage
base. The fin and rudder are in one piece and as this has no guide one will have
to position this carefully to ensure it is fixed vertically and correctly
aligned. At this
 stage one comes to the upper wings.
The outer sets of struts, which are of ‘Z’ shape, are first fixed in place. One should note that the strut on the starboard has an insert cast on it that makes it different from the one at the port wing. This is not shown on the box artwork but is indicated as item 9 on the assembly drawing. There is also a single outer strut to each side of the wings. I found these to be 1mm too short and decided to replace them with ones made from stretch sprue. Incidentally when it comes to position these on the lower wings one should follow stage 3 because the side views shown in stage 4 and that shown at the last page of the instructions are misleading and slightly incorrect. The single strut is fixed to the outer to the tip than the ‘Z’ struts. Before lowering the upper wing, which is in one piece, I fixed the cockpit windshield Perspex piece. I also painted the centre fuselage area and under the lower area of the upper wing. Once the upper wing is fixed in place then the fuselage struts are cemented into the guide holes located on the underside of the upper wing and glued at the spots that they touch the fuselage.
There
is what appears to be a fire extinguisher and there was no indication where this
fits. I placed it inside the cockpit. An interesting feature about this kit is
that the wheel spokes comes as brass etch pieces, two to each wheel. It is the
first time I
 encountered this unique feature and therefore a novelty in itself.
The brass etch spokes fit very well inside the resin wheels and gives very
realistic effect. There is a distance piece that comes with the kit to keep the
correct space distance between the spokes centre, (in my case these two small
items were missing and I had to make my own from spares). Another missing item
was the tail plane struts. Again I had to scratch built these. These struts
appear in the box art and also on the side view at the last page of the
instructions but were for some unknown reason left out altogether in the
exploded view along with the parts themselves. The other item that is worth
mentioning is that while the propeller is beautifully cast, the centre hub where
it fits on shaft differs from the one shown on the drawing and the instructions.
The kit part has a solid flange indicating that the prop was a single piece type
but in fact on the real aircraft these were two separate blades mounted to a
fitting holder that goes onto the shaft.
| COLORS AND MARKINGS |
The
interior of the aircraft is silver as also is the seat, radiator, propeller and
parts of the supercharger. The connecting exhaust pipes were brown. The rest of
the kit is overall olive drab, which makes it a straightforward airbrush job.
The decals are of very good quality made by Begemot and depict a
| CONCLUSIONS |
 This was
an enjoyable build. I recommend this kit to anyone who has made a resin kit
before. The few shortcomings mentioned should not deter anyone from getting the
Hawk particularly to those who like me enjoy building between wars aircraft. The
kit is available from Hannants