Mark 1 Models 1/720 K-class Blimp
| KIT #: | MKM720-10 |
| PRICE: | $33.00 |
| DECALS: | Three options |
| REVIEWER: | John Summerford |
| NOTES: |

| HISTORY |
Excerpted from Wikipedia.
 The K-class blimp was a class of blimps (non-rigid
airship) built by the Goodyear Aircraft Company of Akron, Ohio for the United
States Navy. These blimps were powered by two Pratt & Whitney Wasp nine-cylinder
radial air-cooled engines, each mounted on twin-strut outriggers, one per side
of the control car that hung under the envelope. Before and during World War II,
134 K-class blimps were built and configured for patrol and anti-submarine
warfare operations, and were extensively used in the Navy’s anti-submarine
efforts in the Atlantic and Pacific Ocean areas.
On October 24, 1940, the Navy awarded a contract to Goodyear for six airships (K-3 through K-8) that were assigned the designation Goodyear ZNP-K. These blimps were designed for patrol and escort duties and were delivered to the Navy in late 1941 and early 1942. K-3 through K-8 had only minor modifications to K-2's design, the only major change was in engines from Pratt & Whitney R-1340-16s to Wright R-975-28s. The Wright engine/propeller combination proved excessively noisy and was replaced in later K-ships with slightly modified Pratt & Whitney engines. The envelope size of K-9 through K-13 was increased to 416,000 ft³ (11,780 m³) and those delivered thereafter used an envelope of 425,000 ft³ (12,035 m³).
The K-ships were used for anti-submarine warfare (ASW) duties in the Atlantic and Pacific Oceans as well as the Mediterranean Sea. All equipment was carried in a forty-foot-long gondola. The blimps were equipped with the ASG radar, that had a detection range of 90 mi (140 km), sonobuoys, and magnetic anomaly detection (MAD) equipment. The communications and instrumentation equipment allowed night flying. The K-ships carried four 350 lb. (160 kg) depth bombs, two in a bomb bay and two externally, and were equipped with a machine gun in the forward part of the gondola. An aircrew of 10 normally operated the K-ships, consisting of a command pilot, two co-pilots, a navigator/pilot, airship rigger, an ordnance man, two mechanics, and two radiomen.
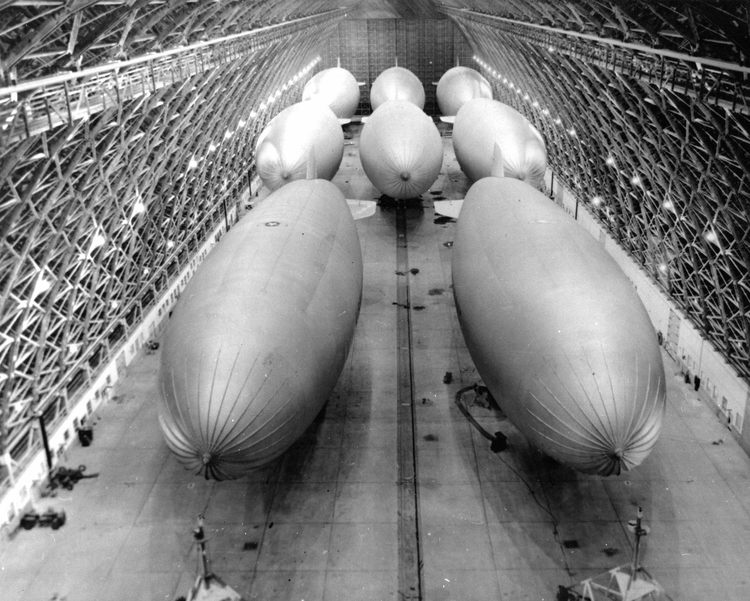
Two blimp hangars in the United States are still standing, one on each coast of the lower 48 states. The east coast hangar is in Lakehurst, NJ, famously know for the Hindenburg disaster. The west coast Hangar is in Tillamook, Oregon, (of cheese and ice cream fame) and is now a museum. Both buildings are among the largest wooden structures in the world.
| THE KIT |
 An
end-opening box holds a single zip-top bag containing all of the parts, decals,
instructions, and a card stock display base. The plastic parts are on a medium
gray sprue. The envelope is molded into upper and lower halves and a separate
nose piece. The gondola is molded into the lower half. Ventral and dorsal fins,
engine pods, props, and a wheel are the detail parts. Seven parts make up the
mooring mast. Some minor flash is present. A resin casting has wheels for the
mast and a teeny-tiny one-piece tractor.
Assembly instructions are an exploded view diagram plus a parts map on one side of a single sheet and a painting diagram on the back side. Color call-outs do not reference any brands of paint or FS codes.
Decal options include an airship stationed in Key West, Florida and was the only blimp shot down by a U-boat after the depth charge failed to detonate. The other two options patrolled the Strait of Gibraltar, one being the first to land in Europe.
| CONSTRUCTION |
 I’m on record
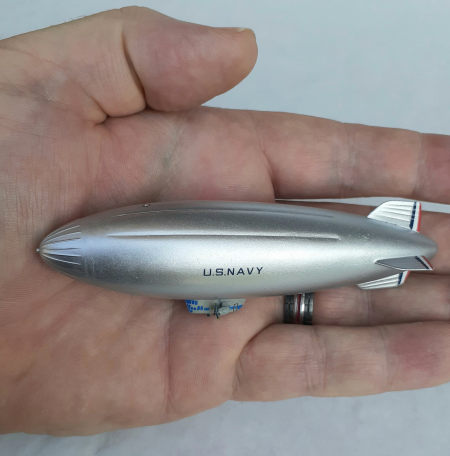
stating that I dislike modeling in 72nd scale, so I wonder if I’ll dislike this
720th scale build 10 times more.
Assembly began with the three parts that make up the envelope. Even after careful sanding of the mating surfaces, the seam between the upper and lower halves needed some filler. Sanding down the mating surfaces of the nose cap is required. Repeated sanding and checking were done before gluing on the cap. Even so, filler was applied and smoothed over.
The vertical fins were attached next. Gaps along the bases needed to be addressed. (I noticed that, if the model is held upside down, it looks like a submarine.)
A coat of white rattle can automotive primer reveled that more attention was needed along the nose cap seam. A couple more sessions of filling/sanding/primer followed. Finley satisfied, I cranked up the compressor and grabbed a bottle of Vallejo Aluminum.
| COLORS & MARKINGS |
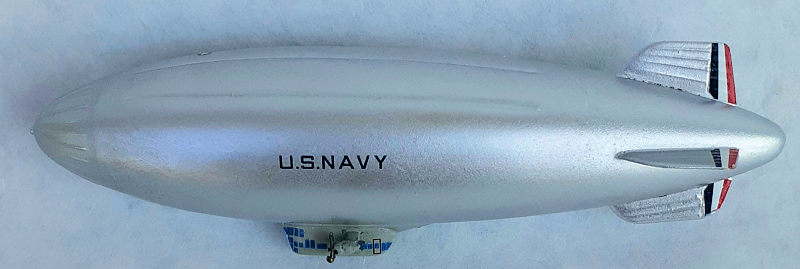
Two paints are needed for the model, aluminum for the envelope and light gray for the gondola. After spraying the aluminum, I found I STILL needed to do more work on the nose cap seam. When I was finely-finely happy, I painted the gondola with a brush.
 I applied the
decals in three sessions. Two decals represent the front and rear windows of the
gondola and I let those set before adding the stars on the top and bottom, plus
the “US Navy” lettering and the stripes on one side of each of the rudders and
elevators. The last session did the other side of the rudders and elevators.
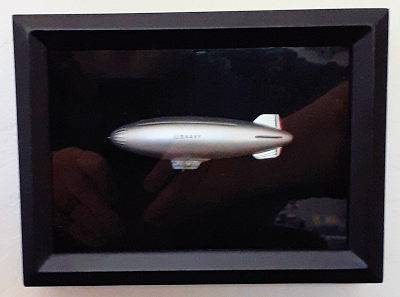
I decided to mount the model inside a shadow box, so a hole was drilled on starboard side of the model and through the back side of the box for a length of brass rod to pin it in place..
Now came the tiny bits. The struts for the engine pods were glued to the pods while they were still on the sprue, then each sub-assembly removed from the sprue and glued into place.
The props were hard to clean up after removal from the sprue, due to their sprue gates at the hubs instead of at one tip. These were glued to the faces of the pods. The tiniest piece I have ever glued to a model was the wheel on the bottom of the gondola. All of the pieces were then painted to complete the build.
The brass rod was epoxied in place, then the model installed in the shadow box.
| CONCLUSIONS |
This kit is an easy build. One does need a good pair of tweezers to do the job. The difficulty I had with getting the nose cap seam right was about the nature of metallic paints and nothing to do with the scale. I have to give kudos to ship model builders for their skill, but I’m not inclined to try any of their projects though. So did I dislike building in this scale even more? Ummm, not really.
8 February 2022
Copyright ModelingMadness.com. All rights reserved. No reproduction in part or in whole without express permission
If you would like your product reviewed fairly and fairly quickly, please contact the editor or see other details in the Note to Contributors.