
| KIT #: | 72139 |
| PRICE: | $31.75 |
| DECALS: | Yes |
| REVIEWER: | Peter Burstow |
| NOTES: | Resin conversion |

| HISTORY |
This CA-18 Mustang, A68-187, a PR.
22, was built by CAC and taken on charge by the RAAF in 1950. After a very dull
career, mainly involving being stored at various sites, it was sold in 1958.
It passed through a number of owners, and had a stint on a pole. In July
1969, Hockey Treloar purchased it with the intention of conversion to a
turbopr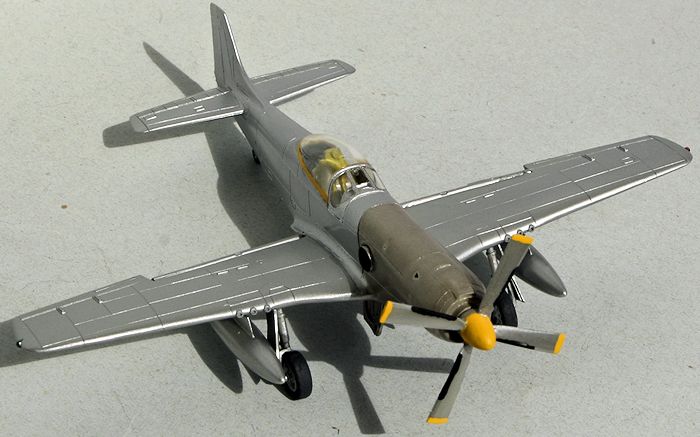 op using a Rolls Royce Dart from a Vickers Viscount. Registration VH-FHT
was reserved, then VH-UFO, neither were ever applied.
| THE KIT |
 This kit is unusual in that it
includes the kit to be converted, as well as the conversion parts needed.
The conversion parts include 14 resin parts, the fuselage halves,
nacelle, fuel tanks, flaps, seat and wheels. There is a replacement wheel well,
and a one piece propeller supplied, so no fiddling with separate blades. The
propeller has been moulded with a brass rod for a shaft. Also included are a
number of wire hair pins, some plastic-card strips and a injection needle.
The kit to be converted is the Academy P-51D, which is supplied complete in a sealed bag. I'm sure this kit has been reviewed somewhere, it looks quite nice, and probably does not deserve the fate which I will subject it to.
| CONSTRUCTION |
The usual start to a resin kit,
wash all the parts in warm water, I used a No. 7 bristle brush and laundry soap.
There was a tiny bit of flash on the major components, most of which fell away
in the washing process. Next I separated the wheel
well, flaps, tanks, belly panel and prop from the pouring lugs, and cleaned up
the remains, this was a quick and easy job, just needing a couple of passes with
a scalpel, and a light wet sand.
Construction proper started with
the Academy one piece lower wing. The shell ejection holes were backed with card
and filled, the holes for the tank pylons were opened up and a new hole drilled
for the pitot in the correct spot, the original being filled. The central of the
three moulded identification lights was drilled lightly to form a cup, the outer
two were filled.
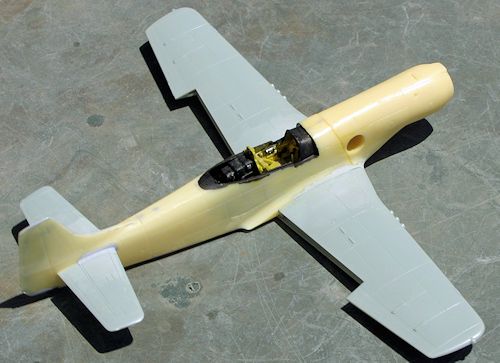 The Academy part is too flat, so
the moulded wheel well was removed, a slot cut in the rear flange, and the resin
well added. Using the supplied template, a plastic card jig was made, and the
wing re-rigged to five degrees dihedral. Sounds complicated, but this process
was explained in detail in the instructions, and illustrated with colour photos.
Finally on to the cockpit which was
assembled OOB. The instructions suggested not using the bulkhead and radio
parts, and building a seat support with the supplied wire. All too fiddly for
me, so I used the Academy bulkhead and seat parts. It looked empty so I added
the radio as well. Dry fitting into the resin fuselage halves found that it
fitted fine, the only modification needed was to cut the floor off just forward
of the instrument panel.
I painted the cockpit assembly and
the fuselage side walls with Tamiya's very stinky yellow-green XF-4, then did a
little detailing with black, silver and buff.
The engine casting was then joined
up, not a perfect fit, with a small step on one side. Fixing the step would have
destroyed a lot of the engraved detail. Probably should have joined the nacelle
to one fuselage half first, then joined up the fuselage, which would have left a
small gap at the top of the fuselage forward of the cockpit. With very thin
resin parts, and superglue, I thought it best to leave it alone rather than
attempt pulling it apart and trying again.
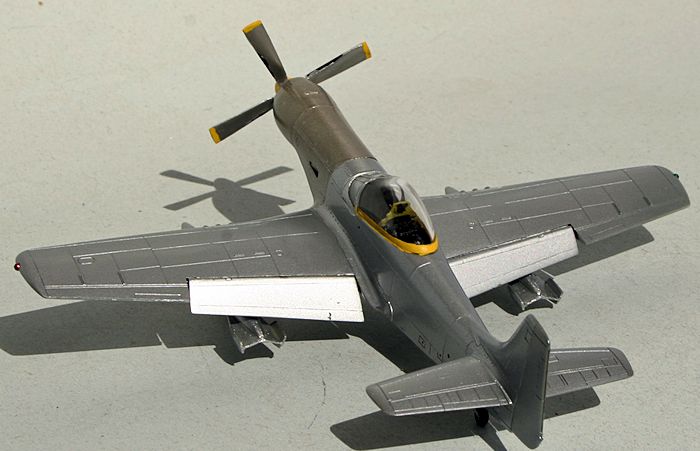 Next offered up the modified lower
wing to the fuselage, needed a tiny bit of sanding of the resin wheel well to
get it to fit. Had small gaps at the leading and trailing edge under the
fuselage. Then added the upper wing halves, again had to sand the wheel well
part to get the wings together. I added a small shim at the trailing edge to
match the fairings moulded onto the fuselage halves. Ended up with a small gap,
which I filled with superglue and then a layer of Mr Surfacer. I then carved out
the gun-camera port, removed the gun barrels and drilled out the gun ports.
Left it for a day for the filler to
cure, then a light sand. Needed a touch more surfacer in a few spots, another
sand then a clean out of the engraved panel lines and details using a sewing
needle. Lack of heavy sanding meant that there was no re-scribing of lines
needed. Gave the model another thorough wash with warm water and soap, and left
it for a day in the sun to completely dry.
| COLORS & MARKINGS |
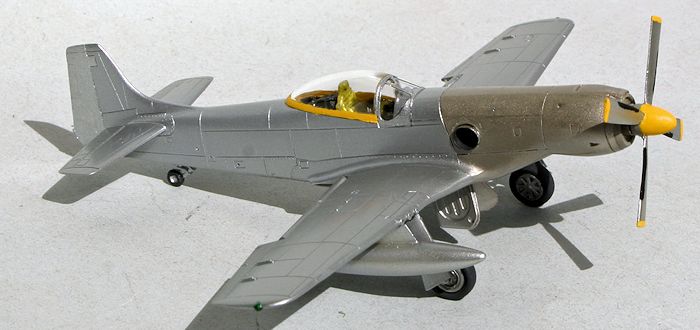
Just about done, added the
undercarriage with the supplied resin wheels, the large fuel tanks, then the
propeller and canopy. The instructions went into a lot of detail about wire
hinges and multi part retraction rams for the doors, but it was all a little
fiddly. Another template was supplied to get the angle of the inner gear doors
right. A bit more detail painting and it was finished.
| CONCLUSIONS |
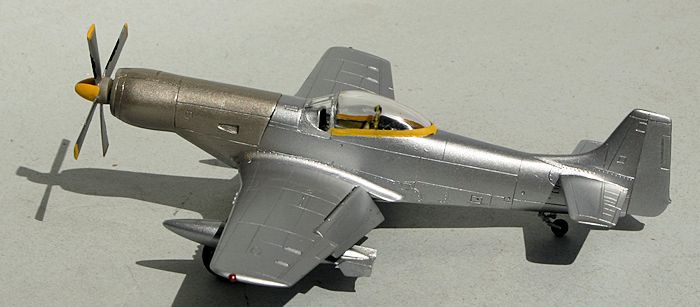
I saw this aircraft many times in
the mid 70's at Fairbairn (Canberra Airport), and walked over to have a close
look a few times. I don't remember taking any photographs of it.
| REFERENCES |
http://www.adf-gallery.com.au/gallery/Mustang-A68-187a
http://www.mustangsmustangs.com/p-51/survivors/CAC?survivors/serial/A68-187
Kit Instructions.
January 2015
If you would like your product reviewed fairly and fairly quickly, please contact the editor or see other details in the Note to Contributors.