| KIT #: | SW 72079 |
| PRICE: | £14.99 when new |
| DECALS: | Two options |
| REVIEWER: | Joe Essid |
| NOTES: | Provides a tough build for a novice |

| HISTORY |
Imagine crewing a Tu-95 Bear a little too close to NATO airspace when a pair of English Electric Lightnings arrive to "escort" you back toward the Soviet Bloc. The only feeling that might be analogous would be what I felt in a London pub once, when a drunken American tourist said something naughty to a woman behind the counter. Out of nowhere, five burly Brits appeared in the blink of an eye, two of them vaulting the bar.
 My fellow Yank was tossed
out the open doorway and into the gutter. A group of office workers nearby
chuckled and as I raised an eyebrow, and one told me "one of your countrymen
misbehaved." Point taken. I asked for another pint and behaved.
I think of the English Electric Lightning in the same way as those big, yet agile men working the pub: it's a burly brawler, a cudgel and not a dart. It looks blunt with angles few American jets ever sported. Atop that, its later models flew at Mach 2. To my eye, the Lightning is the coolest production flying machine built in the UK Postwar (The Vulcan runs a close second). The two have been placed together at RAF Duxford, where I first saw a Lightning up close. I've not seen the two-seat trainer version in person, the subject of this review. It manages to look at potent as its single-seat sibling.
Even in the shadow of a Vulcan, the Lightning looks scary. Planes like the F-104 appear fast standing still, but the Lightning looks like it does what it does so well with brute force: the stacked Rolls Royce Avon engines are a stunning design feature. Until I did my research when building the kit, I had no idea that the plane was the first in the world capable of supercruise.
I greatly regret that I'll never get to see one fly.
| THE KIT |
I get to Canada or the UK fairly often, so of course I hunt down local model shops to buy an aircraft in local colors. from the UK I always ship my kits home. While I could buy the same kits here, it's the memory that comes with the kit that adds something intangible to the build.
 In 2014, before a walking
trip in Scotland, I had a few days in Glasgow with some Scots who have been good
friends of ours a long time. They pointed me toward downtown to find a model
shop, where I ran across Jamieson's Models; it's since become Scott's Models,
located nearby. I urge you to pop in when in Glasgow. The owner and I talked
models and the "state of the hobby" a long time before I walked out with a few
kits. Sword's kit caught my eye and I wanted something British. For some reason
I did not know then, the shop-owner steered me toward other kits. Maybe I told
him that I'd recently returned to the hobby and he realized what lay ahead of
me. Yet the two-seater just looks right to my eye. I shipped it home.
The end-opening box (careful not to lose parts!) reveals two sprues of parts, as well as resin engines and cockpit. Options for three aircraft appear, as well as both Firestreak and Red Top missiles.
A sheet of photo-etch provides details beyond me in 1/72, at least in 2022 when I finally began building: grab-handles for ejector seats, seat-belts, instrument panels. Since then I've gotten more accustomed to eye-strain.
Sword's instructions are well illustrated but the sprues are not numbered, so one must flip back and forth between a chart of part numbers and the instructions.
That and the box are the downsides, as long as one is prepared for a limited-run and mixed-media kit. I wasn't.
| CONSTRUCTION |
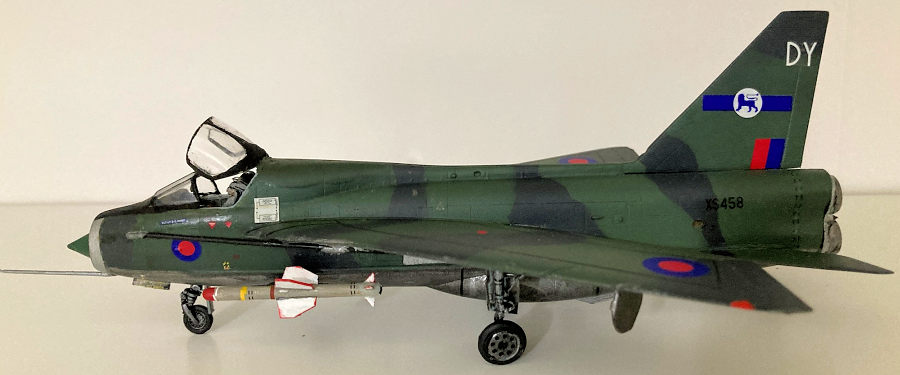
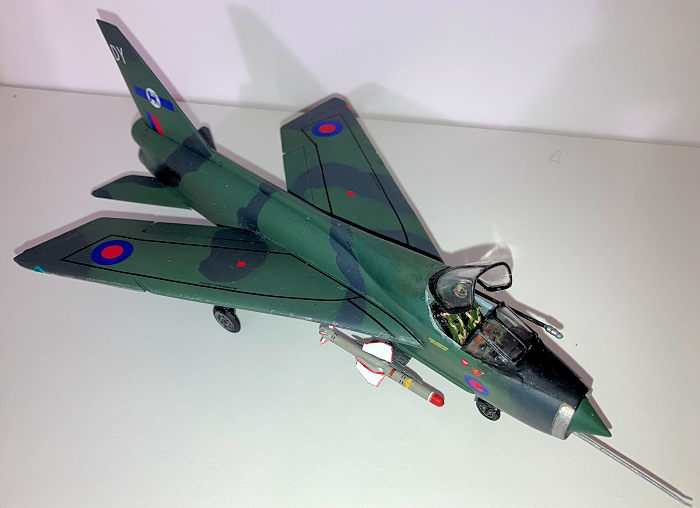
We should be unafraid to share our disasters here. I originally wrote this review in 2022 but did not care for the result enough to share. Now I'll be bold and send it in. The kit also looked better to me when I displayed it in a new case with a white background. I've used that for the photos.
I began with the cockpit, that veritable "kit in itself" and with one exception, I had a fine time building it. It was, in fact, one of the only easy experiences I had with this kit, despite one seat-front being broken when I opened the box. I had to fabricate a new bit out of putty. It went in well.
Once I'd used CA to glue the plane's "office" together, I test-fit it to the fuselage halves. Here, as with the rest of the kit, the lack of nibs for mating parts makes fitment a challenge for those not accustomed to limited-run kits. The first and most serious issue in the build arose: try as I might, the tub would not fit well without a seam so wide as to make the canopy not fit.
I sanded off at least 1/16" of resin in total, taking a bit from each side, until I had a fit. The small resulting seam at the nose and right behind the cockpit took a good deal of work, and I had to re-scribe panel lines with a needle set in a pin-vise, using Dymo label tape to guide my cuts. This practice came in handy later, since the belly needed a similar treatment after some over-zealous sanding. At least the experience helped with my first Rareplanes vacuform kit, where I had to scribe everything.
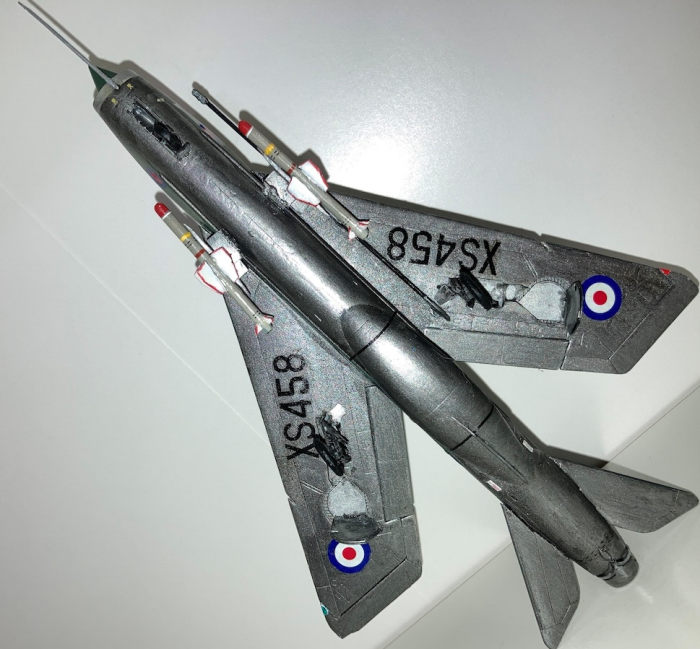
Try as I might, I never quite removed the seam on the bottom of the fuselage. I let it be, as does not show in the case as it does, glaringly, in my photos.
 Save yourself trouble with
the forcing-cone and engine front by lots of test fitting. These parts also
proved difficult. I found what I thought to be the right spot and got them
cemented. In retrospect, I might have reduced the size of the base on which
Sword puts the forcing cone, and the fuselage would have fit together without a
gap. The cockpit would have still needed a lot of work to fit, but I'd not have
experienced all the issues with the plane's nose.
At the other end of the fuselage, I got the resin engine ready. This was easy to saw from its block and even better to paint. In fact, the engine nozzles are my favorite part of the kit.
Wings went on next as well as the vertical stabilizer. The horizontal ones quickly broke off and needed new tabs to stay in place. After much fiddling I got them tacked down at a 90 degree angle. Later I realized that I had the wings without the droop stated in the instructions: that's clearly my fault.
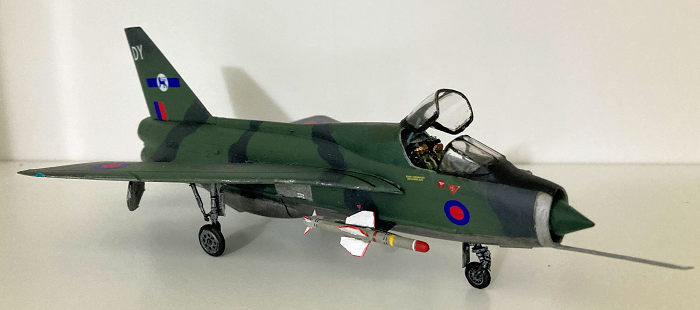
The canopy was not; it never fit. I had to make do with putty, sanding, and more putty to get the canopy nearly flush with the aircraft's nose after installing the hood over the instrument panel. This was, moreover, not the only problem of fitment at this point: the hood proved both too narrow (as if from a single-seat Lightning) and too thick (leading to the canopy issue). I sanded it down on the top until it was nearly transparent; then, the canopy sat nearly flush. For the back portion, it would be posed open to show that fine PE interior (at least the parts I used), so I left it be.
| COLORS & MARKINGS |
Mistakes here were all my fault. I reached for Mission RAF Dark Green and sprayed their Panzer Green instead. I did have the gray correct, and as with all Mission paints, it flows well from my cheap airbrush (a new one has since replaced it). I like the colors so they'll stay. I masked off the areas for painting with Silly Putty and got good breaks in the camo.
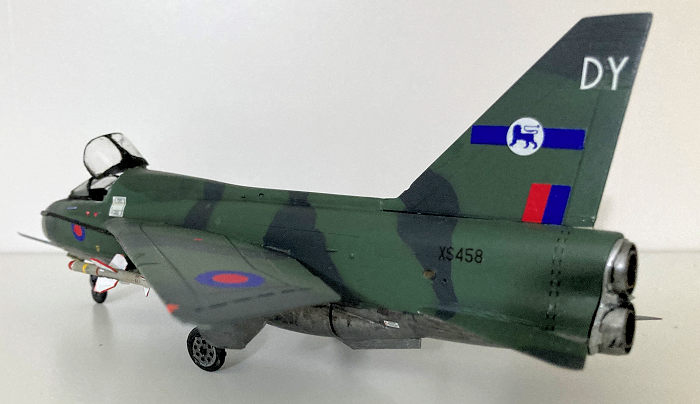 For the natural metal,
it was not much fun. I tried a nameless bottle of dark silver acrylic that
looks fabulous when brushed, but when sprayed, got grainy. I sanded it with
2000 grit to make the finish as glossy as possible, then sprayed it all with
Future to prepare for the decals.
I did no weathering to speak of, save where a little Testors silver used at the intake's ring got onto the camo. It looks in the right place for wear, so I left it. The top of the plane's nose needed a lot of work to get it even partly smooth, so that got flat black, a sanding, more black, finally Future.
The kit decals were a joy, after the frustrations building the kit. They separate from the backing fast and slide on well, snugging down without any decal solution. The only issues were placement of some of the smaller text, not clear from the instructions, as well as the wing-walkway lines. They did not cover the perimeter of the wing, and I had to scrounge some other black stripes left over, ironically, from an F-4 Phantom, the plane that replaced the Lightning in RAF service.
| FINAL CONSTRUCTION |
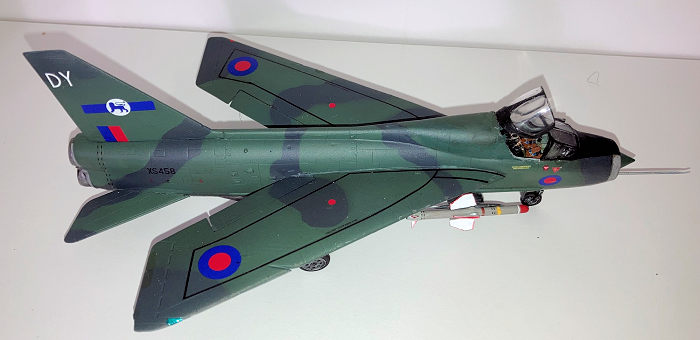 Small parts that go on
last can prove flimsy. Even with my finest nipper I ruined the strut that
holds open the canopy, and resorted to a replacement from a bit of stretched
sprue.
I put on the Red Top missiles, nicely done but fiddly to assemble with their small fins. Oddly, the rear of the missile lacks an engine nozzle. I slapped flat black on the end and will look for a part soon from the scrap-heap. I finished the Red Tops with the red covers for the nose and fins, as the weapons wore when the planes were on the ground.
After a bit of touch up and a shot of Tamiya flat from a rattle-can, I called it done, and I was relieved. Save for a 1/700 scale warship a few years ago, I've never had a model fight me as much as this Lightning did. Good for a pub brawler, I guess!
On the shelf it went, next to a Phantom, again ironically. Pity the Lightning's fate: what a cool plane, even if it did live up to its high-maintenance reputation. So does this kit. Will I build another plane made by Sword? Depends upon the subject.
| CONCLUSIONS |
No wonder the guy in Glasgow pointed me to the Airfix kits. There's a single-seat Lightning from Airfix in the stash now.
Sword's kit is not for the beginner, but I don't see other trainer/two-seaters out there in 1/72. (Matchbox. Ed) It's recommended for the modeler experienced with resin and limited-run kits. Prices at "that big auction site" vary widely, and they run a lot more than the 15 quid I put out. Bide your time to get one, but be prepared for poor fitment of the cockpit, instrument-panel hood, and canopy.
Cheers, lads. Have another pint but stay polite.
11 November 2024 Copyright
ModelingMadness.com. All rights reserved. No reproduction in part or in whole
without express permission. If you would like your product reviewed fairly and fairly quickly, please
contact
the editor or see other details in the
Note to
Contributors.