Hasegawa 1/72 J.35J Draken
|
KIT # |
00047 |
|
PRICE: |
@23.95 MSRP |
|
DECALS: |
one option |
|
REVIEWER: |
Ruud van der Salm |
|
NOTES: |
"Air Superiority" boxing. Mike Howard photos |

|
HISTORY |
See previous Draken article in the Modeling Madness review archives.
|
THE KIT |
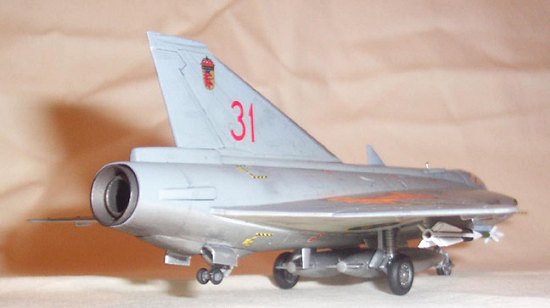
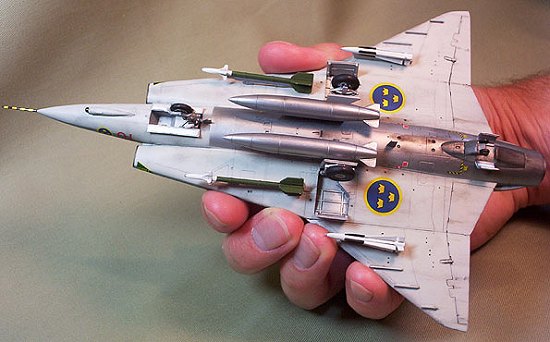
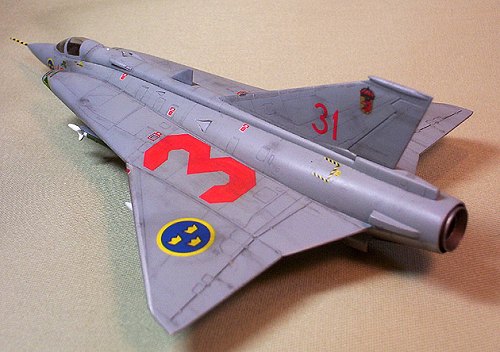
 If you paid full retail for this kit and got it home and opened it ...
you would be wondering why it cost so much. The kits comes with about
64 parts (3 of them clear). The kit seems to not take up much room in
the big box. This particular boxing came with only a single decal
option, that of an all gray plane from Flygflottilj 10. The squadron
is not given, nor is there a specific squadron decal provided.
|
CONSTRUCTION |
 This kit goes together really easily. I was moving along very quickly
(considering it was me) until i hit the two main speed bumps in this
kit. The intakes and the engine. Neither fit exactly as they are
supposed to. The engine meets up nicely with the top of the fuselage,
but leaves a gap with the bottom half. It is a sizable gap, and much
putty was used to fill it. I was able to make it work and not loose
too much detail in the process. The intakes seem to be a bit too small
for where they are to be joined up with the fuselage. In hind sight,
more dry fitting (sanding down the intakes on the fuselage side some to
shrink the opening?) would have saved me a lot of work. These two
issues took a lot of momentum out of this build.
This kit goes together really easily. I was moving along very quickly
(considering it was me) until i hit the two main speed bumps in this
kit. The intakes and the engine. Neither fit exactly as they are
supposed to. The engine meets up nicely with the top of the fuselage,
but leaves a gap with the bottom half. It is a sizable gap, and much
putty was used to fill it. I was able to make it work and not loose
too much detail in the process. The intakes seem to be a bit too small
for where they are to be joined up with the fuselage. In hind sight,
more dry fitting (sanding down the intakes on the fuselage side some to
shrink the opening?) would have saved me a lot of work. These two
issues took a lot of momentum out of this build.|
COLORS & MARKINGS |
 wing has three small fins on it and they over the NMF. I
ended up painting the two sections between these fins by hand and
masking and airbrushing the larger sections.
wing has three small fins on it and they over the NMF. I
ended up painting the two sections between these fins by hand and
masking and airbrushing the larger sections.|
CONCLUSIONS |
 I always had it in mind to build a Swedish jet. This airplane has a
very unique look to it and once i bought the kit, it really called to
me to build it. It is interesting to see a 1960s jet in a modern
air-to-air scheme. The decals add just enough color to off set all the
gray, but the scheme does not take away from the lines of the plane and
the detail of the kit. If you need your "Three Crowns" fix, i would
highly recommend this kit.
I always had it in mind to build a Swedish jet. This airplane has a
very unique look to it and once i bought the kit, it really called to
me to build it. It is interesting to see a 1960s jet in a modern
air-to-air scheme. The decals add just enough color to off set all the
gray, but the scheme does not take away from the lines of the plane and
the detail of the kit. If you need your "Three Crowns" fix, i would
highly recommend this kit.|
REFERENCES |
July 2004
Copyright ModelingMadness.com. All rights reserved. No reproduction in any form without express permission from the editor.
If you would like your product reviewed fairly and fairly quickly, please contact the editor or see other details in the Note to Contributors.