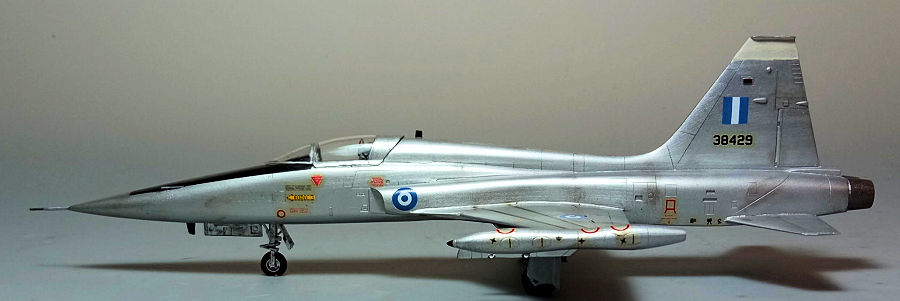
Revell (ESCI) 1/72 F-5A Freedom Fighter
| KIT #: | 4343 |
| PRICE: | $ |
| DECALS: | Two Options |
| REVIEWER: | Spiros Pendedekas |
| NOTES: | Reboxed ESCI kit |

| HISTORY |
Hellenic Air Force (HAF), started receiving the F-5A in 1965. In the same year, the 341st Day Interception Squadron (MAH) was declared operational, followed by the 343 MAH. 55 aircraft were initially received, followed by 17 RF-5As in 1970. In 1975 10 examples were purchased from Iran and later another 10 from Jordan, with 9 more granted by Norway in 1986 and another 10 NF-5A/B in 1991 from The Netherlands.
 Hellenic
Freedom Fighters offered their services for 36 years, including their later
use as “introductory planes” for F-16 and Mirage 2000 pilots, clocking a
whopping 364,647 flight hours, while 23 memorable pilots lost their lives
flying with them. The type was withdrawn from HAF in 2001.
Taking into account that, at least upon delivery, only Greek insignia and codes were painted over the previous ones, it is no surprise that HAF F-5s sported a variety of camos, ranging from “NMF”, to SEA, Asia Minor, Aegean Blue, Dutch Gray Blue, Norwegian Gray and Aegean Ghost, deeming the specific subject a modeler’s haven!
As for the type itself, little can be said than hasn't been said: small, highly aerodynamic and a potent performer, offering low costs, ease of maintenance and great versatility, this very successful plane loudly proved that, at times, less is more.
| THE KIT |
This is the 1986 Revell reboxing of the original 1983 ESCI mold, which, by all means, is a nice kit that can solidly hold its own today. The specific kit was a gift from good Dutch friend John vd Biggelaar, as he knows I have an affection for old classic kits and for a look at its contents you may read its preview found in the ever growing MM archives.
| CONSTRUCTION |
 I started by
trapping the nice cockpit tub between the front fuselage halves. Basic cockpit
color was Hu140 Gull Gray, while the stick grip, throttle quadrant and top
anti-glare area were painted black. I used the very nice instrument decals for
the instrument panel and side consoles. The equally nice four piece seat was
also assembled. Its frame was painted the same cockpit gray, its head cushion
red, its lower cushions a medium green and its ejection handles yellow with
black stripes. The only thing I added were seat belts from masking tape and, in
fact, I was quite satisfied with how this 40 year old cockpit turned out
practically out of the box.
The rear fuselage was next assembled and attached to the front part. Esci had molded their F-5A with separate front and rear fuselage sections, to allow for all versions with as many common sprues as possible. Low point of this is the inevitable seam between the two sections, which, at least, can easily be dealt with some care during construction.
The wings had their slats glued in neutral position (you can pose them extended should you wish) and attached to the fuselage, followed by the tail planes, which are to be attached with a slight anhedral (the head-on view provided at the instructions proved very handy there).
 The well made
but delicate 2-piece intakes were next assembled and attached. Their innards
were painted silver and their ends matt black, to enhance the sense of depth.
Having the basic model almost complete, I could figure out the amount of weight
needed to avoid tail sitting and only then did I attach the three piece nose,
essentially filling its rear section with fishing weights.
This concluded basic assembly. Overall fit was in most places quite good, with the most challenging area being the front/rear fuselage joint. The small front nose section could also have been molded as one piece, instead of left and right. Nevertheless, fit did not disappoint, requiring normal amounts of filler at the expected places (like the wing roots and the fuselage joints).
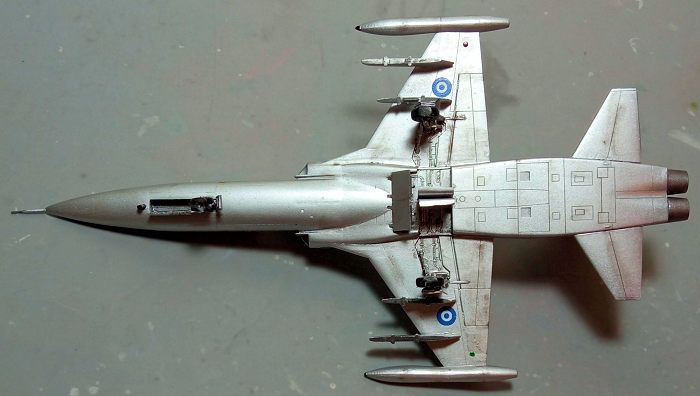
I decided to add the distinctively shaped tip tanks, which were assembled and attached. The four wing pylons were also glued underneath. The wing tanks were also assembled but were left off, to be attached at later stages. As a note, later F-5A versions might feature a number of additional air inlets which are provided by the kit, so you have to figure out which ones are applicable for your version.
Since I was opting for an early overall silver bird and, where all landing gear parts, bays, door innards and airbrake housing were also silver for my example, I decided, apart from the main wheels, to attach all above in position, so they could be painted together. After a final sanding, I took the bird to the paint shop!
| COLORS & MARKINGS |
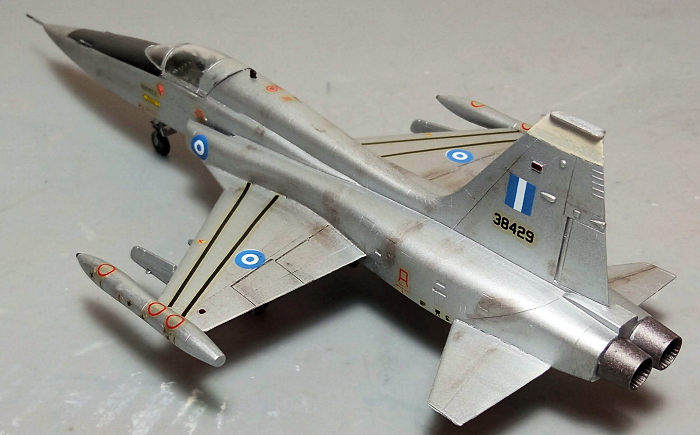 I gave the
complete model, together with the wing tanks and doors, a coat of Hu11 Silver,
which I lightly buffed with a soft cloth upon drying, to add some extra shine. I
then painted the top part of the vertical stabilizer off-white (from an aged
Hu130 tin) and the front anti-glare area Hu85 black). The pylons’ sway braces
were painted gunmetal. Though glossy, I took no risks in damaging the always
sensitive silver paint and coated everything with Future, to prepare for
decaling.
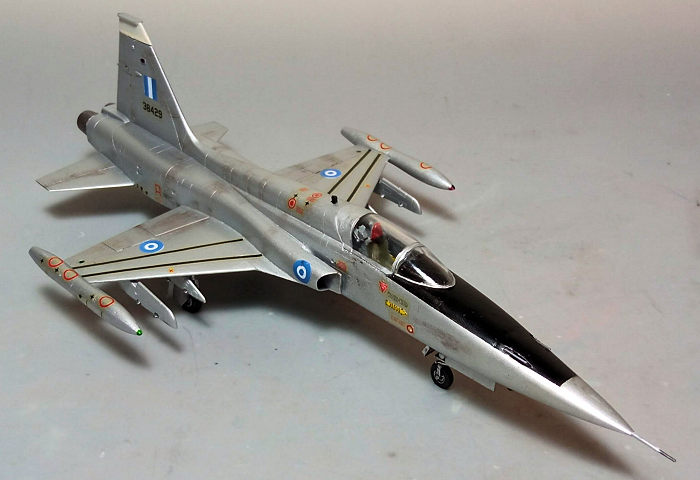
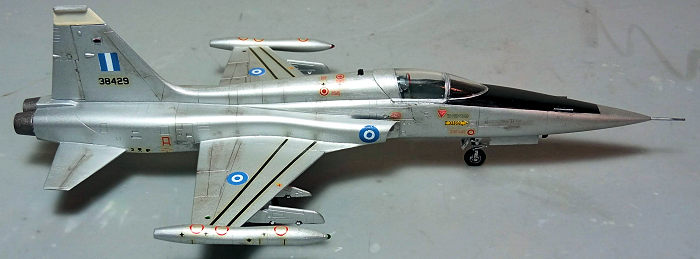
I used Greek insignia from an old generic “Plastimodellismo” decal sheet. Apart from some off-registering, decals went on nicely. For the rest, I used the kit decals, which, albeit exhibiting some yellowing, they otherwise looked usable. That sheet was dated back in 1986 and, if I recall well, Revel decals of that era did not age too well, as at times they were disintegrating upon being submerged to water. Deciding to take no risks, I coated the complete sheet with Microscale liquid decal gent and the decals behaved well, easily detaching from their backing paper and succumbing nicely to all contours, with the yellowing not being that apparent. A coat of Future sealed them.
The main wheels were attached, followed by the dragged doors. The wing tanks could not be attached at the correct angle, as they were too close to the main doors, so I decided to leave them off. The exhausts were painted Mr Hobby Burned Iron and attached in position. Their shallow inner ends were painted matt black, to add a sense of depth.
I decided to add some weathering, consisting of a black wash to accentuate all engraved panel lines, followed by dark brown and dark dry pastels to somewhat tone down the NMF shine at a few areas where light amounts of dirt or grime would reside. A heavier black wash was applied at all landing gear parts, bays, door innards and airbrake housing, nicely enhancing the molded-on details, with a satin coat giving the bird its final hue.
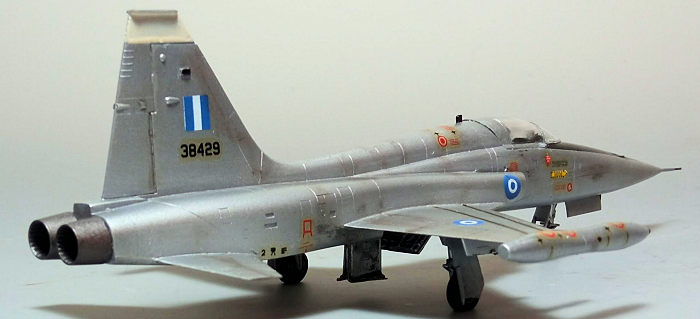 The
transparencies had their well defined frames hand painted and attached in
position, with fit being quite nice. The seat’s rear framing sat too high
(possibly operator error) so I had to trim it down, in order for the canopy to
fit. Nevertheless, the trimmed area is below the non transparent part of the
canopy, so it is not that noticeable.
The nice looking pitot was attached in position, with its tip painted Testors Burned Metal and its body painted silver (a number of pitot bodies were often seen painted with red stripes, but I was too lazy to commit and, for the same reason, I did not paint the intake lips red). Though provided by the kit and looking good, I decided to represent the front guns with stretched sprue (painted Testors Burned Metal) for a more scale appearance.
The correct for my version top mounted IFF and underside UHF antennas were painted black and attached. Blobs of red and green clear paints represented the various wing tip and fin mounted anti collision lights, before calling the early Hellenic Freedom Fighter done!
| CONCLUSIONS |
Though more than four decades old (as of 2024), this is still a fine kit of the iconic F-5A: general shape looks correct, molding is crisp, panel lines are finely recessed and at the correct places, detail is very good for the scale (the key areas of the cockpit and landing gear included), fit is good, transparencies are nicely done, instructions are great and decals, despite their age, behaved satisfactorily after some coating with liquid decal film.
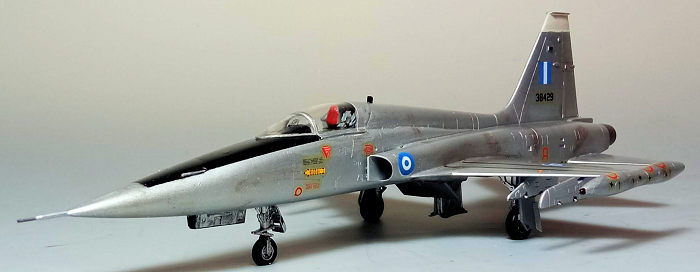 Though
not totally shake and bake, its relatively uncomplicated construction deems this
kit suitable even for the inexperienced modeler. Out of the box, a very nice
F-5A can be built, with a good amount of aftermarket being available in order to
enhance it.
It is quite noteworthy that Esci came up with such a fine product back in 1983, which can easily hold its own today. The kit was recently reissued by Italeri with a very nice decal sheet (and also, to my understanding, with properly maintained molds, so molding is expected to be clean and crisp). If you have one or come across one at a reasonable price, get it and build it. After a pleasant build, a great Freedom Fighter will emerge!
Happy Modeling!
October 2024
Copyright ModelingMadness.com. All rights reserved. No reproduction in part or in whole without express permission from the editor.
If you would like your product reviewed fairly and fairly quickly, please contact the editor or see other details in the Note to Contributors.