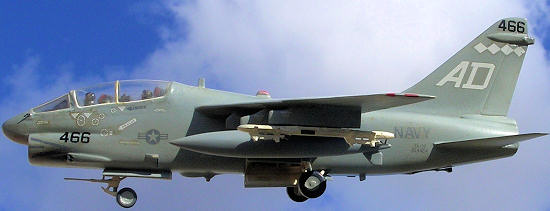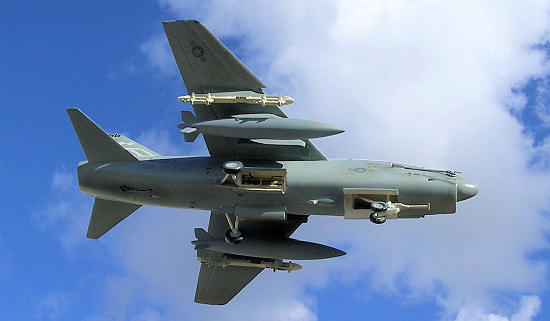
Airfix 1/72 TA-7C Corsair II
| KIT #: | ? |
| PRICE: |
1988:
7s 6d |
| DECALS: | Two options |
| REVIEWER: | Carmel J. Attard |
| NOTES: |
Conversion A: using two A7E Kits to produce a TA7C. Conversion B: Airfix A7E + Falcon conversion fuselage |

| HISTORY |
 conversion on
the Corsair introduced two new parts to the standard A-7E so that the fuselage
increased in length by 34 inches (0.47), i.e. 16 inches (0.22) forward of wing
location and 18 inches (0.25) aft. The rear fuselage was given an upward tilt
of a little over 1 and 1/3 degrees. This will maintain suitable clearance when
the aircraft is in the take off run.
The TA-7 as came to be known, was 500 Lb heavier apart from being longer than the E model. The rear cockpit, which accommodated the instructor, was raised above the forward one and a new upper fuselage and dorsal fairing added. A housing was added to the rear fuselage to fit a landing drag chute located at the base of the fin. The forward cockpit was unchanged from the A-7E and the rear has full primary and secondary controls for take-off, navigation and landing on carrier decks or concrete runways. The canopy is a one-piece moulding hinged on the starboard fuselage. A rear protection shield is provided between the cockpits to give the rear occupant protection in the event of emergency ejection. The production version was fitted with a standard radome. Following the success of the TA-7 conversion and good performance, 24 TA-7 were eventually converted from A-7B and 36 from A-7C that formed two A-7 units.
| THE KIT |
| CONSTRUCTION |
 Two A-7 kits were required to
obtain the new fuselage extensions. In my case I used a brand new Airfix A-7 and
parts from another scrapped one. The two fuselage halves are first cemented
together leaving out the ducting part 1 and part 2, bulkhead 5 and the cockpit
components parts 3 and 4. A razor saw cut out marked lines on both halves of
another fuselage into three sections. These sections are
 placed on one side and
the intake ducting from both kits was cut into 4 sections (see sketch). The ones
shown in red are discarded and the remaining parts are cemented together as
depicted in the sketch, which resulted into a lengthened duct of an overall
length of 2.04 inches long. At the rear of this duct bulkhead 5 was then
cemented.
The second part of the conversion
consisted of lengthening the fuselage by inserting the extensions at the forward
and at the rear of the fuselage, the rear fuselage being at a slight tilt upward
as mentioned earlier. Cutting the rear insert section slightly wider at the
bottom does this. The four fuselage half inserts (these are shown in red, see
drawing) are now glued to the fuselage from the other kit, which was also parted
accordingly. The rest follows the kit instructions and also involves building
the second crew accommodation, inserting a second seat, coaming, side and front
instruments and control stick. These are built u from plastic card cut or bent
to shape. Having detailed the interior and painted interior grey with touches of
black. The drag parachute housing at the base of the fin at rear is made from a
shaped piece of sprue. Any blemishes or slight stagger at the seams is corrected
by fairing with Plasto filler followed by sanding. The undercarriage is
assembled according to kit instructions. The clear canopy came from a cockpit
canopy set issued by Airmodel.
| COLORS & MARKINGS |

| CONCLUSIONS |
August 2011
If you would like your product reviewed fairly and fairly quickly, please contact the editor or see other details in the Note to Contributors.