| KIT #: | 04289 |
| PRICE: | €9 in 2010 |
| DECALS: | Two options |
| REVIEWER: | Spiros Pendedekas |
| NOTES: | Stand model |

| HISTORY |
The North American T-2 Buckeye was the United States
Navy's intermediate training aircraft, intended to introduce the U.S. Navy and
U.S. Marine Corps student naval aviators and student naval flight officers to
jets. It entered service in 1959, and was replaced by the McDonnell Douglas T-45
Goshawk in 2008. The T- 2D
and T-2E were export versions for the Venezuelan Air Force and Hellenic Air
Force, respectively. All T-2 Buckeyes were manufactured by North American at Air
Force Plant 85, located just south of Port Columbus Airport in Columbus, Ohio. A
total of 609 aircraft were built during the production run. The name Buckeye
refers to the state tree of Ohio, as well as the mascot of Ohio State
University.
As of 2021, T-2 is the only training jet aircraft of the Hellenic Air Force and
is used for the final stage of young pilots’ training. T-2s operate from
Kalamata Air Force Base (120 Air Training Wing) and are assigned to 362 “Nestor”
and 363 “Danaos” Squadrons. Many generations of Greek pilots have been trained
with the T-2. It’s high reliability and excellent, forgiving flight
characteristics (it easily recovers from a spin), have made it a true asset for
the HAF cadets late stages training, However, with spare parts becoming scarce,
it is more and more difficult to keep many of them operational, let alone the
fact that their avionics suite is not up to modern standards. Therefore, this
iconic trainer is soon to be replaced by the M-346.
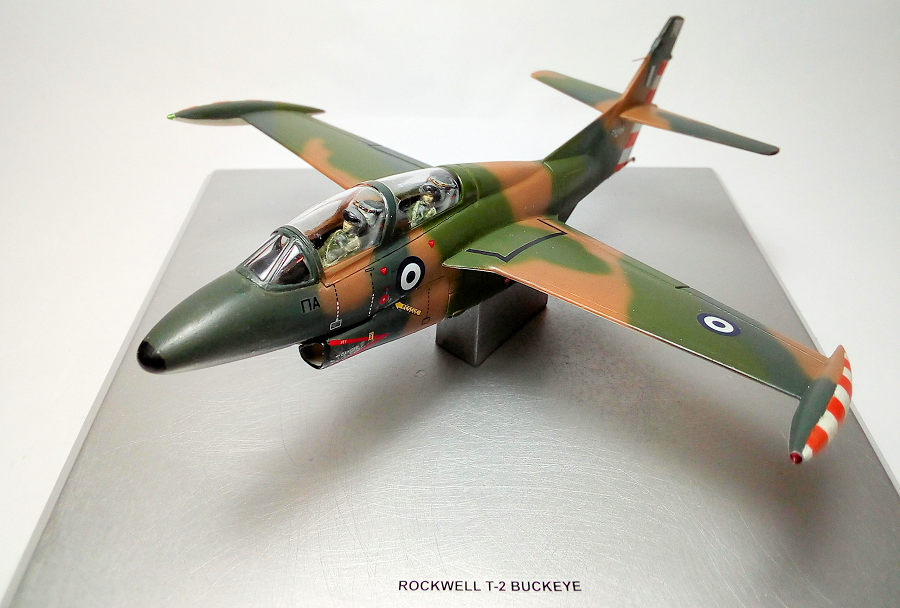
HAF Buckeyes have worn the “Vietnam” camo throughout their operational life.
| THE KIT |
You can read Scott’s thorough review here.
I bought this nice little kit in 2010 at a “normal” price of €9, intending to
finish it as a HAF bird. Soon after I acquired the detailed quarter scale two
Bobs / Special Hobby offering, and my motivation on building the “basic” Revell/Matchbox
one somehow exuberated. Still, there was some strange attraction to this kit,
yours truly trying to find an excuse to build it. Well, a HAF Air Vice-Marshal,
good friend of mine, had served in the type for quite a while and had no
wheels-up T-2 at his office library. Well, mission conceived!
| CONSTRUCTION |
 I attached
the two fuselage halves and the top/bottom half wing parts, followed by
attaching the wings and tailplanes to the fuselage, taking care of proper
alignment (right angles everywhere on the Buckeye).
I then attached the exhaust nozzle covers and front intake parts, followed by
gluing all gear doors in “closed” position. Fit was generally good, with some
attention required at the complex area, where the front doors meet the intakes.
The presented gaps there were treated with liquefied styrene.
At no time, I had a nice T-2 basic shape, which was first coarse sanded with 320
grit, then puttied with Squadron Green and finalized with 1000 grit. Having
decided to deal with the cockpit later, I headed to the paint shop!
| COLORS & MARKINGS |
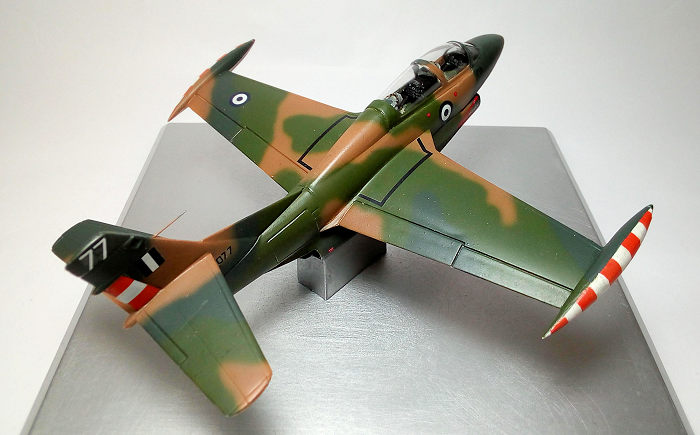
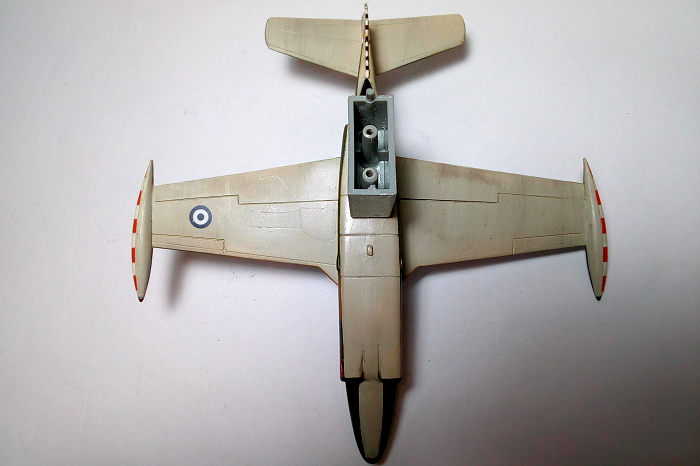
I started by applying Hu28 (for the FS 36622) at all
undersides. Upon drying, I applied a protective coat of Future and masked it,
paying some extra attention at the tip tanks area. Then, with my Revell Vario at
its finest settings, low air pressure and relatively thin paint, I freehan ded
the top camo, starting with the brown (Hu118), then the dark green (Hu116) and,
finally, the light green (Hu117), followed by the usual micro touch up
iterations/corrections. An acceptably tight camo resulted. After some masking, I
painted the tip tanks outer part satin white. The innards of the intake trunking
were also painted satin white with matt black in the end, in order to provide an
illusion of depth. A coat of Future then prepared this beautiful bird for
decals.
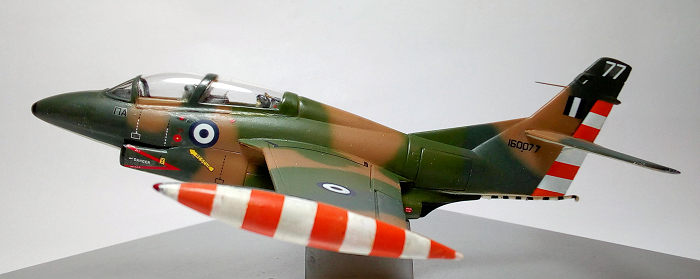
I used the kit decals for depicting T-2E, s/n 160077, as it stood in 2005 in
120TW, Kalamata AFB. The Cartograf decals behaved excellently all over, with the
exception of the outer tip tanks ones that received some micro cuts and many
applications of Mr Mark Softer, in order to conform on the curvy surfaces. A
coat of Future sealed all decals, followed by a lot of touch up sessions at the
tip tanks decals, in order to look ok.
| FINAL CONSTRUCTION |
I gave the cockpit area a Hu140 Gull Gray coating with
black instrument/side panels and anti glare areas. I then added the nice kit
provided instrument decals. In order to beef up the simplistic looking seats, I
added overhead ejection handles. Basic seat color was gull gray with light gray
headrests, khaki top parachute container and yellow/black ejection handles.
Surprisingly for a Matchbox kit, no pilots are provided. I used two such figures
from my spares box, repositioning one’s head, in order to liven them up. They
were painted with dark green uniforms, gull gray helmets, oxygen masks and
gloves, black boots and shades, cream faces and linen seatbelts. I attached them
to their seats and glued them in the cockpit. I also attached two small gunsight
glasses, made of cut acetate pieces.
 The intake
lips, nose front and aft exhaust area were masked and painted black. In order to
represent the engine exhausts, I cut two straw pieces of appropriate width,
painted them Testors Burned Metal and attached them in the bland kit holes that
were supposed to represent the exhausts, the result looking more realistic.
The arresting hook was painted white with black stripes and attached in
position. I also attached a fin antenna from stretched sprue, its tip painted
gunmetal.
The Buckeye sports very prominent tip tank navilights, i.e. red or green
transparent glass, attached to an aluminum rim at the tip of the tank. They are
not provided in the kit. To replicate them, I first painted the tip of the tank
silver, with my Pilot extra fine silver pen and, upon drying, I affixed (with a
toothpick) a red/green micro dab of clear paint at each silver tip.
Weathering was minimal, mainly a tad underside dirtying and fluid leaking with
dry pastels and artists oils, as those birds were generally kept in good
condition. I might have tried some topsides fading, but the small scale and my
laziness prevented me from doing so…
After various touch ups here and there, I gave the whole model the final almost
matt clear coat (80/20 matt/gloss), sealing everything in.
Finishing the model, I installed the two canopy pieces that I had hand painted
before. Fit was passable, the gaps faired with white glue and touched up
accordingly. Cockpit looked acceptably busy (for the scale), under those closed
canopies.
For the display, I settled on using a leftover base (only the bottom plastic
plate) from an 1:100 Collection Armour Metal F-14 (do you remember them? Beloved
metal models, the Armour company taken over from Franklin Mint some time ago,
not sure if they are still produced – most likely not).
After a light sanding I applied two coats of Plastikote Silver (from a can) at
the plate. I used the plastic supporting block of the base and secured the T-2
on it with 2 screws, then pressed its bottom at the corresponding plate holes.
It was a tight fit, so no bolts were necessary. I also applied a “T-2 BUCKEYE”
decal onto the base (this was the header decal at the decal sheet).
After a coat of Future onto the base (to seal the decal AND the silver paint), I
called the Air Vice-Marshal’s Buckeye done!
| CONCLUSIONS |
 The
definitive 1/72 Buckeye is the modern (2015) Wolfpack kit, looking great from
here, with very good details. Though more expensive than the Revell/Matchbox, it
is the obvious choice for a well represented 1/72 Buckeye. (By the way, to my
pleasant surprise, the last 5 years or so, I see more and more amazing 1/72 kits
emerging, an attitude I hope to be kept up!)
The Revell/Matchbox is an old mold kit, with simple, “trenchy” external details
and equally simplistic cockpit. It is a solid kit, easily put together by a
novice modeler, who can come up with a nice representation of a Buckeye. A big
plus is the excellent Cartograf decal sheet, which is provided at the Revell
reissue. If you own this kit, or find it at a cheap price, it might not be a bad
idea to grab it and build it. A good looking T-2 will emerge, together with a
nice, sweet nostalgia of our younger “Matchbox” days.
As for this build, yours truly had a great time putting this sweet kit together,
now being proud to know that it resides at my friend’s, the Air Vice-Marshal’s
office.
Happy modeling!
| REFERENCES |
Wikipedia
Scalemates
Jetwash Aviation Photos website
Haf.gr website
17 August 2021
Copyright ModelingMadness.com. All rights reserved. No reproduction in part or in whole without express permission.
Thanks to for the review kit. You can get yours at your local hobby shop or on-line retailer.
If you would like your product reviewed fairly and fairly quickly, please contact the editor or see other details in the Note to Contributors.