
1/72 Bleriot XI Penguin Trainer
| KIT #: | |
| PRICE: | $ |
| DECALS: | None |
| REVIEWER: | Stephen Foster |
| NOTES: | Scratchbuilt from plastic card, strip, rod and copper wire |

| HISTORY |
Louis
Bleriot was the French designer of a series of pioneering aeroplanes before the
outbreak of World War One which bore his name: the most successful of these was
the design no XI in which gained him immortal fame by being the first person to
fly over the English Channel in a heavier than air machine in 1909. Bleriot was
an engineer who was very interested in the new field of aviation and who
developed a system of flying training and instruction that was so successful
that it was widely adopted in a number of countries. It should be remembered
that at this time aircraft were underpowered and could barely lift one person,
let alone two. Dual controls were also a thing of the future in the first decade
of the 20th century, and as early aircraft were not always stable or easy to fly
accidents were common, especially in training. It was in order to try to reduce
the number and cost of accidents that Bleriot devised his system whereby student
pilots could get some idea of how to control a machine before they actually took
off from the ground. As there were no flight simulators Bleriot used his type XI
design as the basis for a non-flying
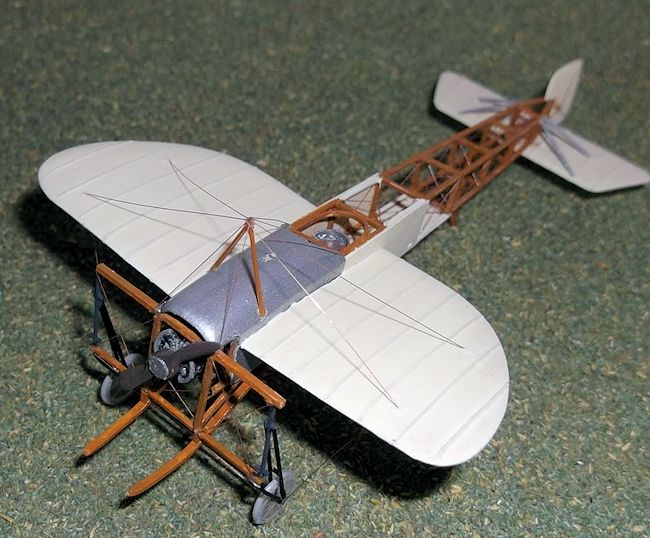 training machine which students could
practice in as they raced along the ground. Because each stage of the training
was based upon the previous one the student could acquire the necessary skill
and confidence with a minimum of risk to himself or his machine and without
having to have an instructor sitting in the machine with him.
The student started by
sitting in a type XI monoplane which had clipped wings so that it could not
leave the ground. The reduced span and inability of these machines to fly earned
them the name Penguins. After some simple instruction the student would climb
into the Penguin and the engine would be started. The student would then be able
to let the machine roll along the ground and he would push the stick forward so
that the tail came up and he could try to keep the machine on a straight line
with the rudder. After the student had practised racing along the ground at up
to 40 mph and had demonstrated that he could control it properly, he graduated
to a type XI with a full wing span and a more powerful engine and full sized
propellor. He would repeat the ground exercises at first, but when the
instructor considered that the student had sufficient control a full take off
and flight would be permitted with the student lifting the machine about 1 meter
off the ground and then landing again. Further easy and limited stages allowed
the student to eventually take off and complete a circuit of the airfield before
landing. The pilot then went on longer and higher flights until he was ready to
complete a circuit of over 100 km with two stops which tested his flying and
navigation skills. An average pilot could learn to fly in about 4-5 months using
this method. The system had the advantages that a few instructors could train a
large number of students, and although accidents were frequent they were rarely
fatal and the damage to the machines could be easily and quickly repaired. They
were expensive however and contributed greatly to the financial costs of
learning to fly.
Bleriot Penguins
were basically the type XI monoplane with clipped wings, a less powerful engine,
smaller propellor and fitted with skids to stop the machine from nosing over.
Some had a horizontal bar above the cockpit rather than a pylon structure. There
were many variations on the basic design which
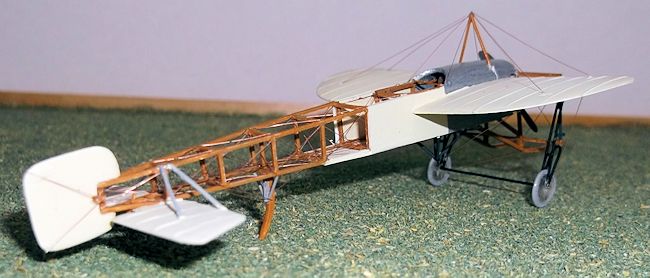 were probably the product of the
availability of suitable engines, local modifications and repairs. Some machines
had a wider track to the undercarriage to make it more stable on the uneven
surfaces of early airfields, and the elevators on the tail varied from the early
type (as used on the machine that Bleriot used to cross the channel) to later
more conventional types. In short, like most early aircraft there seems to have
been a great deal of variation on the basic theme.
The idea of
building a Penguin came from a question from a modeller on a website who asked
what was the relationship between the type XI machine and the Penguin. Being
interested in lesser known early aircraft I decided to make one. It would be
possible to use the Eastern Express kit which was originally issued by Frog in
their Trailblazer series in the early 1960's, but I decided against this as it
has so many inaccuracies that a scratch-build would be just as easy and a lot
cheaper. I used the basic plans for the type XI of 1913 in the Datafile number
109 The Bleriot XI at War and such information that I could find on the
internet. I used 10 and 20 thou card, Evergreen strip, plastic rod, 5 amp fuse
wire, stretched sprue, clear acetate and other bits of scrap, with copper wire
for the bracing and control wires, together with bit of imagination and
modellers' licence where I was uncertain of specific detail.
| CONSTRUCTION |
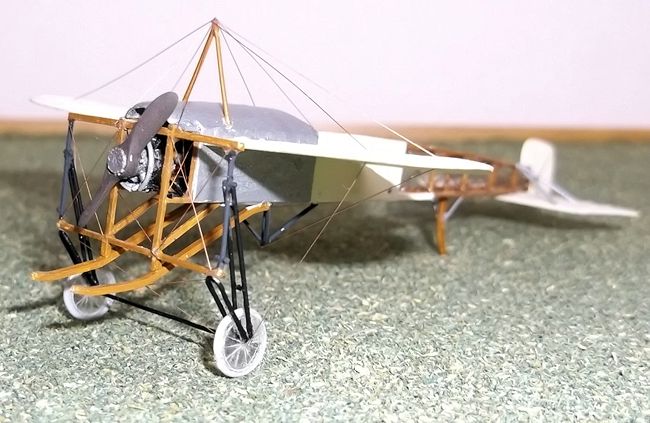 make the supports.
A throttle lever and a couple of dials completed the cockpit details.The whole
of the fuselage sub-assembly then had to be painted and rigged with 40 swg
copper wire.
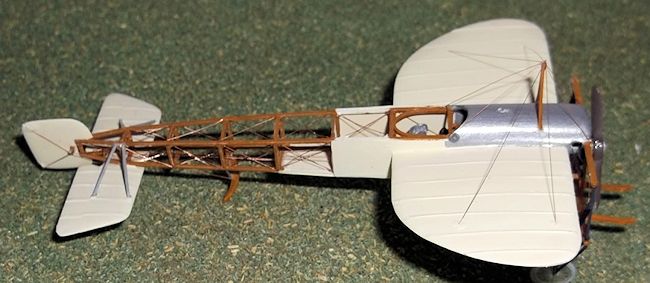 on some machines an earlier variant of the tail
skid was used which consisted of wooden pieces bent into a U shape). The wings
were glued on next, ensuring that the correct dihedral was achieved and some
tiny gaps filled with thick paint. I painted the fuselage and wings at this
stage.
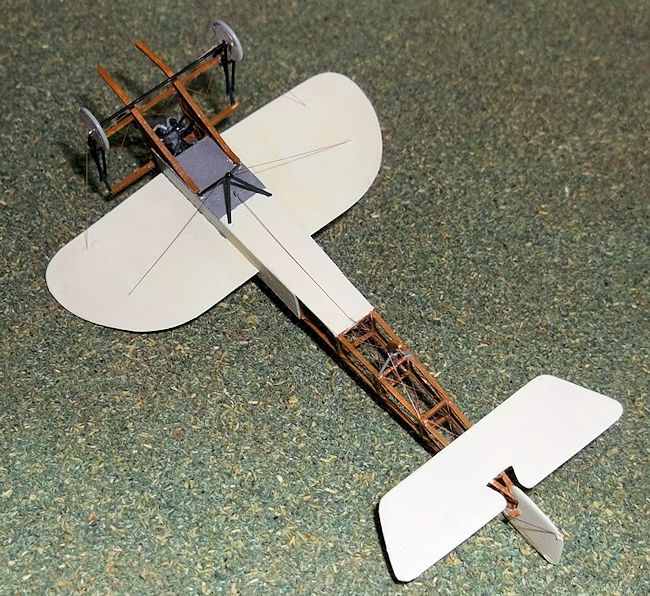 the front vertical engine supports. The side legs,
curved forks and axle were made from 5 amp fuse wire. I rolled this between two
small blocks of hardwood to get it straight and then curved the forks using a
pair of tweezers, and the plan as a guide. The other parts are straight so can
be cut to length. I glued the wheels on to the axle leaving about 1mm extension
on the ends to take the legs later. I superglued the forks to the axle, making
sure that they were in line. Then I superglued the forks to the bottom of the
cross-bar below the engine, making sure that I achieved the correct angle. This
was a real fiddle and I think that my model sits a little high, despite having
carefully followed the plans. Finally I glued the straight side legs to the
axle/fork joint and to small pieces of sprue glued to the uprights on the
undercarriage frame. This was stronger than I had dared to hope but it will not
survive a crash landing so care is needed with handling. I finally added the
rudder and completed the rigging with rolled copper wire. The propeller was cut
and shaped from a scrap of 60 thou card with a boss from 10 thou card. When
painted it was glued to the front of the engine and the model was complete.
| COLORS & MARKINGS |
| CONCLUSIONS |
June 2015
If you would like your product reviewed fairly and fairly quickly, please contact the editor or see other details in the Note to Contributors.