Choroszy 1/72 Albatros J.II
|
KIT #: |
A69 |
|
PRICE: |
$26.00 including shipping
|
|
DECALS: |
One option |
|
REVIEWER: |
Kyle Bodily |
|
NOTES: |
Resin kit |
Now it is very important to know that these J-type aircraft were not
used, for the most part to attack ground targets.
J-types were just too valuable to use for such missions.
That is not to say that if the Germans had the aircraft numbers similar
to the British or the French that they would not have used them more for trench
strafing. All but for a few months
of the war the Germans were just outnumbered.
In fact by the end of August and September 1914 the Germans were out
numbered in just almost every quantifiable aspect.
From that time on,
Germany
would only be able to out number the allies for short periods and then only at
specific points on the front. This was made very apparent after the Battles of
Verdun and the
Somme
where
Germany
totally lost air supremacy or even air parity.
They say that
necessity is the mother of invention and it was very necessary for
Germany
to develop organization and tactics to ensure that her Air Service would be the
match or the superior to any thing it may go up against.
Under the
supervision of Generalleutnant Ernst von Hoeppner the German air service began a
total overhaul of its organization and tactics.
In August 1916 the Jagdstaffeln were created.
The job of the Jagdstaffeln was to deny the enemy accesses to the
 airspace over the German lines and in the German rear.
This is why German fighters did not, as a rule of thumb, go over the
Allied lines, not because the German pilots were afraid of the Allies.
It just was not their job and every German pilot was drilled to
understand that his position in the line was of the utmost importance and that
if they left their point in the line, that gave the Allies an opening to
penetrate the German lines.
German
two-seaters almost always operated in pair.
The war records are full of accounts of a single German two-seater
staying to fighting while its companion ran for the German lines.
The aircraft that stayed to fight was actually a Schutzstaffel two-seat
fighter and the aircraft that ran was the Abteilungen aircraft rushing home to
deliver its cargo of photo reconnaissance and other intelligence.
The
Schutzstaffeln (protection units) were two-seat fighters that did range over the
Allied lines. They were the fighter
escorts and were tasked to protest the Field Flieger Abteilungen (field flying
units), the Flieger Abteilungen (long-range reconnaissance units) and the
Artillerie Flieger Abteilungen (Artillery spotter units).
The Albatros
J.II was what we would call a high value asset.
They were very valuable to the AOK (Armee Ober Kommando) and the AK (Armee
Korps) and were, as a rule of thumb held for high value missions where the risk
of such a valuable asset would be worth the information received.
Their mission profile was to obtain very time critical and actionable
intelligence and to spot for the artillery at points of critical concern.
Usually the observer/gunner/radio operator was a very highly trained
officer who could be working directly for the Oberste Heeresleitung (Supreme
Army Command) more commonly called OHL.
The Abteilungen began receiving the
Albatros J.IIs by June of 1918. The
new Albatros J.IIs were a marked improvement on the earlier J.Is.
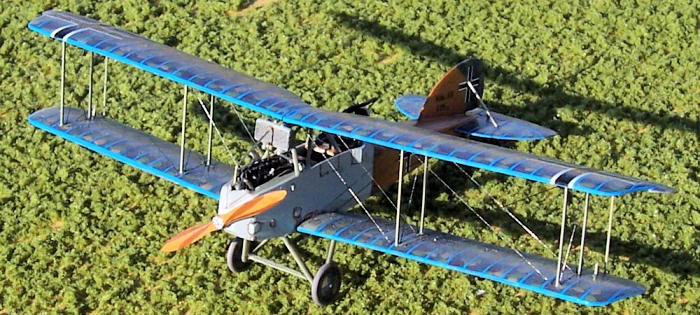
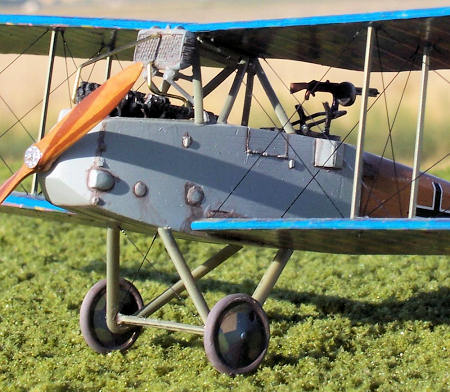
The J.II had the whole front of the aircraft armored.
This not only protected the crew but also the engine.
The only J-type aircraft that was liked more then the Albatros J.II was
the Junkers J.I.
Albatros J.IIs
served until the Armistice. One
served with Lithuanian Karo Aviacija until the Soviet invasion of 1940.
Some resin kits are
difficult to build and some need considerable putty and cleanup.
The first time I
opened the box of a Choroszy kit. I
found myself very happy with my purchase.
The first thing I noticed was that the quality of the kit was superb.
When resin kits are well made, I think that the quality and detail is
better than any plastic kit.
 I decided right
away that I would buy more as soon as I got the money.
Slowly I’ve start to get more and more of these kits.
I have never been unsatisfied with a Choroszy Modelbud kit.
These kits fit and go together very well.
When you open
the box you will find 45 parts cast in yellow-tan resin in four zip-lock bags.
In the first bag you’ll find the wings and tail surfaces.
In the second one you’ll see the fuselage halves.
The third has the engine and associated parts and the forth bag contains
everything else. Loose in the box
are the decals and a small sheet of film for a windscreen.
The instructions
are nicely printed with good three view drawings that really helped me determine
the rigging placement. The only
color call callouts are for the exterior.
For the crew compartment you will need to get some references.
The decals are
in two colors, black and white, but they are very well done and thin.
Let’s light this
bottle rocket and get this built.
I started with
the cockpit and engine. I painted
all the little bits that would go inside the fuselage and assembled the cockpit.
I added some seatbelts from the new Eduard 1/72 scale P-E German seatbelt
set. I only added the Eduard
seatbelts but with a little work you could do some really nice things to the
cockpit. The two fuselage halves
went together well and I didn’t need any putty for the seams.
I like to use
brass strut stock for the interplane struts for the added strength.
I find that the other struts worked fine.
At this point I studied the three views and all the other information I
could get and drilled the rigging holes.
I like to use a #80 drill bit and drilled all the holes for the rigging
before painting. I do this to not
accidently damage the painted surfaces.
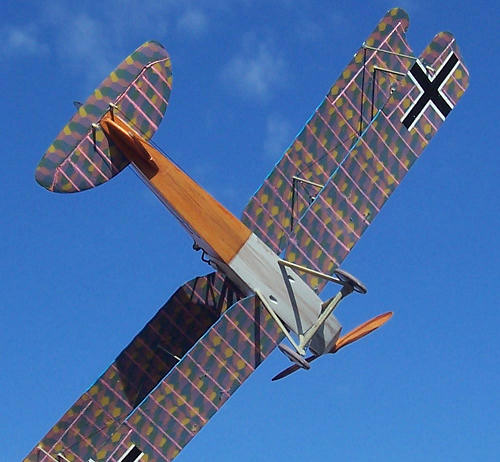
I used Eagle Strike decals five color lozenge decals to cover all the
flying surfaces and drew on the rib tapes.
 After I painted
the rest of the parts I assembled and rigged the model without the
undercarriage. Last but not least I
finished it by adding the undercarriage.
I like to put the undercarriage last to prevent me knocking it off as I
build.
I’ve found that mono-filament works best
for me because of its strength.
This, in turn adds a lot of strength to the model.
All I do is
drill little holes in the top wing that only go about half way through and drill
little holes that go all the way through the bottom wing.
I use thick super glue to anchor the mono-filament in the top wing and
set it aside to cure well. Then I thread the line through the bottom wing and
anchor it with a drop of super glue.
After the glue has dried I clip the line flush with the wing surface.
Coincidently enough, the bottom insignia almost always covers up the
rigging holes and all you need to do is apply the decals to the bottoms of the
wings. If not, just hit the area
with a sanding stick and apply some touch up paint and your good.
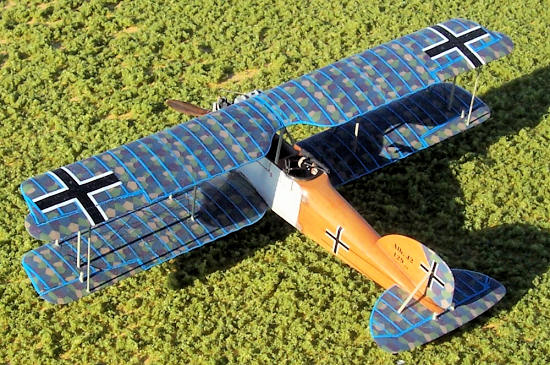 Most photos of these
aircraft show a simple paint scheme.
Basically a varnished fuselage with a painted armored forward fuselage
and lozenge fabric flying surfaces.
I painted the steel armored cockpit light gray inside and out to mach my
interpretation of the photos that I found.
The struts were painted RLM 02 again to match the photos.
The aft fuselage was finished in wood.
Finally the wings ant tail surfaces were decaled in Eagle Strike upper
and lower lozenge decals
The decals went on well and
settled down perfectly. After the
decals dried I weathered the model with the usual washes and dry brush
techniques.
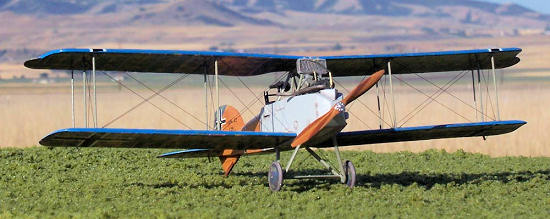
The rigging was
straight forward and only took a couple hours.
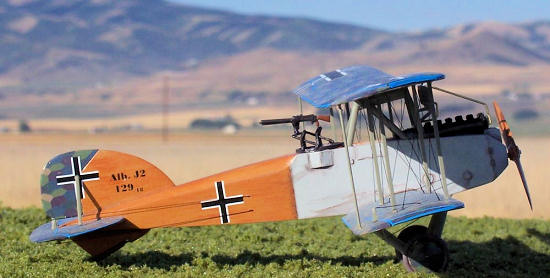 Well I’m getting quite the
collection of German J series aircraft.
This Alb J.II looks great next to my Junkers J.I and Albatros J.I.
Now I have to find an
AEG
J.I and J.II.
The quality of
Choroszy kits is among the best that I have ever seen.
People that know me know that I’m cheap so if I spend my own money on a
model kit I have to think that it is worth it.
I’ve had no problem spending my money to get these kits.
In fact I’ve got quite the collection of Choroszy kits.
I highly
recommend any Choroszy kit to anyone that wants to give an all resin bi-plane a
go.
I got this kit
from Choroszy Modelbud. If you like
this kit they have this and many more.
Check them out at www.modelbud.pl/
“Schlecht-Flieger!
Germany and the origins of Air/Ground support 1916-1918” Rick Duiven & Dan-San
Abbott
“Jane’s All the
Worlds Aircraft 1919” (Jane’s Fighting Aircraft of World War I)
“Austro-Hungarian
Army Aircraft of World War One” by Peter M. Grosz, George Haddow and Peter
Schiemer
“Reconnaissance
& Bomber Aircraft of the 1914-1918 War” Harleyford Publications limited
Kyle Bodily
July 2011
If you would like your product reviewed fairly and quickly, please
contact
me or see other details in the Note to
Contributors.
Back to the Main Page
Back to the Review
Index Page


 airspace over the German lines and in the German rear.
This is why German fighters did not, as a rule of thumb, go over the
Allied lines, not because the German pilots were afraid of the Allies.
It just was not their job and every German pilot was drilled to
understand that his position in the line was of the utmost importance and that
if they left their point in the line, that gave the Allies an opening to
penetrate the German lines.


 Well I’m getting quite the
collection of German J series aircraft.
This Alb J.II looks great next to my Junkers J.I and Albatros J.I.
Now I have to find an