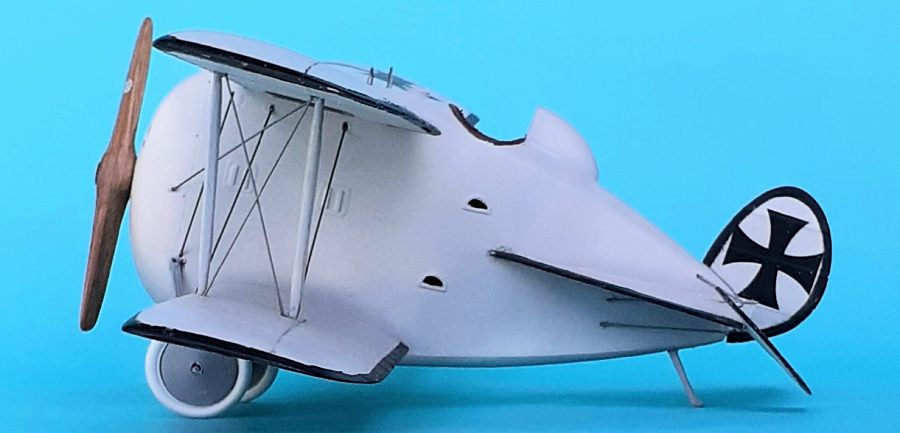
Planet Models 1/32 DFW Floh
| KIT #: | 244 |
| PRICE: | $100.00 |
| DECALS: | One option |
| REVIEWER: | John Summerford |
| NOTES: | Aero Master wood grain decal used for the interior. A hand carved prop substituted for the kit part. |

| HISTORY |
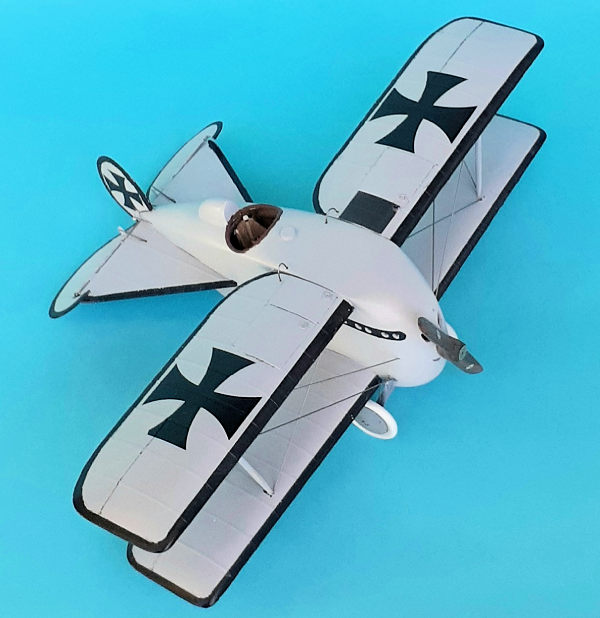 Built
as a prototype by Deutsche Flugzeugwerke (DFW) in 1915, the T28 featured
innovative design concepts and construction, including one of the earliest uses
of a thick airfoil. It was nicknamed “Floh”. An internet translator engine going
from German to English produced the word “Escaped” (Really?) On a hunch, I tried
“flea” in English to German and came up with “floh”. This makes more sense to
me.
The plane was indeed fast, with a Mercedes D.1 engine producing a maximum speed of 112 mph. (180 km/h) Its contemporary, the Fokker Eindecker, had a maximum speed of 87 mph. (140 km/h) Like the Eindecker, it featured a synchronized machine gun. The second prototype had aerodynamically balanced elevators, meaning curved extensions extending beyond the stabilizers.
The Floh was rejected from service due to its high landing speed and poor ground visibility. (I wonder what Corsair pilots would say about that.) Perhaps it was too radical a design and beyond many early pilots’ skills to fly effectively. The rudder seems too small and maybe that contributed to difficult flight characteristics.
| THE KIT |
 All of the
airframe components are well cast resin. What few bubbles noticed are in mating
surfaces. Flash appears on most parts, but is easily cleaned up. Planet Models
have thoughtfully provided dimples where rigging and struts attach, so these
areas can be deepened with a drill. The photo-etch fret has seat belt, control
horns, turnbuckles, and, along with an acetate sheet of gage faces, parts for
the instrument panel. Parts are included for both prototypes tail surfaces.
Total parts count, excluding the photo-etch, is 37.
The decals are printed by DEAD Design and feature four large Iron Crosses, two small crosses, a black panel for the exhaust and a pair of logos for the prop.
The instructions are printed on two sheets of the metric equivalent of 8 ˝ by 11. One side has history in Czech and English, plus a parts map. The next two sides cover nine steps and a rigging diagram. The final page has painting and decaling information. No paint brands are referenced, nor are there any color call-outs for the cockpit.
| CONSTRUCTION |
 Thinking
that a painted faux-wood prop wouldn’t look right, I tried my hand at carving
one. I’ve had a sheet of walnut and a sheet of cherry wood from Midwest Products
for over two decades, so I took the plunge. Two layers of each species resulted
in the proper thickness. These were glued and clamped together. Using a rotary
tool, the rough shape was formed. Sanding sticks and ever finer sandpaper
finished the prop. After a wipe down with alcohol, two coats of Future floor
polish were brushed on, with a light sanding between coats. A photo-etch prop
boss from Copper State Models completed the prop. I’m guessing that the time
spent wasn’t much more than painting a prop.
All of the resin parts were scrubbed with cleaner and tooth brush. Holes in the fuselage for the rigging were opened as were the steps to the cockpit. The mating surfaces of the were lightly sanded on a flat surface to ensure a tight seam. A ball-and-socket arrangement is used to attach the wings to the fuselage. Not trusting the strength of those joints, they were drilled out for 1.5 mm brass rod
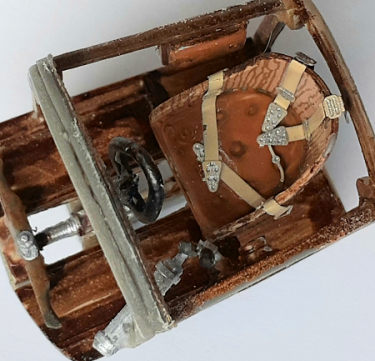
Finally, assembly could commence with the cockpit. The main frame was glued together with cyano. This and the photo-etch instrument panel and interior of fuselage were sprayed with a coat of light sand color primer. The framework and floor board were swiped with a brown felt tip marker.
 After an
overcoat of Future, the instrument panel and fuselage interior were treated with
wood grain decals. With a dry instrument panel, the openings for the instrument
faces were trimmed with a sharp blade. A chrome felt tip marker was used to
highlight the bezels. The acetate instruments were sandwiched between the resin
and photo-etch front with the epoxy acting as the glass covering of the
instruments. This assembly was glued to the cockpit framework.
The seat was given the same decal treatment, then the cushion painted and seat belts glued in place. The control stick comes in two pieces, with a Spitfire style grip glued to the stick. My piece shattered during removal from the casting block, so a new one was fabricated from brass rod.
A little bit of sanding on each side of the cockpit assembly achieved a good fit when it was trapped between the fuselage halves. Epoxy and clamps were used to glue the halves together getting alignment as precise as possible. Some filling and sanding followed.
To ensure a dihedral in the wings, holes for the brass rod were drilled at a slight angle. Two rods were cut to length, one for the top pair of wings and one for the bottom. The rods acted like spars when they were epoxied in the fuselage. A solid join resulted from this arrangement. The stabilizers were given a similar treatment with .015 music wire, which was a good thing because I could have knocked them off at least twice.
With the interwing struts left off to make painting easier, A small piece of foam rubber was packed into the cockpit and the model was ready for paint.
| COLORS & MARKINGS |
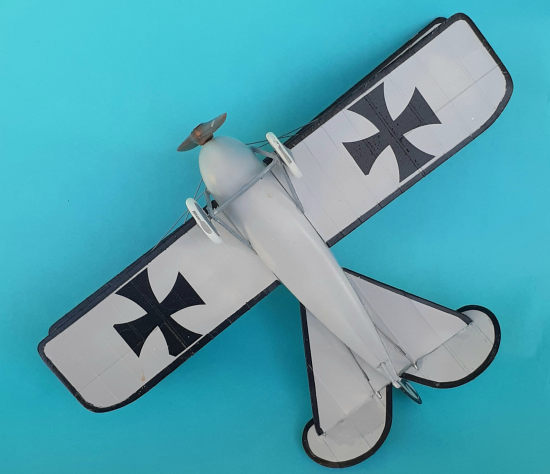
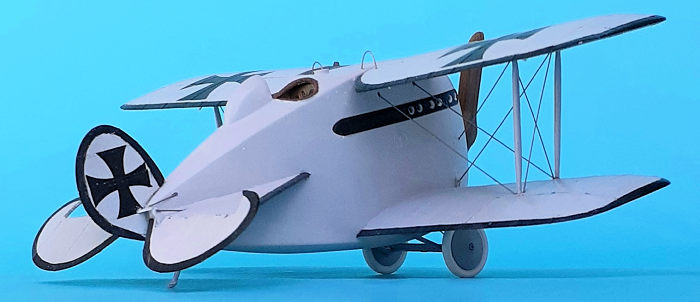 A coat of
primer revealed areas needing more filling and sanding and the second coat had
the model ready for paint. Flat Light Gray from Tru-color paint was sprayed
overall. This brand is new to me, so I thought I’d give it a try. It worked
nicely.
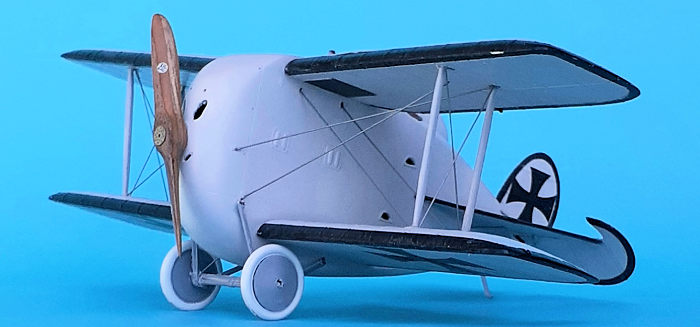
The top and bottom surfaces of the radiator were masked around. Not wanting the radiator to appear too dark, it was sprayed with RLM 66 (Schwarzgrau)
Around all of the edges of the flying surfaces was masking for the black trim. I need to re-think my masking technique, as I suffered bleed around some of the raised detail. That meant that I had to mask the black trim and spray additional gray over the offending areas.
The decals are very thin and the tips of the iron crosses are prone to curling under themselves. The trick is to cut the backing paper as circular as possible and, when applying the decal, remove the paper diagonally. The rudder decal is a couple of millimeters too large, so consider trimming it before application. A treatment of Micro Sol gets them to settle down well.
| FINAL CONSTRUCTION |
The interwing struts are commendably thin resin. Unfortunately, I didn’t get the wings on either side parallel, rendering the struts useless. Four toothpicks were flattened by sanding sticks and cut to length. They worked very well in aligning the wings.
Given the amount of space between the wings and no cabane struts to fuss with, this is one of the easiest biplanes to rig. Since I don’t find photo-etch turnbuckles convincing, they weren’t used with the .015 music wire and the process was done relatively quickly.
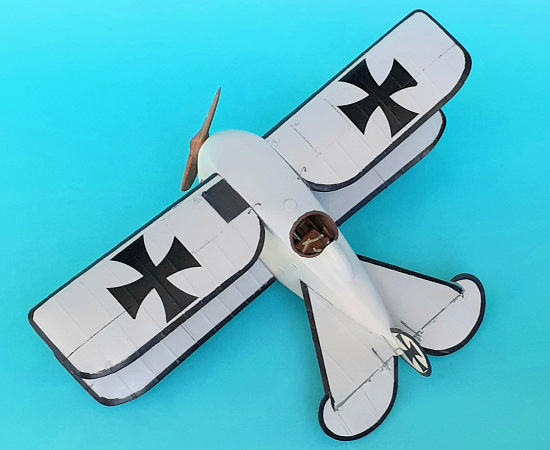 I didn’t
like that the control horns are supplied as three pairs instead of three parts.
Therefore, one-piece horns were fabricated from .020 card stock. Notches in the
elevators and rudder were cut, the horns attached, and the control parts glued
in place. When the glued cured, the control wires were added.
After cutting the reinforced wheel struts from the casting block, I doubted that they were strong enough to support the model, so they were given additional reinforcement with .015 music wire and cyano glue. A jig was constructed to align the struts and axle. Epoxy was used to assemble the three pieces and constant adjusting was made while it set up. The tops of the struts were pinched inwards so that they would naturally grip the fuselage.
The wheel struts may be “handed”. If so, I missed it because getting that assembly square on the fuselage was a challenge. A rotary tool was used to elongate some of the mounting holes. The pinching action worked as planned and more epoxy was daubed at the joins.
Before completing the model, a clearcoat of satin finish was sprayed over everything. All that was left to add were the wheels and prop.
| CONCLUSIONS |
I think this aircraft looks like something out of an early Micky Mouse cartoon. (My wife thinks it’s a whale, bless her.) Surface detail is very nice and parts clean-up is minimal. I think one should have some experience assembling resin kits before attempting this one. Be prepared to think through which techniques to use and the order of assembly when working on each step. Filling and sanding is minimal, but getting everything to align is the big challenge. Even with the low parts count and easy rigging, I spent around 30 hours on the model.
15March 2022 Copyright ModelingMadness.com. All rights reserved. No
reproduction in part or in whole without express permission. If you would like your product reviewed fairly and fairly quickly, please
contact
the editor
or see other details in the
Note to
Contributors.