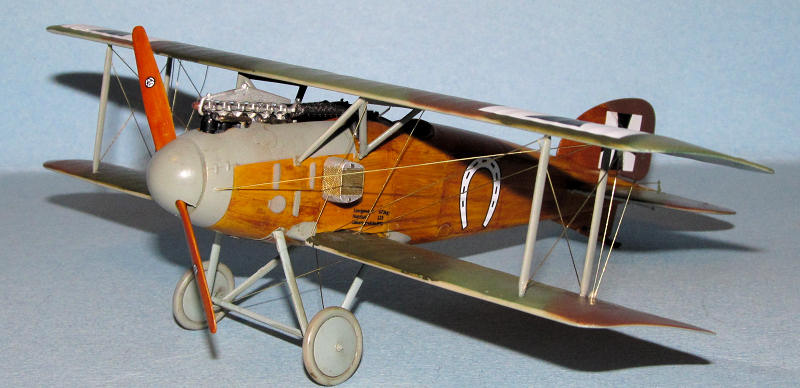
Eduard 1/48 Albatros D.II
| KIT #: | 8082 |
| PRICE: | $24.95 |
| DECALS: | Four options |
| REVIEWER: | Dan Lee |
| NOTES: | Profipak version |

| HISTORY |
From Wiki
Albatros designers
Thelen, Schubert and Gnädig produced the D.II in response to pilot complaints
about poor upward vision in the Albatros D.I. The solution was to reposition the
upper wing 36 cm (14 in) closer to the fuselage and stagger it forward slightly.
Rearrangement of the cabane struts also improved forward view. The D.II
otherwise retained the same fuselage, engine installation, and armament as the
D.I. Basic performance was
unchanged. Idflieg ordered an initial batch of 100 D.II aircraft in August 1916.
D.IIs formed part of
the initial equipment of Jagdstaffel (Jasta) 2, the first specialized fighter
squadron in the German air service. Famous pilots included Hptm. Oswald Boelcke
(Jasta 2's first commander) and Manfred von Richthofen. With its high speed and
heavy armament, the D.II won back air superiority from Allied fighter types such
as the Airco DH.2 and Nieuport 11 (but in turn suffered at the hands of improved
Allied fighters such as the Nieuport 17 and Sopwith Pup—writer addition to the
article)
End Wiki
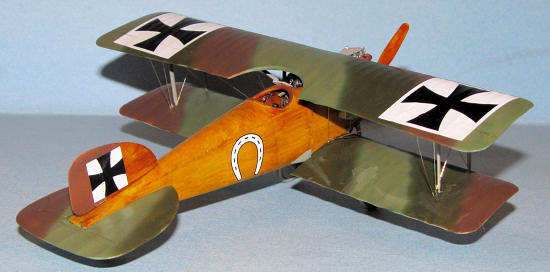 The
Albatros DII Scout was the 2nd model of the famous Albatros family of fighters.
It was not very maneuverable compared to its Allied counterparts but it
had a speed advantage over them which smarter pilots exploited.
Energy Vs Turn
The Albatros was
probably the first example of the fighter pilot’s maxim “Speed is life, more is
better” as it was the first “energy” fighter due to its relative poor
maneuverability and energy advantage (aka speed—the terms are interchangeable.)
Fighter planes come in two basic types, energy and turn although modern
designs can combine the two. Energy
fighters tend to fly in the vertical plane and are dependant on increased engine
power, diving and climbing ability while turn fighters tend to fight in the
horizontal and depend on their agility rather than on speed.
In World War I, most
pilots preferred the turn fighter over the energy fighter as they felt that
maneuverability was more important than speed.
This was true in WW1 considering the low horsepower and reliability of
early aircraft engines; there wasn’t much of a speed advantage for the energy
fighter to exploit.
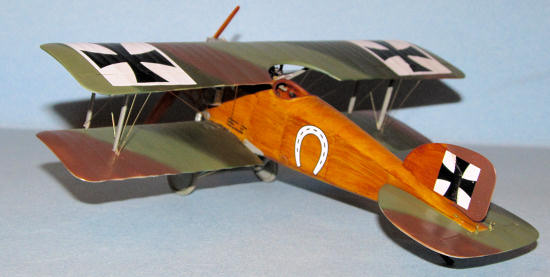 It wasn’t
till WW2 with improved aerodynamic design and engines that the energy fighter
showed itself to be superior over the turn fighter as pilots realized that they
didn’t have to get into a twisting turning dogfight to shoot down the enemy
especially when facing against planes like the A6M Zero who could out turn
anything in the sky during the early part of WW2.
Faster energy fighters broke away from slower turn fighters and
re-engaged at will because of the relative speed advantage they had over them.
After initial combat most air forces in WW2 recognized the superiority of
the energy fighter over the turn fighter with only the Japanese clinging to turn
fighters (Ki-27, Ki-43 and A6M) till it was way too late for them.
Jet age combat and the introduction of the Air to Air Missile showed that one needed to combine both energy and turn abilities into a fighter which led to the designs such as the F-16, the Su-27/33, F-15 and the F-22 etc.
| THE KIT |
The Eduard Albatros
kits are among the easiest to build of WW1 kits.
This is a profipack version which comes with PE for the seatbelts and
guns. It has a similar parts
arrangement as the Albatros DV and DIII kits previewed here.
| CONSTRUCTION |
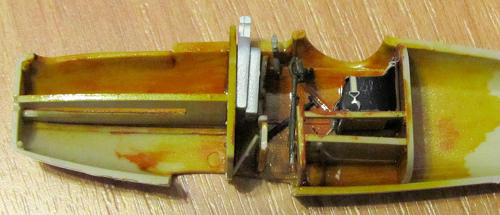 It began
with the cockpit. I decided to try
use water color Burnt Sienna instead of MM Acryl Burnt Sienna to dry brush with
for the wood effect. It didn’t work
out as well as the watercolor ran in various places when I sprayed on two or
three thin coats of Gunze Clear Yellow to get the honey brown wood effect.
Oh well.
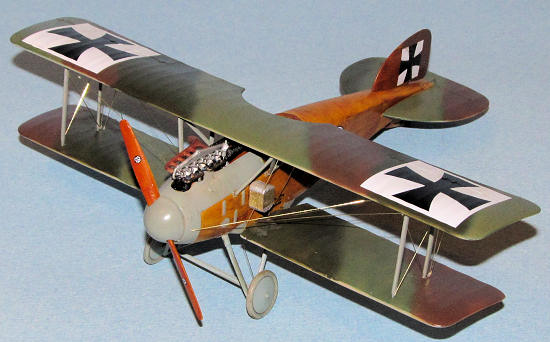 fixed that problem by using CA glue instead of regular glue on one side to
stiffen the join. Finally I added
the seat and the seatbelts to the seat.
| COLORS & MARKINGS |
Painting
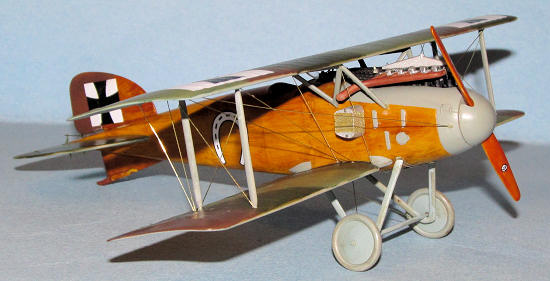 I began
working on the fuselage wood effect for the fuselage, the bottom wing, the prop
and the rudder. I took a worn flat
brush with a little amount of MM Acryl Burnt Sienna and began to dry brush the
surface. I kept spreading the paint
in one direction for the entire panel.
Once the panel was done, I would make curves in the wood grain effect.
Other panels I would add more or less paint or change direction to show
it is another panel of wood. I
thought about adding knots, but decided against that as it would require I wreck
another 0 pt brush as I have found that the wood grain effect is hazardous to
the health of my brushes. When it
was dry, I realized that I had REALLY over done the wood effect.
I took some

 Decals
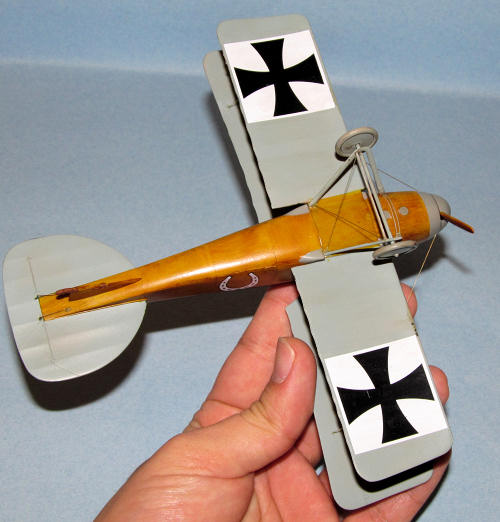
The Eduard decals (Cartograph,
actually) are pretty good and went on one self created issue and little if any
silvering. Fortunately, there
weren’t that many stencils with WW1 aircraft.
The one self inflicted issue I had was when I accidentally ripped off
part of the upper starboard iron cross.
I was lucky that I only tore off part of the white square background
rather than the cross so I repainted it.
Once the decals were
dry, I wiped away the excess decal solution and proceeded to do a simple wash
(highlight certain panel lines and add some grime underneath including the
undercarriage.) The excess was
removed using slightly damp Q-tips.
| FINAL CONSTRUCTION |
The machine guns were
made with PE and plastic bits. I
opted not to remove the plastic cooling jackets on the Spandaus and just covered
them with the PE ones because I have had a hard time in the past to make them
perfectly round. They were a bit
fiddly and some care is necessary to add them in.
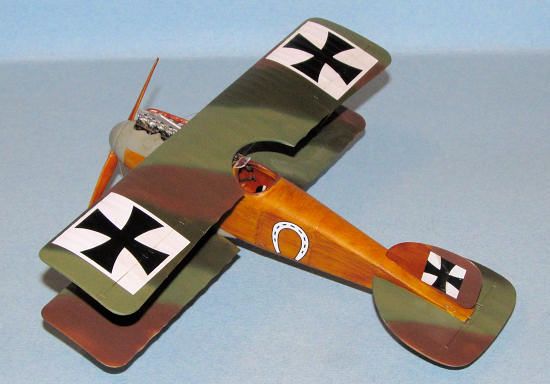 The landing gear for the Albatros DII is a little more fragile than the
DIII or DV but it is easier to align that the others.
I glued the wheels on using CA glue, adjusted them and turned the plane
over to let it cure overnight.
| CONCLUSIONS |
October 2010
If you would like your product reviewed fairly and quickly, please contact me or see other details in the Note to Contributors.