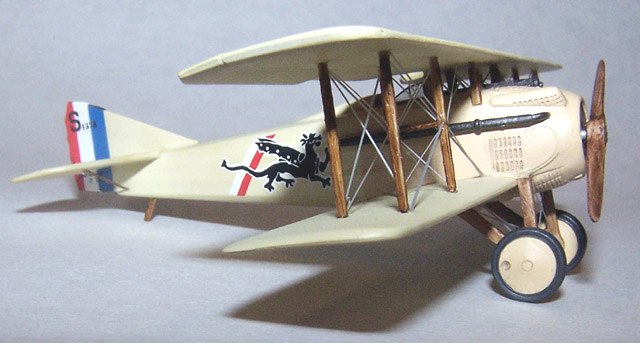
MAC 1/72 Spad VII C.1
|
KIT # |
72048 |
|
PRICE: |
$20.98 |
|
DECALS: |
three options |
|
REVIEWER: |
Dimitriy Levin |
|
NOTES: |
Includes etched brass fret |

|
BACKGROUND |
Please visit the Preview for a bit of history and a look at what is in the box.
The kit is made up of 36 injected parts in
tan-colored hard and somewhat brittle styrene. Surface detail is good
with an appropriately subtle fabric effect and finely recessed panel
lines. There is a small amount of flash on most parts. MAC is clearly
planning multiple versions of the SPAD VII and the kit includes two
different radiators, a very nice drum-fed Lewis
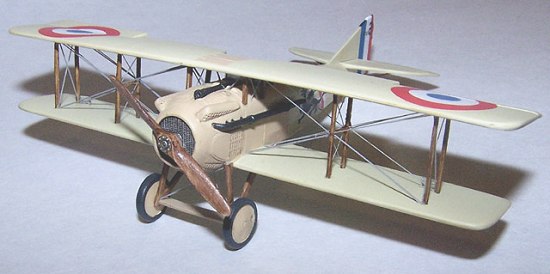 machine gun (presumably
for a British aircraft) and skis (for a Russian version?). Three
different windscreens are provided on a small sheet of clear acetate. A
small brass photoetch fret contains cockpit details, seat belts, and a
few other fiddly bits.
The painting instructions are fairly good with color callouts in generic names and subassembly painting indicated where appropriate. The assembly instructions are lacking however. One problem is that there is no indication of which radiator and windscreen go with which aircraft. I ended up using the parts shown in the painting instructions. Another problem is that the rigging diagram is incorrect -- it shows single flying wires and rigging around the cabane struts is in the wrong place. The boxart is essentially correct on the right side but curiously shows only single flying wires on the left. On the upside, the instructions include fairly detailed line drawings of the aircraft which are helpful in alignment and rigging.
|
CONSTRUCTION |
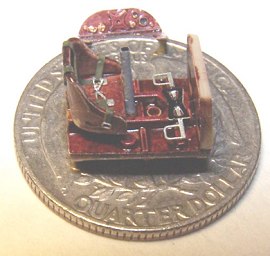 I built the kit straight from the box with kit
decals. Predictably, I began with the cockpit. The floor sits much
further forward than the instructions or the sidewall detail in the
fuselage suggest so I recommend dry-fitting everything carefully --
things should fit without major sanding. To reproduce wood finishes I use
Minwax oil-based wood stains which can be found in any hardware store.
The liquid part of the stain doesn't grab styrene very well so the trick
is to scoop the goop from the bottom of the tin. After it dries for 10-15
minutes, I use a stiff brush to remove the excess and create a grain-like
pattern. The stains dry completely in 24 hours and once dry resist
rubbing off. Thus, the floor, the photoetch instrument panel and the seat
were painted in Minwax Red Mahogany.
The instrument panel has an odd protrusion above it with a dial etched into it. I was not able to find anything even closely resembling this in any drawings or photos and thus I removed it. The sides of the fuselage were painted in PollyScale Clear Doped Linen with ribbing picked out with Minwax Golden Oak. The overall level of detail in the cockpit is quite good for 1/72 but there is plenty of opportunity for superdetailing. In particular, the sidewalls are completely bare except for some ribbing. The fuselage halves fit well with only a minor amount of filler required. The same could not be said for the radiator, the underside of the engine compartment (molded as a separate piece spanning both fuselage halves), and the cowlings over the cylinder heads. All required a considerable amount of filler.
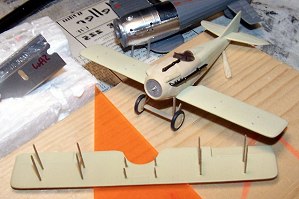 The wings are done in the typical maddening
short-run fashion with two tiny bumps and an otherwise butt join. The
bumps were removed, the holes drilled out, and the wings mounted on steel
pins. The wing to fuselage join required a minimal amount of putty. The
one-piece tailplane and the rudder were also added at this point, and the
elevators were slightly drooped. The ailerons on the top wing were also
mobilized for some visual interest. The landing gear assembly butt-joins
to the fuselage but gel superglue and patience resulted in a good fit.
Attachment of the top wing initially presented a challenge since there
are no locating holes for the cabane struts on the fuselage and the SPAD
VII had two sets of interplane struts on each side. Examination of the
references revealed that all struts are perfectly vertical and I chose to
mount both cabane and interplane struts on the upper wing first using gel
superglue and a triangle to ensure vertical alignment. The resulting
assembly was extremely solid and literally popped into the respective
holes on the bottom wing -- definitely one of the easiest top-wing
attachments I've ever done.
The kit oddly provides photoetched pieces for cabane strut braces -- the photos clearly show that cables were used. All rigging was done with stretched sprue. This was a tad time-consuming given the small size and the extensive rigging in the kit, including the double flying wires, but I prefer this method to drilling 50 holes in a perfectly good model.
|
COLORS AND MARKINGS |
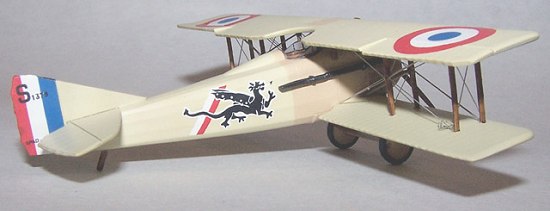 I decided to build the Spa.65 aircraft shown on
the box which was painted in varnish linen with a cream nose section.
Since PollyScale CDL turned out to have an eerie green tint (think Sky
Type S but much lighter) I airbrushed the linen parts with an undercoat
of Modelmaster Acryl RLM04. This gave the CDL topcoat a yellowish tint
more appropriate for the French varnish linen. A search for what "cream"
looked like presented a flurry of contradicting information so I settled
on a 50/50 mix of PollyScale USAF Tan and CDL. It's probably wrong but it
works for me. :)
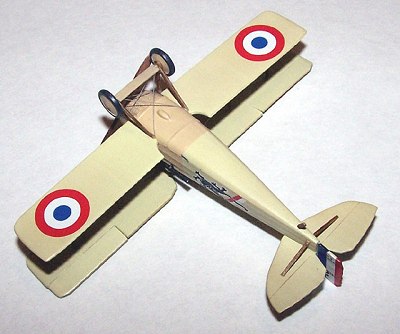 The Vickers machine gun and the exhausts
were painted with Gunze water-based Steel over a PollyScale Black
undercoat. The radiator grille was painted with PollyScale ATSF Silver
and given a black/brown oil wash. The struts and the propeller were
painted with a combination of Minwax Golden Oak and Cherry. The model was
shot with Future in preparation for decals.
The thin but strong decals went on largely without problems. I used Microsol only on the rudder and the decals immediately reacted to it. Other decals did not require the use of a setting solution. I build a lot of interwar French aircraft and I have never seen a kit in which rudder decal fit the rudder well. This was no exception, requiring some trimming and touch-up painting. The serial numbers are a separate decal and impressively you can actually read even the finest print. The white in the roundels was sufficiently opaque for my light-colored bird but I suspect it will show the dark background if you decide to make the camouflaged "Revanche IV." The finished model was given a very gentle oil wash and a clearcoat of MM Acryl semigloss.
|
CONCLUSIONS |
The MAC offering begs for a comparison with the old Airfix kit. I have not built the Airfix SPAD but based on my experience with Airfix of that period and on-line reviews, the Airfix kit appears to be better engineered, much easier to build, and significantly cheaper. The MAC kit offers superior detail and attractive decal options and makes for a very nice finished model.
Recommended for intermediate modelers with some short-run experience, good eyesight and fine tweezers.
|
REFERENCES |
March 2004
Copyright ModelingMadness.com.
If you would like your product reviewed fairly and fairly quickly, please contact the editor or see other details in the Note to Contributors.