|
KIT: |
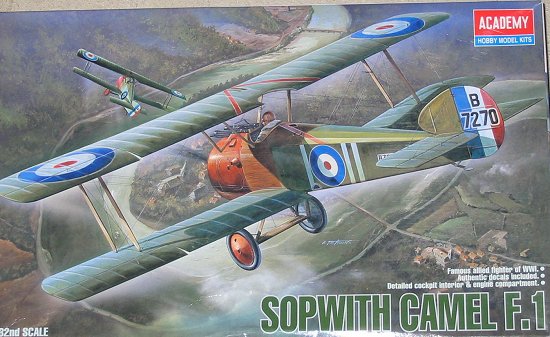
Academy 1/32 Sopwith Camel |
|
KIT # |
2189 |
|
PRICE: |
$15.98 |
|
DECALS: |
Two aircraft |
|
REVIEWER: |
|
|
NOTES: |

|
HISTORY |
There is probably no more famous aircraft from WW1 than the
Sopwith Camel. The Red Baron may be the most famous pilot, but everyone has
heard of the Camel.
The Camel was produced in a number of versions. The most common one, the Camel
F.1, is the version that most people are thinking of when they think “Camel”.
This was the land-based aircraft, carrying two Vickers machine guns in the
fuselage “hump”. It was in this aircraft that Capt Roy Brown engaged the Red
Baron on the Baron’s final flight. (I’m not getting in to that “who killed the
Red Baron- Brown or ground fire?” debate.)
|
THE KIT |

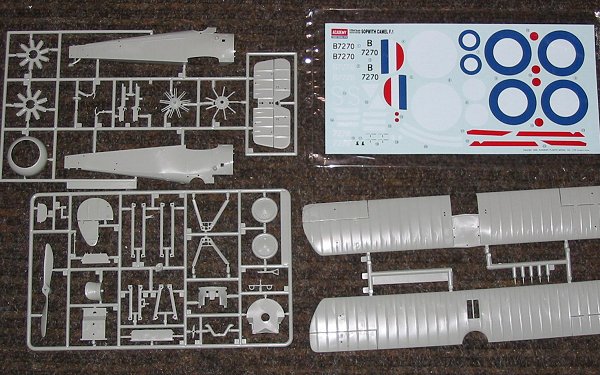
The kit, molded in light gray, consists of two main sprues of
parts, plus another for the wings. Panel lines around the cowling are recessed,
with raised stitching detail on the fuselage. Each wing is molded as a single
piece. A small spool of black poly-cotton blend thread is supplied for
rigging.
The rigging is designed into the kit. There are holes in the model for the
thread, and certain assembly steps call for rigging to be installed. The
fuselage, for example, has some rigging installed before the halves are joined.
I do think that black thread is a little harsh for the rigging though- the
contrast with the model will be too much. I don’t think black thread does a
good job of representing steel rigging wire. If you want to use thread, I’d go
with a light gray or silver color instead.
My model had very clean moldings— no signs of mis-alignment, and no flash.
Trailing edges seem to be pretty fine, too. Control horns are separate pieces,
and not molded in to the wings. The molding of the hinge detail for the control
surfaces looks good, and the surfaces could easily be detached and
re-positioned.
My only complaint about the moldings is about the wings. The rib detail seems
exaggerated, especially at the leading edge. The ridges and valleys that
represent the main ribs and the false ribs and the covering sag are just too
pronounced. If you look at photos of the real aircraft, they just don’t stand
out that much. I think a little sanding will be in order here.
There is no pilot figure included in the kit. There are no clear parts, either,
even though the three view shows a windscreen.
The instructions are the typical pictorial style, with warnings and color
definitions in about 12 different languages. There is a nice three view for
both versions of the plane, showing colors and decal placement.
There are decals for two RAF aircraft, both in the standard PC-10 green over
doped linen scheme. The first is Roy Brown’s Camel, from 209 Squadron in May
1918. The second set of marking is for an aircraft from 43 Squadron, also in
1918. The decals for Brown’s aircraft includes the wing chevron and fuselage
stripes, which some references say had probably been removed by the time of his
famous fight with von Richtofen.
The decals look nice and thin, and my copy were printed in register. The decal sheet has the roundels in 3 parts, one for each color. There’s a big white circle, upon which the blue outer ring is placed, followed by the red center spot.
|
CONCLUSIONS |
This looks like a fairly easy build, for a WW1 fighter. The integration of the
rigging into the model’s parts and instructions should make it easier for the
novice to rig the model. The provision of mounting holes for the rigging should
make it easier to go with fine steel wire, if that’s your preference, too.
I think this kit is worth consideration, especially if you want
to try a WW1 aircraft, but were put off by the task if rigging it. This kit
would be a much better starting point than a smaller scale model.
This kit is in my “I want to build it soon” pile.
Review kit courtesy of the IPMS Granite State GraniteCon 2002 kit raffle.
If you would like your product reviewed fairly and quickly by a site that has well over 150,000 visitors a month, please contact me or see other details in the Note to Contributors.