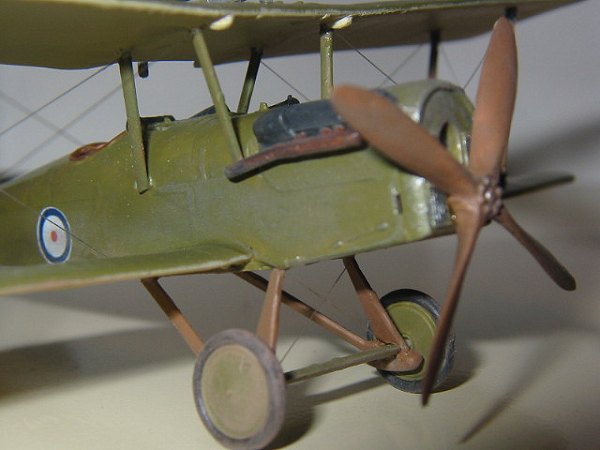
Roden 1/72 Se.5a
|
KIT # |
023 |
|
PRICE: |
$9.98 MSRP ($8.96 at Squadron) |
|
DECALS: |
Eight options |
|
REVIEWER: |
Bill Michaels |
|
NOTES: |

|
HISTORY |
The prototype SE-5 made its first test flights in late November of 1916. After a period of testing, the aircraft entered production in early 1917. By the end of March 1917, the first batch of 24 aircraft were completed.
The SE-5 was generally a success when it entered service in the spring of 1917. The one shortcoming of the SE-5 was that it was a little underpowered, with its 150 HP engine.
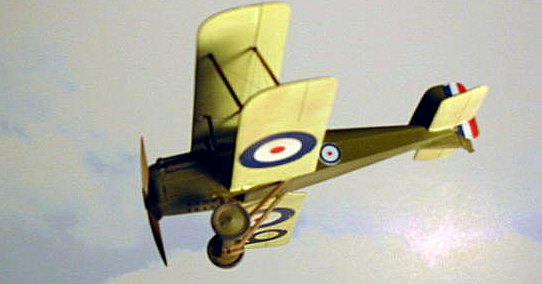 As the SE-5 was entering production, the new 200 HP
Hispano-Suiza engine was also entering production. Early tests showed
that the new engine gave a significant improvement in performance. The
new aircraft, with the 200 HP engine, was designated the SE-5a, and
ordered into production.
Unfortunately, the 200HP engine was in short supply. Because it was a French engine, French aircraft manufacturers had priority, and there were numerous quality problems with engine to boot. The parts used in the gearing for the propeller were especially problematic. As a result, when the SE-5a entered service in the summer of 1917, it suffered from a large number of engine failures.
With the lack of suitable engines holding back delivery of SE-5a airframes, the RAF looked to other powerplants for use as possible alternatives. A number of alternatives were evaluated, but the Wolseley Viper turned out to be the best. The Woseley was based on the Hispano-Suiza 200 HP engine, but was direct drive, avoiding the gearing that was the weak point of the French engine. However it wasn’t until early1918 that there were enough engines to allow production to standardize on the Viper engine. Until then, the SE-5a could be found with a variety of engines.
The SE-5a went through a number of other changes as well. For example, early SE-5as had the same steel tube landing gear of the SE-5. But the SE-5a was heavier than the SE-5, and the gear needed to be strengthened. Later models had a steel tube with wooden fairings. There were a number of other variations, too. Narrow or wide chord stabs; headrest or no headrest; long or short exhausts were some of the more obvious ones.
|
THE KIT |
Roden has produced two SE5s in 1/72 scale. (The other kit is of an SE-5a with the Woseley Viper engine, kit number 045.) The now-familiar modular engineering of the kit parts allow common sprues to be augmented by smaller sprues of version-specific parts. The kits are all basically the same, with different detail parts and decals. Rather than go into a lot of additional detail about the kit parts, I’ll instead point you to our intrepid editor’s preview of this kit, here.
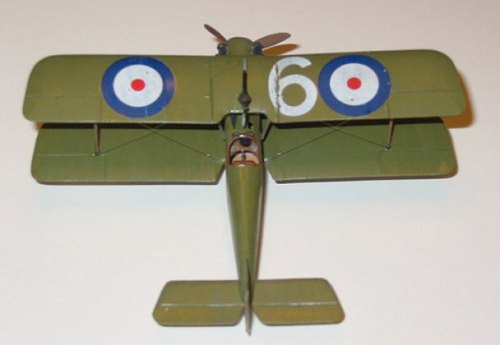 Like many Roden kits, this kit features markings
for 8 different aircraft. The instructions include profiles for the 7
aircraft, identified by roman numerals. It is not immediately apparent,
but the eighth aircraft is actually the one shown in color on the back of
the box.
The first thing I did was to study the different profiles in the instruction booklet and choose which one I wanted to build. Most of the aircraft are the basic PC-10 over linen color scheme, but there are a variety of marking choices to consider. I ended up choosing the box art aircraft.
I then went through the instructions to mark which parts are going to be used for the aircraft I was building. I also “X”-ed out the sections and parts not used with my version of the plane. The kit includes two styles of stabs, two styles of landing gear, two fuselage tops, long and short exhaust pipes, and a separate head rest. It seems like each of the eight aircraft the kit builds uses a different combination of the parts, so you need to be careful.
|
CONSTRUCTION |
Assembly starts with some of the little
subassemblies. The fuselage top, the radiator, the Lewis gun, and the
landing gear are assembled first. (I saved my landing gear to the end- I
like to assemble it on the model to get the alignment and spacing
 correct.) My radiator had a couple of sink areas in the recessed fin
area. There’s not much you can do to fix it and preserve the detail—the
best I could do was fill the sink holes with some super glue and use
paint to simulate the lost detail.
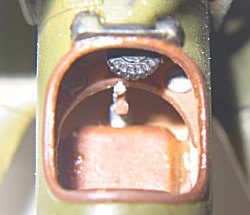
The fuselage is the first challenging part of the
assembly. The fuselage started with left and right halves. There were a
couple of big ejector pin marks that had to be removed, and then I
painted the interior of the fuselage in the cockpit area beige, and
picked out the molded in framing detail in a dark brown. When that dried,
I glued the halves together. Into it went the cockpit pieces—a seat,
stick, rudder petals, instrument panel, co aming, and spare ammo drum for
the Lewis gun. So far, so good…
Things then started to get more challenging. The nose area is made up from five pieces— the sides get a bottom and curved left and right engine covers added to them. The trick was getting all 5 pieces trimmed to fit, and in place. The tricky part is minimizing gaps while keeping everything aligned, parallel, and square. I couldn’t use any of my usual clamps, because they would push other parts out of alignment. In the end, the nose was symmetrical, and lined up with the radiator reasonably well, but I had some seams and gaps to fill.
|
COLORS AND MARKINGS |
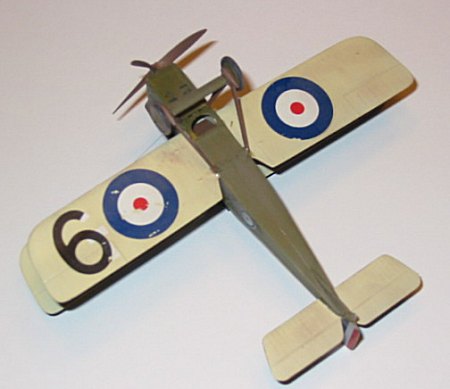 While the fuselage was drying, I went ahead and
painted the flying surfaces. I like to use PollyScale French Beige as my
color of choice for doped linen undersides. I airbrushed the undersides
of both wings and the stabs. When dry, I attached the bottom wing and
stabs to the fuselage. They both fit well. The model was now ready to
have the green paint applied.
When building 1/72 scale biplanes, I find it is usually easier to paint the struts while they are still on the sprue. I usually brush paint them, and then touch them up as needed after they are installed. All the wing struts were painted dark brown, while the landing gear was printed green.
I airbrushed the upper surfaces of the model with PollyScale WW1 RAF green (PC-10). I let the model sit for a couple of days, to be sure the paint was fully cured. I then brushed a coat of future on the model, to prepare it for decaling.
|
FINAL CONSTRUCTION |
Mounting the top wing on a 1/72 scale biplane can be a real challenge. On some models, especially complicated ones, a jig is the best way to get the wing aligned. The SE-5 series have a fairly simple strut arrangement, so I didn’t think a jig would be necessary.
To mount the top wing, I started with the wing struts. I glued the four wing struts into place with Testors liquid cement- the one in the fine tube applicator. I did not worry about getting the struts exactly aligned--- they just needed to be close. I concentrated on getting the struts parallel, and keeping the left and right sides at the same angle. I let the struts dry overnight.
 The next day, I added the top wing, making sure the
four struts were properly seated. I used small dabs of Testors liquid
cement (the one in a bottle), to slightly soften the joints where the
struts were attached to the bottom wing the day before. This made it
possible to focus on getting the top wing in the right position relative
to the bottom wing, with the right amount of stagger. The application of
the liquid cement on the struts allowed them to move a little, without
setting up tensions that would try to spring back later. I let this dry
for a day as well.
With the four wing struts and their glue joints fully cured, I could then add the cabane struts. I applied them one at a time using tweezers and super glue. A couple of the struts needed fine trimming for length- I used a fine sanding stick to work down to the length needed without taking off too much.
After the wing struts were complete, it was a pretty simple task to flip the model over and attach the landing gear. It was now time to add the decals.
Decal Disaster
The model already had a coat of future, so I could start right off with applying the decals. The kit includes a large sheet of decals, will all the markings for the eight different planes. The decals are very thin, which turned out to be a problem. When the first decal it the water, it started to disintegrate into dozens of tiny fragments.
I went to the hobby shop and got a bottle of decal topcoat. I then painted the rest of the decal sheet, and tried again. Even after topcoating, the decals continued to give me problems. Several of the roundels broke while being positioned, or lost little pieces from the edges.
In the end, I was able to get enough usable decals off the sheet to at least do all the major markings. However, the idea of doing a specific plane was now history. Instead of a specific aircraft, I ended up with sort of a generic SE-5a.
The sad decal saga ended with a second coat of Future to seal the edges. Once that had cured for a couple of days, I added a flat top coat. I used PollyScale semi-gloss acrylic clear- a pure flat coat would have been too matte for the doped fabric look.
Final touches
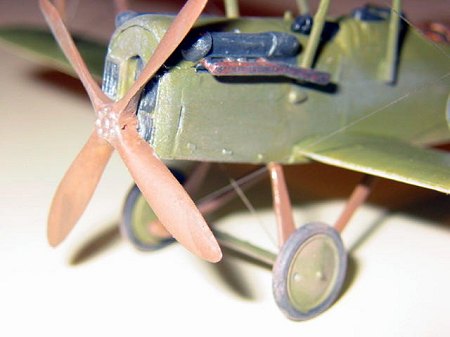 Early on, it was apparent that this model would
never be a contest entry. Rather, it was destined to join my collection
of WW1 aircraft hanging from the office ceiling. With that in mind, I
was not going to give the model the full rigging treatment. Instead, I
just added enough rigging to give the “rigged effect”. I used invisible
thread for the rigging on my model.
I used to use invisible thread, colored by dragging it under a black felt tip marker. However, on a recent visit to the fabric store, I found that invisible thread came in colorless and “smoke” colors. I tried the smoke color for the first time on this model, and was pleased with the result. (I used super glue to attach the rigging.)
I used some pastel chalks to weather the plane a little. I added some exhaust streaks, and some general grunge on the bottom of the aircraft, especially near the engine. I used some brown chalk to add the dirt and dust to the landing gear and the bottom of the plane, with a couple of subtle streaks for mud thrown up by the wheels onto the bottom of the wing. I also used the chalks to try to help hide some of the cracks and other decal problems.
|
CONCLUSIONS |
Recommended for experienced modelers. I’ve been a fan of Roden 1/72 scale WW1 aircraft for some time. Clever engineering has allowed Roden to release multiple variants of a given aircraft. The downside of this is that the kits have a number of extra pieces—six pieces may be needed instead of only two if the kit only did one variant of the subject. Multiple parts and fragile thin, scale struts add to the difficulty of these little models, but make them better looking replicas once completed.
This was the first Roden kit I’ve run into with the fragile decals. I’ve heard others have had that problem- the decals are so thin, that sometimes they fall apart. Next time, I’ll be sure to start with one of the extra decals, instead of one I need for my particular model. (And I’ll have some aftermarket decals on hand, for “Plan B” if necessary.)
The Roden kit is definitely a more detailed model than either the old Revell or Esci versions. This is a well detailed kit, with enough options to allow you to build several different versions. Also, I think the kits are a great bargain—you get a lot for only $10 (US).
March 2004
Copyright ModelingMadness.com
If you would like your product reviewed fairly and fairly quickly, please contact the editor or see other details in the Note to Contributors.