| KIT #: | ? |
| PRICE: | $ |
| DECALS: | None |
| REVIEWER: | Chris Peachment |
| NOTES: | Scratch built |

| HISTORY |
Most
modelers and aircraft enthusiasts are aware of the Coanda
1910, and if they aren't, then they should acquaint themselves with it, because
it was the very first jet aircraft, built in France in 1910. It wasn't powered
by a jet as we have come to know them, but rather by an inline petrol engine
driving, instead of a propeller, a ducted fan on the nose, which compressed the
air behind it. This was then mixed with petrol vapour and ignited, resulting in
a jet efflux which was largely flame and not very thrusting.
 Accounts
vary as to whether it actually became airborne. At the time it was thought not.
But the designer Henri Coanda, much later in life, claimed that he thought that
it had, he just didn't notice at the time.
A
replica of the 1910 aircraft is on display at the Henri Coanda airport, which is
the main airport of his native Romania. There is a 1/72 resin kit of it
available from Fan Kit, a Romanian company. And a very nice scratch built
version on the internet by Gabriel Stern, which I might well try to emulate one
day, once I have got a lot better at scratch building.
Nothing daunted, Coanda constructed another machine a year later, very different
from the 1910, and using such materials as he could salvage from the burnt wreck
of the first machine.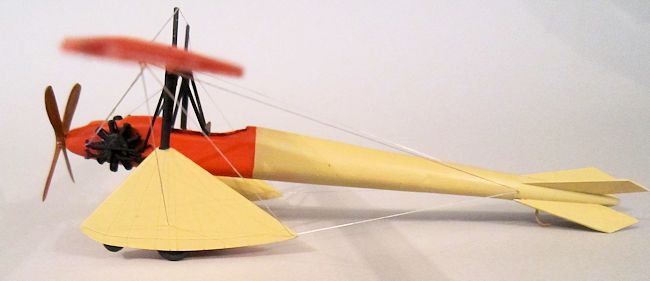 torque
effects of rotary engines. What it would also have done though is increase the
gyroscopic effect, which would have a strong and unpredictable effect on the
handling, especially in turns.
Coanda's main area of expertise was in fluid mechanics, especially how a jet of
air behaves close to a curved surface, and the “Coanda effect” is with us to
this day in the design of blown flaps on aircraft. It is also the phenomenon
which enables flying saucers such as the Avrocar to fly. And even Grand Prix
cars use it now, by routing the exhaust gasses over parts of the body to
increase aerodynamic efficiency.
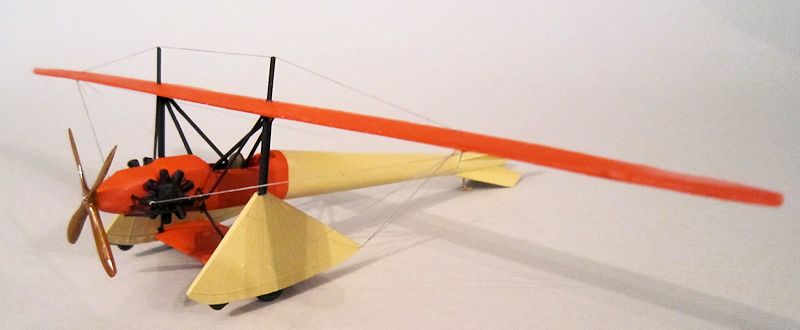
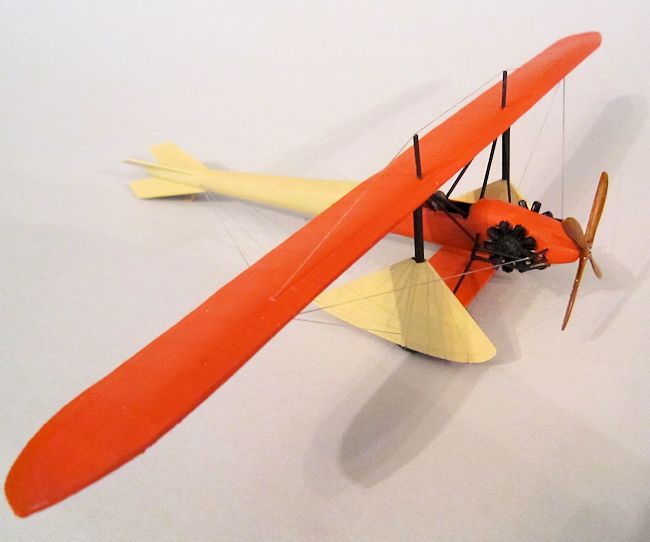
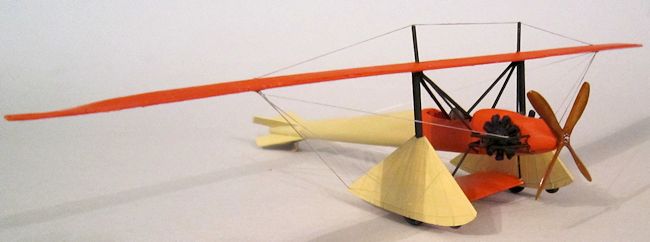
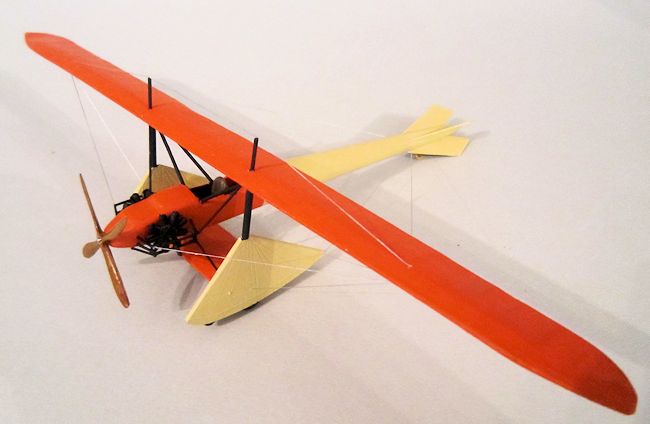
I studied the few pictures of the 1911, and was baffled because there seemed to be no struts connecting the fuselage to the wing, only rigging. One can easily imagine the weakness of this setup. Then I slowly came to think that what look like rigging wires between fuselage and wing could only be very thin metal struts. Even so there are few of them, and only fastened to the single main spar of the wing. The torsional forces on the few junction points must have been huge. So I took a few liberties by increasing the width of the struts, which are mainly cabanes, and adding a couple which were necessary to hold body and soul together.
| CONSTRUCTION |
Some
plans were found on the excellent Russian website Their Flying Machines,
adjusted to scale and several photocopies made so that one or two could be cut
up for templates.
I
began with the wing since that seemed simplest, and used my favoured method,
borrowed from the famous Harry Woodman, who used to scratch build biplanes and
wrote a book about it long ago which is revered as
 the
Bible of scratch builders.
The
bottom surface was cut from 20 thou plastic card and the upper surface from 10
thou, heavily scored on the inside with a biro to represent ribs. The leading
edges were glued, then a plastic rod inserted at about 1/3 the chord back from
the leading edge. Then the rear skins were glued together, and sanded to fit.
So far
so good, but then I was undecided about the fuselage. So instead I turned to
those quaint wheel spats, which are just one unique distinguishing feature of
the aircraft. It looks like it is trailing two dead umbrellas, turned inside out
by the wind. Why exactly Henri chose that shape for what was a simple
undercarriage is a mystery but I suspect he had a whimsical streak.
One
old photo reveals that the skirts could in fact be rolled up over the frame and
they look like they are made of thin tarpaulin. I cut four triangles to shape,
glued their edges, scored a few ribs and put spacers in the middle while they
set.
I
began eyeing some balsa planks for the complex fuselage, which is circular at
the rear end, and tapers to flat sides at the front, with a stepped upper nose.
But then I bit the bullet, and with a loud cry of
“We are Plastic, not Wooden, Modellers”, glued together six strips of
plastic card, cut from the plan. The four inner ones had a cutout for the
cockpit, the two outer ones did not. I now had a square box section with the
right sideview. It was then but a matter of only weeks to sand the thing down to
the right shape, while distracting the mind through advanced yogic techniques.
Or what others call staring out the window while not thinking.
Once it was in shape, a seat, a stick, and an instrument panel taken from a suitable etched set were put in place. I doubt that the original pilot, a stout-hearted soul called Bountry-le-Soin, had much else in his workplace. I also wonder what possessed him to climb into the cockpit in the first place.
| COLORS & MARKINGS |
 The
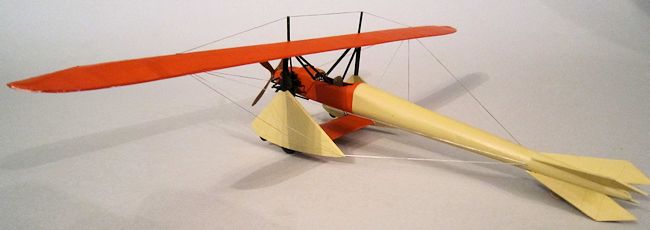
1910 Coanda is always shown in a coat of brick-red paint. Since there was only
one, I imagine that Henri would have had some spare tins of the paint lying
around the hangar, and so opted for that colour for the wing and forward
fuselage. Black and white pictures showed a marked difference with the rear of
the fuselage and so that was painted in linen, for which I used Vallejo Buff.
The red was also from the Vallejo range.
The
1910 Coanda is always shown in a coat of brick-red paint. Since there was only
one, I imagine that Henri would have had some spare tins of the paint lying
around the hangar, and so opted for that colour for the wing and forward
fuselage. Black and white pictures showed a marked difference with the rear of
the fuselage and so that was painted in linen, for which I used Vallejo Buff.
The red was also from the Vallejo range.
Most
photos show that the 1911 was in fact a sesquiplane with a small wing between
the spats. But there is one picture which shows it as a biplane with extensions
to this on the outer side of the spats. Taking the path of least resistance, I
opted for the sesquiplane and made one up in the same method as the wing and
painted it red.
Now
came what the Spanish call “the moment of truth”. Or the moment when the matador
must plunge his sword into the bull and hope he hits the right spot. Otherwise
it is “the moment of disembowelment”. I offered up the fuselage into the box and
wondered how on earth it could be connected. By close scrutiny of the photos, I
managed to locate most of what seemed to be rigging but could only be struts.
And duly replicated them using slightly over-thick rod. After it had set, it was
still a flimsy arrangement, and was
 handled
with with my breath held and hands made steady by abstinence from strong coffee.
Then
came the engines. Two rotaries were chosen from the Box of Dead Engines, and
glued one on either side of the nose. Murky old photos show a rat's nest of
wiring and small bits of machinery surrounding the engines, but fortunately I
found a close-up of the engines from an air show in
Paris, and these show that a cage was made to frame the engines, which allowed
them to rotate, but also formed part of the fuselage structure, to which struts
and rigging were then added. There was also what looked like exhaust pipes
emerging through the frames. This was all rigged together from plastic rod with
two sets of reading glasses on my nose, and a thesaurus to hand so that I could
find variants of strong oaths and curses.
The
cruciform tailplanes were cut from 10 thou card, and glued. Once again the
photos are deceiving. They show the tailplanes just clear of the ground, but no
reason for them to be so. And so I
formed a tail skid in the same pattern as the 1910 Coanda, reasoning that it
would probably have been a survivor of the early
 crash,
and so could be recycled. It is a paperclip, bent to suitable curves with needle
nosed pliers.
When
making scratch built models the main thing that plagues the modeler is problems
of alignment. You soon find yourself ignoring the plans, just to get things to
fit correctly without looking awful. But there is one great consolation from the
few pictures of the Coanda 1911. Which is the fact that he too had problems of
alignment. The two rigging support king-posts on the upper wing have a distinct
lean to them, and are not in line with the undercarriage struts. There may have
been a good reason for this. Or it might have been, as I suggested, that
mechanical engineering was not Monsieur Coanda's strong suit. But, it allows
you, the modeler, a little leeway. As a matter of fact I lined up the struts,
because alignment is more aesthetically pleasing than crookedness, but still,
the wiggle-room is there if you want it.
Finally, a little rigging with elastic thread, coloured silver with a gel pen and held in place with small drops of superglue gel, put in place with a sharpened toothpick.
| CONCLUSIONS |
 I was
once in Romania just after the fall of their dictator Ceaucescu, and a fine
country it is, with a Mediterranean people who are hospitable and amusing.
And the countryside around Transylvania looks like the last remaining
rural landscape which is unchanged since Medieval times. It is a place of
mountain meadows, castles, and ancient forests, and it is very beautiful.
The
Romanian for 'Yes' is 'Dah'. I don't know what the crowd shouted in triumph as
they dragged the wretched Ceaucescu from his balcony and rang the Army for a
firing squad, but perhaps it was a loud “DAH”.
I
repeated it, as I settled back with a long sigh and a single malt. For there in
front of me was the only known model of a rare aircraft built by a master of
aviation. If there is another out there, it has left no footprint on the
internet. Coanda went on to design even more strange and wonderful machines,
before having a long career with Bristol aircraft in the UK. He finally settled
in the US and his legacy in the shape of blown flaps is the main reason why your
airliner is so safe when flying slowly in to land.
| REFERENCES |
http://www.the-blueprints.com/blueprints/modernplanes/modern-c/18093/view/coanda_(1911)/
http://flyingmachines.ru/Site2/Crafts/Craft28597.htm
http://www.newfluidtechnology.com.au/wp-content/uploads/Henri_Coanda_The_facts.pdf
April 2014 If you would like your product reviewed fairly and fairly quickly, please
contact the editor or see other details in the
Note to
Contributors.