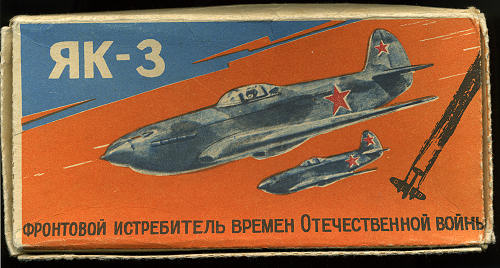
Russian 1/48 Yak-3
| KIT #: | ? |
| PRICE: | $5.00 from the sales table |
| DECALS: | Insignia only, and those are junk |
| REVIEWER: | Scott Van Aken |
| NOTES: | Injected plastic stand model with no interior. |

| HISTORY |
Lighter and smaller than Yak-9 but powered by the same engine, the Yak-3 was a very agile dogfighter and a forgiving, easy-to-handle aircraft loved by both rookie and veteran pilots. Early combat experience showed it to be superior to all Luftwaffe fighters at altitudes below 5,000 m (16,400 ft). It could roll with the Focke-Wulf Fw 190 and its turn rate was almost equal to the Bf 109.
The biggest drawbacks of the aircraft were its short range, the tendency of the glued-on plywood covering the top of the wings to tear away under high-G loads, and poor engine reliability. The pneumatic system for actuating landing gear, flaps and brakes, typical for all Yakovlev fighters of the time, was problematic. Though less reliable than hydraulic or electrical alternatives, the pneumatic system was preferred due to significant weight savings.
Since 1991, a number of Yak-3s have been newly manufactured by Yakovlev for the warbird market using the original plans and dies. These are powered by Allison V-1710 engines and have the designation Yak-3M. Several of these are airworthy today, mostly in the United States, but also in Germany and Australia. Others have been converted to "Yak-3U" status from Yak-11 trainers for private owners, with these aircraft also being popular worldwide.
| THE KIT |
 Packed
in a typical Soviet era box that is made from recycled cardboard, inside is a
newsprint quality set of instructions, a decal sheet with eight stars and the
kit inside a greasy, polyethylene bag.
Parts count is minimal as this is a stand model. No cockpit and no landing gear. In fact, gear doors are not even outlined on the underside of the kit. All of the detail is raised panel lines, including the control surface hinges and the decal placement marks for the stars. I have not seen this on a kit since I was a pre-teen back in the early 1960s. Most modelers will be sanding away these markings and rescribing at least the control surfaces. The rest of the detail is fairly good when it is there at all.
As you'd expect, there is flash, and the prop spinner in particular has a nasty sink area. These are also found along the fuselage opposite alignment pins. These pins are best sanded off as they are basically tiny nubs and are misaligned so that the halves will not mate up properly. I'm not sure why, but it seems like the Soviets were fond of light blue for their clear parts and this one has a single, well molded, and thick canopy. A very beefy stand is included on which to display your model when done.
Instructions are adequate and note where the various parts are to be located. I'm assuming there is painting information on there somewhere, but as my ability to read Russian disappeared shortly after my stunning good looks, I don't know for sure. The insignia decals are useless, probably because they are old. I cut one out and when it grudgingly decided to depart from the backing sheet, it did so in near microscopic pieces. Aftermarket will be your only recourse.
| CONCLUSIONS |
This is one of those where you can't just run down to the local store and grab one. I picked this one up as it was cheap and I thought it would be an interesting build. It will also give me an opportunity to try out my UMM Scriber as I'm not much of a rescriber and this would be a perfect kit on which to practice.
| REFERENCES |
http://en.wikipedia.org
January 2009 If you would like your product reviewed fairly and quickly , please
contact
me or see other details in the
Note to
Contributors.