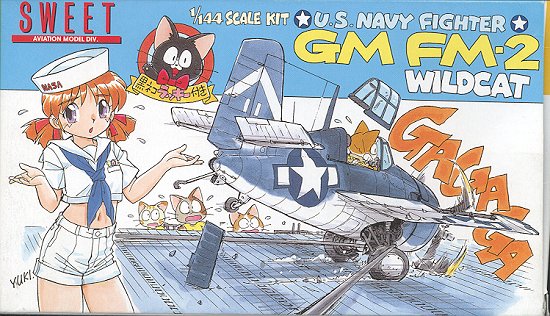
Sweet 1/144 FM-2 Wildcat
|
KIT # |
14103 |
|
PRICE: |
¥1000 |
|
DECALS: |
Five aircraft |
|
REVIEWER: |
|
|
NOTES: |
Two kits included in the box |
|
BACKGROUND |
|
CONSTRUCTION |
As you can imagine from a kit with minimal parts, actual
construction isn't exactly a time-intensive event. I painted the interior
with Humbrol #88, which many say is a good match for the Bronze Green used
in these planes. The wheel well area was done in white using
Vallejo Acrylics. Both of these colors were brushed on. I next glued the wing
halves together and The wings were glued in place. Fit is excellent and no
filler was needed on this or any other part of the construction. While this
was drying, I glued the drop tank halves together and then glued in the
tail planes. The engine was painted black and then dry-brushed with
aluminum to bring out detail. Probably the most difficult job was masking
the canopy. It is quite small, though it does fit well and was glued in
place after masking. I left out the engine and just press fit the cowling
in place until after painting. The last bit to be glued in prior to a trip
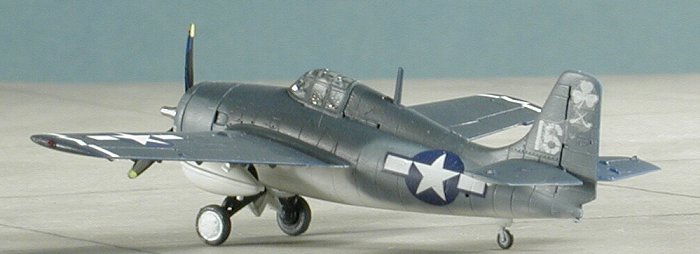
to the paint shop was the radio mast. CAMOUFLAGE & MARKINGS The kit gives several paint schemes, going from an Atlantic scheme
through variations on the tri-color scheme and then to overall gloss sea
blue. Being a bit of a masochist, I decided on the tri-color scheme. It
also gave me a chance to try out the
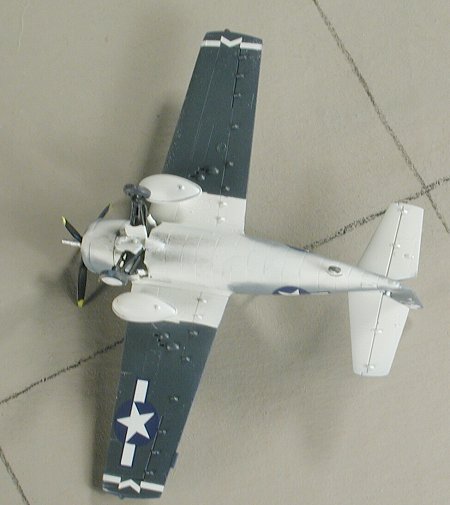
Next, I masked off some of the white areas (like the tailplane
undersides) and sprayed on the upper gloss sea blue. Again, I left it most
of the day to properly dry. So far, the paint was performing superbly. All
the sea blue bits that would be hurt by overspray (like the upper surfaces
of the wings and tailplanes were masked. Now for the real test. Next day, I
mixed up the intermediate blue and cranked on the compressor. This part of
the aircraft was then sprayed. To my delight, I had very little in the way
of overspray. I was expecting a real mess and it didn't happen. This has to
be among the best, if not the best, enamel paint I've ever used. I
let it cure until late that night when I applied some Future on it in
preparation for decals and such. MORE
CONSTRUCTION Now for the last bits of construction prior to decals. The landing gear
for the Wildcat is somewhat intricate, but Sweet did a great job on it. I
ended up brush painting the black areas on the struts and then glued them
into the proper place. Tires were painted a dark grey using Floquil's Grimy
Black. I just couldn't seem to get the wheel to look right so decided to
use a circular decal to take care of that problem.
Then I installed the struts. As expected, the scale struts are not very
strong and I broke one installing it. Fortunately, the connecting braces
are there to hold things in place so after the usual fiddling and fussing,
I got the gear and center section in place and stuck on the gear doors.
Slathering lots of glue on it for strength, I let it dry while I painted
the prop flat black and installed the engine. With that dry, I touched up some areas where the paint wasn't too great
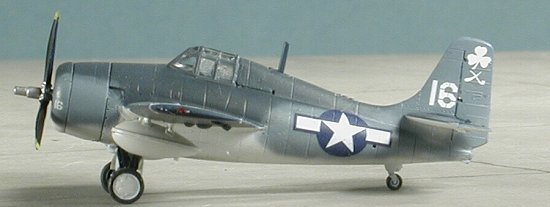
thanks to gluing and painted the formation lights. Then it was time for the
decals. These are made by Cartograf and are very well printed. I chose the
VC-94 markings from the USS Shamrock Bay as they had the nice geometric patterns on the wings. I
carefully placed the decals in position and waited for them to snuggle
down. Nothing. I put a drop of Solvaset on them to help them along. More
nothing. Letting that dry, I then tried Champ. Still nothing. It seems as
if the decals are impervious to setting solutions and will not snuggle down
or even stick well on their own. I finally did several applications of
Champ before they even seemed interested in sticking! After that, I glued on the drop tanks and the wheels. Thanks to the
broken strut, the wheels aren't exactly on there straight! Then took the kit
to the paint shop for a clear matte overcoat. I then removed the masking
from the canopy, hoping that not much leaked under the tape! The exhaust
stain was applied with pastels, some touch up painting was done and
finally, the prop installed. cleaned them up. After gluing the fuselage halves
together, the seams were sanded smooth and any panel line detail rescribed.
cleaned them up. After gluing the fuselage halves
together, the seams were sanded smooth and any panel line detail rescribed.
 White Ensign line of new enamel
paints. First I sprayed the drop tanks, required landing gear/wheel bits
and underside of the plane with white. Considering that I did the dark blue
plastic version of the kit, the white covered quite well. The tinlet
suggested 6 hours between coats so I set the model aside overnight to dry.
White Ensign line of new enamel
paints. First I sprayed the drop tanks, required landing gear/wheel bits
and underside of the plane with white. Considering that I did the dark blue
plastic version of the kit, the white covered quite well. The tinlet
suggested 6 hours between coats so I set the model aside overnight to dry.
|
CONCLUSIONS |
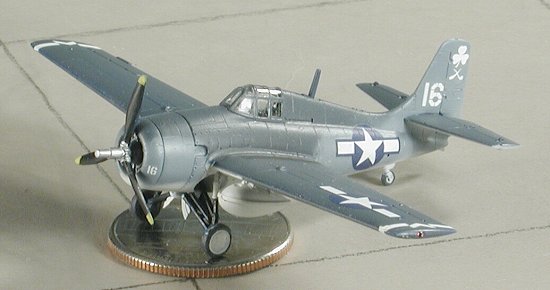 As with the earlier Hurricane, the actual
construction was pretty easy, other than the broken strut. I'm not sure why
the decals were such a pain and on the next one, I'll use very hot water as
that may be part of the problem. As you can see it from the image of this
model perched atop a quarter, it isn't a big model! The kit can be assembled in a day or two
and then the rest is just painting and letting things dry. I really like
these Sweet 1/144 kits and understand that an A6M Zero will be the next
release.
As with the earlier Hurricane, the actual
construction was pretty easy, other than the broken strut. I'm not sure why
the decals were such a pain and on the next one, I'll use very hot water as
that may be part of the problem. As you can see it from the image of this
model perched atop a quarter, it isn't a big model! The kit can be assembled in a day or two
and then the rest is just painting and letting things dry. I really like
these Sweet 1/144 kits and understand that an A6M Zero will be the next
release.
October 2003
#1285 in a series
Copyright ModelingMadness.com. All rights reserved. No reproduction in part or in whole without express permission from the editor.
My thanks to Kevin Krajniak for providing the review sample.
If you would like your product reviewed fairly and quickly, please contact the editor or see other details in the Note to Contributors.