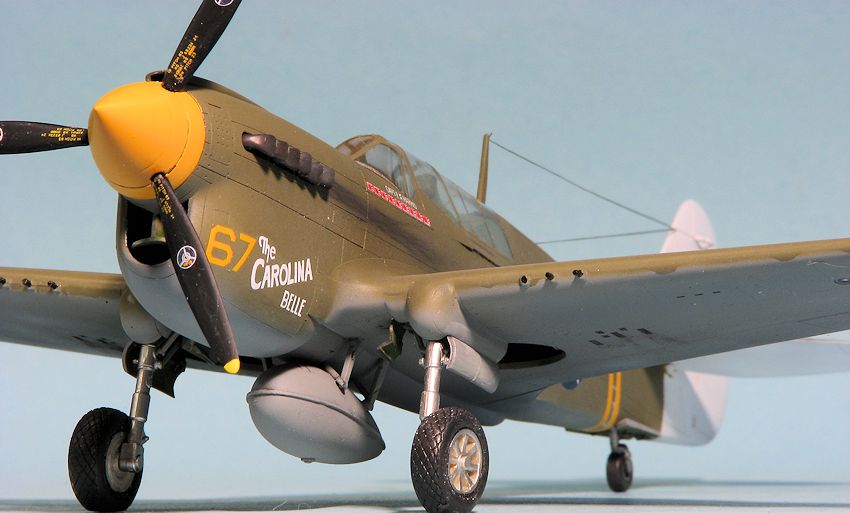
Mauve 1/48 P-40N Warhawk
| KIT #: | 1 |
| PRICE: | $4.00 ($21.00 SRP when new) |
| DECALS: | One option |
| REVIEWER: | Scott Van Aken |
| NOTES: |

| HISTORY |
The N variant of the P-40 was probably the most built and the last production Curtiss fighter ever done. Thanks to some mismanagement and failed projects, Curtiss was no longer the fighter king it was in the 20s and 30s. Eventually the company folded completely in the early 1950s
 The reason for the P-40N was to
reduce the growing weight and return the kind of performance that
pilots wanted. The biggest visual change to the N was the change in the
design of the aft canopy section to provide greater rearward vision. Early
Ns also reduced the number of guns to four, but this didn't last long and
the 6 gun armament was soon restored.
While few P-40Ns saw action in the Med or Europe, there were a lot of them spread around the Pacific theater with many of them going to units in the CBI as well as the Southwest Pacific. This includes Australian and New Zealand squadrons, who spent much of their war in New Guinea or the Solomons rooting out stubborn Japanese units. Other large users of the type were US training units and some Canadian squadrons who used them for home guard.
| THE KIT |
The Mauve kit was widely seen as the best late 1/48 P-40 around until Hasegawa released theirs. Only down-side of the Mauve kit is that it really needs a better interior and better wheels. This is taken care of by True Details, who offer a super interior and wheel set for this kit that completely transposes it. It will add about another $13 to your kit, but it is really necessary to bring it up to specs.
 The kit itself is molded in darkish
brown plastic that is somewhat brittle so you need to take care when
removing parts. I managed to break one or two during the build. The kit
offers a multi-piece canopy so you can display your nice interior. It also
comes with optional centerline tank. The formation lights are separate
pieces, which adds a lot to it. There are the required engraved panel lines
and the fin is off-set to the left, just like on the real aircraft. The kit
also has individual exhaust stacks though I suppose that with some grinding
you can cut away the backing to use aftermarket exhaust. The kit also has
separate prop blades. This will help with painting any complicated spinner
designs.
Instructions are OK, but not really great and completely in Japanese. Decals are provided for one very flamboyant parrot nosed aircraft flown by a US training unit. However, they are junk and have to be replaced by an aftermarket set. Fortunately, there are a lot of additional sets around that you can use, so this will not be a problem.
| CONSTRUCTION |
This will be the third Mauve kit I have built of this
aircraft, the last one in 2004. While I believe Mauve is no longer in business,
their kits can still be found. This one was bought from a vendor many years ago
at a show in Cedar Rapids. The previous owner had started on it and it cam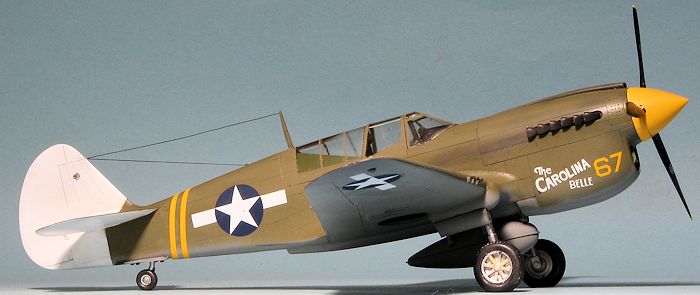 e with
True Details resin wheels and interior. The aft fuselage had been glued together
as were the wings. Some of the interior bits had also been painted. For some
reason, the previous owner had cut a wedge out of the area behind the cockpit,
so it now does not fit flush. Many of the small parts had been pulled from the sprues and placed in a small box. This is where I come in.
First thing I did was to make sure there were enough bits to build the kit. It wouldn't be the first time that I'd bought a started kit only to find out it was also missing things. Everything seems there. I then constructed the forward radiator assembly and installed it, not an easy task with the rear fuselage bits glued already. I then closed up the fuselage and took care of the seams.
I then concentrated on the cockpit bits, and by this I mean
finished painting things and installing the seat and such. The True Details set
is as close to a drop fit you will find in resin sets so if you have this kit, I
highly recommend spending the extra for the cockpit. I have another of these
sets in the wings, just waiting to find another cheap Mauve kit in which to
place it. I glued in the instrument panel, which took a bit of fussing to get
properly aligned. Once the cockpit was painted, and the side panels assembled
and 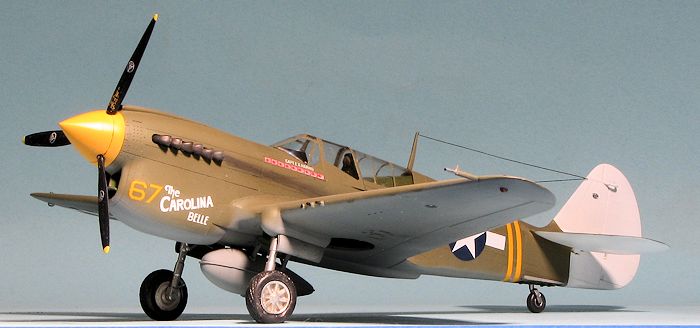 after they were dry, it was inserted from the bottom of the fuselage into
the cockpit.
The wing was next. I first glued on the right side and when dry, did some pressing on the fuselage to get the larger gap on the left side to close, using super glue for the left side. I guess a spreader bar would have worked as well and next time I'll use one. With the wings attached and the joins filled, the tail planes were glued on.
I then masked the canopy bits. Much to my relief, the wedge cut out of the area behind the cockpit would not be visible with the rear canopy in place. I also found that the rear canopy section was a bit wide when it was glued on. I did not get a great fit on the sliding canopy section, though the windscreen fit without issues.
| COLORS & MARKINGS |
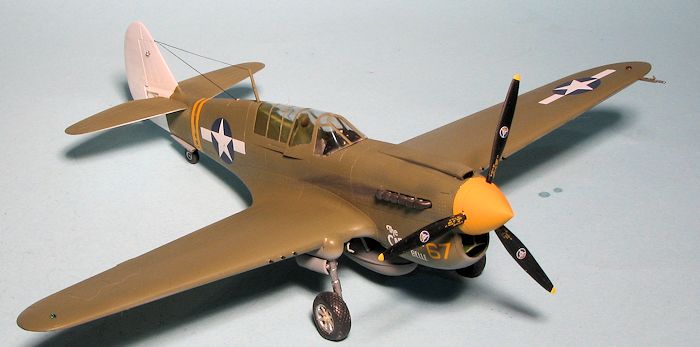
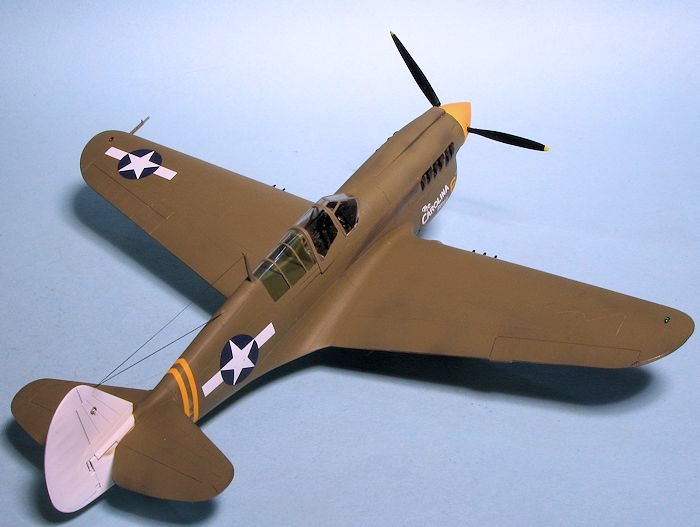
Warhawks of this era did not come in a variety of colors. I
chose a 49th FG plane which was in OD/Neutral Grey with a white tail and yellow
spinner. I had wanted to do a China based plane, but the kit's DF antenna and mount
was not in the box. First I filled the wheel wells with tissue and sprayed
the underside Neutral Grey. I used Model Master enamels and Tamiya acrylic
lacquers for the paints, all thinned with lacquer thinner. I then sprayed the
tail section and underside of the tailplanes with white along with the spinner,
 which was later painted yellow.
Now the sheet I was using, Aeromaster 48-308, does not call for the underside of
the tailplanes to be white, but I have read and been told by those who know,
that doing this was S.O.P. as it made the plane more visible from the
ground so they would not be fired upon by friendly forces. Most decal sheets
miss this detail as the lighter shade of the underside of the tailplanes is
difficult to discern in period photos.
I then masked off the white areas and painted the upper surface with Olive Drab, lightened with some light grey as the color in the bottle seemed a bit dark. I did the usual back and forth before gluing on the main gear legs and the tail gear. The model was then given an overall gloss coat in preparation for decals.se planes had a lot of sun exposure.
As mentioned, I used Aeromaster 48-308 which has 49th FG aces on it. The markings for this one are for the plane of Capt. E.A. Harris of the 8th FS. Despite the sheet being from 1997, the Microscale printed decals went on without any fuss. I did put the tail stripes a bit farther forward than the instructions showed as I didn't want to deal with cutting them so small bits would fit on the tail wheel doors. WWII P-40s are pretty simple to decal as they don't usually have a ton of markings. Eventually they were all applied.
| FINAL CONSTRUCTION |
It was then time to add on all the other bits. I glued the props onto the spinner back section and then attached the forward part, after which I applied prop decals. The box had a set of True Details wheels so those were painted and after drilling out the back of them to match the axle stubs, were glued on. These have overaccentuated bulges on the bottom which many people will sand down, but I left them as they are.
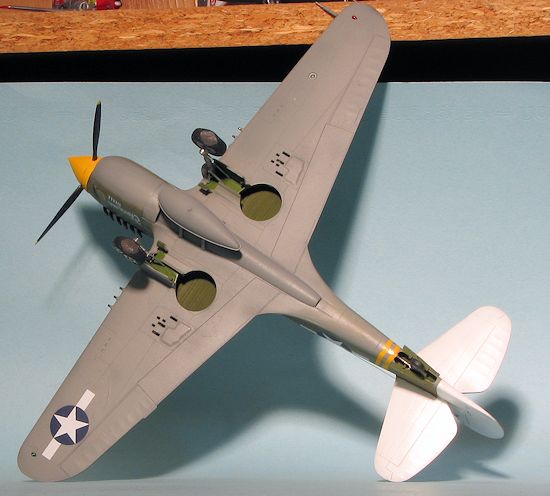 When removing the drop tank braces from the sprue, every
single one of them broke at the 'vee'. Rather irritating to say the least and
something that only added to the difficulty of getting them lined up for when I
attached the tank. The rudder hinge was also glued on at this time. It has only
one mounting hole and the instructions are not too clear on which side goes
where.
Returning to the underside, the gear doors were glued on with one of the larger main gear doors breaking when removed from the sprue. A small strut was glued onto the main gear and the radio mast was attached. This kit has individual exhaust stacks and while they are a pain to install, it is not impossible, just be sure to install them from the back moving forward. The pitot tube was glued on and after some touchup painting, the airframe given a coat of clear matte.
Normally that would be the end of it, but not in this case. Mauve does all the formation lights in clear plastic. Two were painted red on the bottom, two green and when done, all six plus the landing light were painted silver on the bottom side. These were then attached using clear paint. The final bits were the assembly and installation of the prop and spinner, a bit of exhaust stain with pastels, installation of a radio wire with EZ Line and the removal of the masking from the clear bits. Sharp eyed readers will notice one of the gun barrels is gone. This was missing from the very start and I just did not replace it. Perhaps it was in for maintenance and not yet reinstalled.
| CONCLUSIONS |
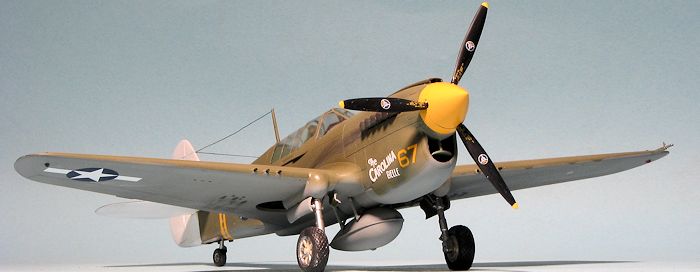 I know full
well that the Hasegawa is a much better kit, but the Mauve one can hold its own
with a bit of help from a good cockpit set. Not only that, the Mauve one can
usually be located at a very reasonable price from vendors at shows. If you have
one, dig it out and build it for it makes into an excellent model.
February 2015
Copyright ModelingMadness.com. All rights reserved. No reproduction in part or in whole without express permission from the editor
If you would like your product reviewed fairly and fairly quickly, please contact the editor or see other details in the Note to Contributors.