
Dako 1/72 Yak-7B
|
KIT # |
12006 |
|
PRICE: |
CDN $11.92 |
|
DECALS: |
Three aircraft |
|
REVIEWER: |
Scott Van Aken IPMS C5729 |
|
NOTES: |
|
BACKGROUND |

Visit the preview for a historical background and a look at what is in the box.
It is a pretty much standard commentary on kits from
Eastern Europe that, for the most part, they need to be treated as short
run kits. Face it, it takes big bucks to buy and operate the very large
high 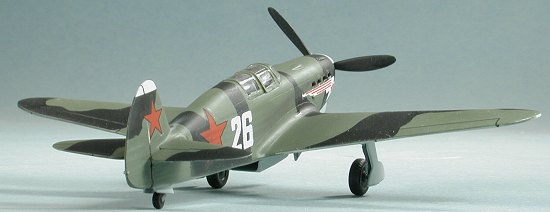 pressure injection molding machines and to pay for the expensive
computer guided mold cutting machines and the expensive high grade metals
that are used. As a result, most of these guys and gals use low pressure
machines and lower grade and easier to cut metals for their molds.
pressure injection molding machines and to pay for the expensive
computer guided mold cutting machines and the expensive high grade metals
that are used. As a result, most of these guys and gals use low pressure
machines and lower grade and easier to cut metals for their molds.
That generally means thicker, softer plastic. A lower level of detail, and generally poorer fit than what one gets from the 'big boys'. Fortunately for us, they are producing interesting kits and if one has intermediate skill levels, then they are not impossible to build and can make for some superb models.
|
CONSTRUCTION |
First thing I did was to start cleaning up parts. All of
them have some level of molding seams from minimal to quite a bit. It was
especially evident on the thinner pieces and the clear bits. One can either
clean as one builds (which is what I do) or do a gran mal cleanup of
the entire kit at once. I did start with the interior on this one. Building
up the various parts was not difficult, though I did have a bit of
trouble wi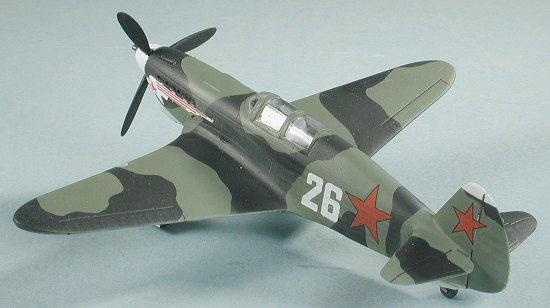 th the side consoles. There is no definite locator for these so
one has to do a lot of guestimating from the instructions. There are
cut-outs on the kit floor that help to align it when it comes time to
install things. BTW, I painted all interior bits dark gull grey with black
boxes and side consoles.
th the side consoles. There is no definite locator for these so
one has to do a lot of guestimating from the instructions. There are
cut-outs on the kit floor that help to align it when it comes time to
install things. BTW, I painted all interior bits dark gull grey with black
boxes and side consoles.
During this time, I also installed the exhaust. These fit from the inside. The openings in the fuselage are too small to permit them to fit so they all needed opening up, especially from the inside. I painted the instrument panel and installed that along with the interior parts. Before closing up the fuselage halves, the tail wheel needs to be glued in. This has a mounting T that is too long and needs trimmed. I did not trap the prop back plate between the two halves as recommended, leaving the prop off until last.
Once the fuselage was together, I brought out the filler as there was definitely some need for it in a few spots. Meanwhile, I went to work on the wings. Fit here is not at all bad and they were quickly assembled. They are a bit thicker on the wing tip than I'd like and those of you with the time and some sandpaper can undoubtedly make them the proper thinness.
Where I hit my first problem area was mating the wing to
the fuselage. Fit is rather poor. Especially in the back where the wing is
way too thick for the cutout in the fuselage. There were also large steps
in the wing root area, despite my cutting
 down on areas where I thought
there'd be trouble prior to gluing. The back area got treated to the BAF
(Big-Ass-File) while the wing roots got several shots of filler. The
forward wing/fuselage join wasn't the greatest either. The wing root
intakes are here and, well, the end result is OK, but not that great.
During this filler-fest, the tailplanes were glued in and some filler used
for those. Same went for the separate rudder, which fit fairly well.
down on areas where I thought
there'd be trouble prior to gluing. The back area got treated to the BAF
(Big-Ass-File) while the wing roots got several shots of filler. The
forward wing/fuselage join wasn't the greatest either. The wing root
intakes are here and, well, the end result is OK, but not that great.
During this filler-fest, the tailplanes were glued in and some filler used
for those. Same went for the separate rudder, which fit fairly well.
After a short breather while I worked on something else, I
returned to the kit to finish things up. First was the gun sight. This
little piece was almost totally imbedded in the clear sprue and required
some careful cutting to get something that looked proper out of it. With
that installed and painted, it was time for the canopy bits. I should
mention that the front and rear canopy sections have the part numbers
switched in th e instructions. Anyway, I carefully cut the rear section off,
cleaned it up and test fit it in place. Way too tall. I then sanded down
the fuselage where it fit until things were more acceptable. Still a teeny
bit too tall, but a LOT better. Then the sliding portion was cleaned up and
glued in place followed by the windscreen. Actually, though the general
fit is not the greatest, it doesn't look that bad when done. The other
clear bit was the landing light. This piece is very much oversize for the
slot in the wing to which it fits. After some sanding down of this small
piece, I placed i
e instructions. Anyway, I carefully cut the rear section off,
cleaned it up and test fit it in place. Way too tall. I then sanded down
the fuselage where it fit until things were more acceptable. Still a teeny
bit too tall, but a LOT better. Then the sliding portion was cleaned up and
glued in place followed by the windscreen. Actually, though the general
fit is not the greatest, it doesn't look that bad when done. The other
clear bit was the landing light. This piece is very much oversize for the
slot in the wing to which it fits. After some sanding down of this small
piece, I placed i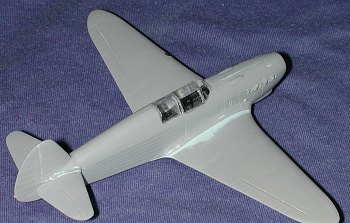 t in the opening and put lots of Ambroid Pro-Weld cement
in the opening. Then, using a pair of pliers, I forced the part into
position. The 'hot' liquid cement I use is a great lubricant for these
things as it 'melts' away
the plastic and forms a very solid bond. When dry, it was sanded down to
fit the wing and then polished using various grades of sandpaper.
t in the opening and put lots of Ambroid Pro-Weld cement
in the opening. Then, using a pair of pliers, I forced the part into
position. The 'hot' liquid cement I use is a great lubricant for these
things as it 'melts' away
the plastic and forms a very solid bond. When dry, it was sanded down to
fit the wing and then polished using various grades of sandpaper.
Turning to the underside, there is a coolant radiator and an oil radiator that need gluing in place. Both fit rather poorly and needed some trimming to get into position. Once there, the usual filler was needed to smooth things out to where they were presentable.
At this point, I had a pretty complete airframe that was properly 'fillered' and ready for masking and painting.
|
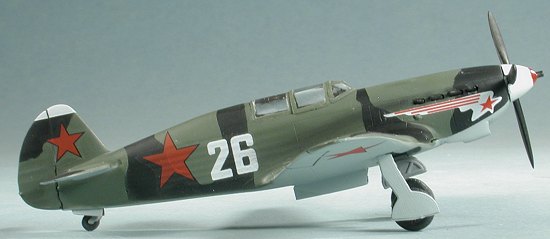
CAMOUFLAGE & MARKINGS |
 The clear bits were masked with Tamiya tape and then the underside was
painted with Aeromaster Russian Light Blue enamel. When dry, it was masked
and the upper surface painted with Aeromaster Russian Topside Green enamel.
This was thinned with lacquer thinner so it dried VERY fast. The upper
sides were then masked off and the remaining aircraft painted black as
stated in the kit instructions. As usual, it was an hour of masking
and five minutes of painting. I'd thought of free handing the camo, but in
1/72, it often looks better to mask. The fin tip and prop spinner were
painted white.
The clear bits were masked with Tamiya tape and then the underside was
painted with Aeromaster Russian Light Blue enamel. When dry, it was masked
and the upper surface painted with Aeromaster Russian Topside Green enamel.
This was thinned with lacquer thinner so it dried VERY fast. The upper
sides were then masked off and the remaining aircraft painted black as
stated in the kit instructions. As usual, it was an hour of masking
and five minutes of painting. I'd thought of free handing the camo, but in
1/72, it often looks better to mask. The fin tip and prop spinner were
painted white.
Back at the bench, the plane was put on its landing gear. This required a bit of clean-up as did the retraction struts. The wheels were then applied as were the gear doors. I had to use the alternated tail wheel doors as the original fell to the carpet and was quickly snagged by the carpet gnomes. Somewhere in this house is a stash of about 30 pounds worth of plastic bits!
Once those items were on, the model was given a coat of Future clear gloss
acrylic in preparation for the decals. Now I'd had less than positive
experiences with the ProDecals that come in this kit so I tried one from a
set of markings that I wasn't going to be using. No problems, so I
carefully applied the rest of them. Needless to say, the decals in this kit
are superb. A bit more clear trim around them than some others, but they
are very thin, go down well and are nearly totally opaque. The previous
problem must have been a one-time deal or just with that particular kit as
this time I was quite pleased with the results.
On the
|
FINAL CONSTRUCTION |
With the decals down and dry, the model was then taken back to the paint
shop for an application of clear matte, using my long-standing mixture of
Tamiya flat base and Future. Then the prop had the tip hand painted
red before installation, the 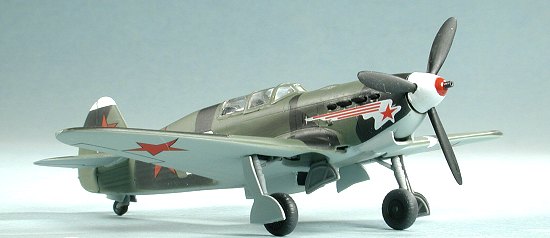 masking
taken off and a bit of pastel used for exhaust. I didn't use the radio mast
as most Russian aircraft didn't have radios because they were so poor. The
pitot tube I also left off as it had broken into many pieces and I was a
bit too lazy to make a new one!
masking
taken off and a bit of pastel used for exhaust. I didn't use the radio mast
as most Russian aircraft didn't have radios because they were so poor. The
pitot tube I also left off as it had broken into many pieces and I was a
bit too lazy to make a new one!
|
CONCLUSIONS |
There it is. Not a bad little kit and it looks nice when it is finished.
A bit more work that I was expecting when I first opened the box, but
overall, nothing that the intermediate modeler cannot handle. I really
appreciate how nice the decals are, for Yak-7s are not well taken care of
by the standard aftermarket folks. If your penchant is the VVS, you work in
1/72, and you need a pretty nice Yak-7B, well here you go! May 2003 Copyright ModelingMadness.com. All rights reserved. Thanks to IPMS Canada
and Sky Grid for the review kit. If you would like your product reviewed fairly and quickly, please contact
the editor or see other details in the Note to
Contributors.
#1269 in a series