Zvezda 1/72 Yak-3
| KIT #: | 7301 |
| PRICE: | $13.50 SRP |
| DECALS: | Two options |
| REVIEWER: | Scott Van Aken |
| NOTES: | New tool. Snap fit |

| HISTORY |
The
Yakovlev Yak-3 (Russian language:
Як-3) was a World War II
Soviet fighter aircraft. Robust and easy to maintain, it was much liked by
pilots and ground crew alike. It was one of the smallest and lightest major
combat fighters fielded by any c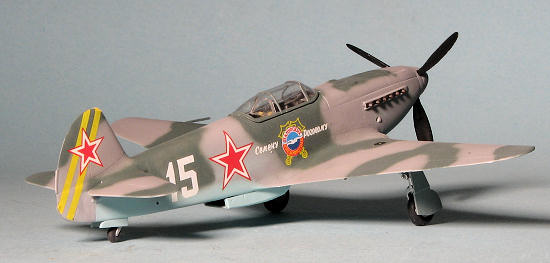 ombatant during the war, and its high
power-to-weight ratio gave it excellent performance. It proved a formidable
dogfighter. Marcel Albert, the official top-scoring World War II French ace, who
flew the Yak in USSR with the Normandie-Niémen Group, considered it a superior
aircraft to the P-51D Mustang and the Supermarine Spitfire. After the war
ended, it flew with the French, Yugoslav and Polish Air Forces.
In addition, since 1991, a number of true replica Yak-3s have been newly manufactured by Yakovlev for the warbird market using the original plans and dies. These are powered by Allison V-1710 engines and have the designation Yak-3M. Several of these are airworthy today, mostly in the United States, but also in Germany and Australia. Others have been converted as reproductions instead, to "Yak-3U" status from Yak-11 trainers for private owners, with these aircraft also being popular worldwide.
| THE KIT |
This is the first aircraft kit in Zvezda's 'My First Model Kit' line. It very much reminds me of the Hobby Boss quick build kits, though it has considerably more parts. I also notice that the kit is produced under license from Yakovlev, so it seems that even the Russians cannot get away from lawyers!
 A snap kit it may be, but the kit is quite detailed. A full
interior is provided and is molded onto the upper wing section. The wing is a
two part construct with the wheel well area being separate. The wells are nicely
detailed as well, though the well walls have cause long sink areas on the upper
wing that you can probably see in the sprues photo. I also found sink areas on
the main gear doors. These can be built raised if one wishes, though there is no
display stand. To help fill in the interior, the kit comes with a three piece
pilot, though I would have thought a single mold would have been enough to
handle this. Two different instrument panels are also provided, one with raised
detail and the other to take the decal. The interior also has a separate control
stick and rudder pedals as well as a seat.
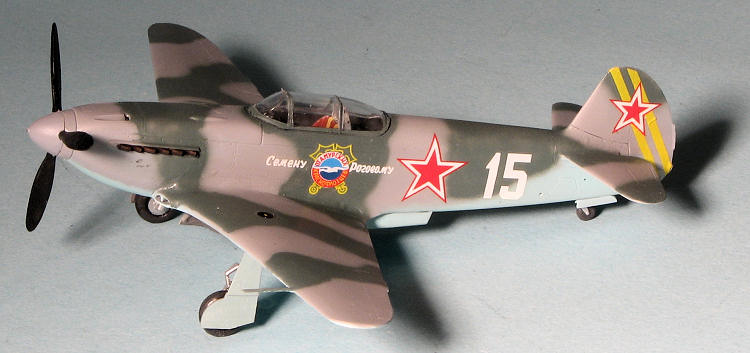
The prop hub is molded along with the propeller. A backing plate is provided that plugs into the nose section. Landing gear appear to be quite sturdy. The fuselage snap locks into the wing with the lower wheel well insert hiding the connection. Instructions are well done with markings options for two planes. One is the box art plane from Normandie-Niemen in the markings of their top ace, Marcel Albert. This plane is in the two greys scheme. The other is the mount of Semen Rogovoy in 1944. This one is in dark green and very dark grey. The paint call out refers to the darker grey as 'steel', but this is not the correct shade. Markings are well printed and for those who wish, there have been aftermarket sheets for this aircraft.
| CONSTRUCTION |
You would expect a snap kit to be boom, boom, done. Well, while I am sure that
those who just want to have a super fast build will be able to do that, those of
us who want a more finished product will use cement and take the time to fill in
seams and other things. Honestly, as nicely detailed as this kit is, it w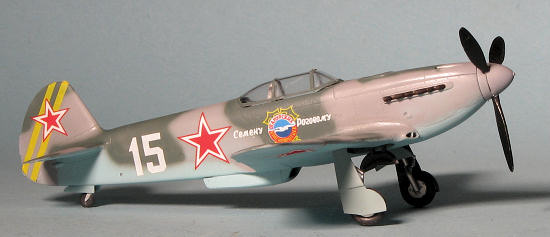 ould be
a shame to simply slam it together and say 'done'.
To get things underway, I cemented the lower wing section into the wing/interior assembly. There is not only a bit of a gap that should be filled, but the major wing assembly has some very large sunken areas just outside the wheel wells that really should be filled. For this purpose, I used my usual filler, which is super glue. This sometimes requires multiple applications, but the result is a nice, hard surface that sands well and does not shrink.
Once that was done, the cockpit was built up and tape used for the harness. I should mention that some of the parts are a very tight fit and I had to use glue to lubricate the join enough to get the parts to fit properly. Once that was done, the fuselage halves were joined, trapping the back part of the spinner in place. This was then given the filler routine and was joined to the wing. Again, an extremely tight fit and one where I had issues getting the forward section of the wing to fit into the curved cut out in the fuselage. In fact, I had to cut away a bit at the fuselage to get the wing to fit down all the way. Then the tailplanes were attached and a few sink areas were filled along with the very prominent seams on the fuselage from the wing fit.
With that done, the canopy was masked and then fit into place in preparation for painting.
| COLORS & MARKINGS |
 Though the
image on the side of the box shows the scheme I wanted to use as being a bright
green and black camouflage, no Yak-3s were factory painted in these shades.
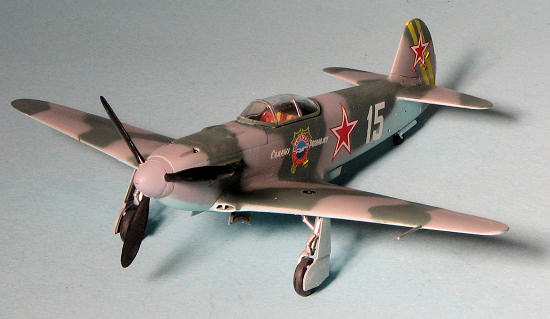
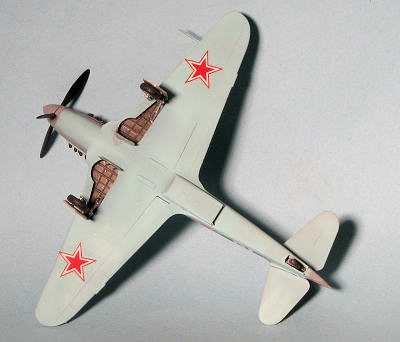
Instead, they were two greys over a light blue (AMT-11/12/7). I used Colourcoats
paint for this, but ran out of the AMT-7 so used RLM 78 for the gear doors. This
was hand sprayed as the instructions showed a rather loose pattern. I should
also mention that the instructions do not show the right side of the fuselage or
the right tailplane so one simply has to guess at how the pattern might be for
that area.
| FINAL BITS |
I then returned the kit to the bench to paint the
wheel wells and the landing gear. The instructions state that the wells are
silver, but from other sources, they are to be grey. I used the same color I
used on the cockpit, Tru-Color's NYC Light
 Grey, which
is actually a rather dark grey for this area. This paint is thinned for airbrush
use, but is thick enough to where it brush paints beautifully. Landing gear was
painted aluminum using Tru-color's Aluminum paint as were the wheel hubs.
Landing gear was then installed along with the retraction struts. They fit very
well.
I then gave the kit an overall gloss coat in preparation for the decals. I thought I had some 1/72 Yak-3 decals, but that was not the case so I used the kit markings for Lt. Semen Rogovoy in 1944. The markings came free from the backing in a very short time and stuck well. They also responded well to setting solutions. The yellow used is rather transparent, though the whites were nicely opaque. I did not use any of the stencil markings included. The prop was then attached, again, using glue to help get it in place. I then attached the wheels and gear doors, did a bit of paint touch up and then sprayed on a clear matte using Pledge and Tamiya matte base. The masking was removed and that was it.
| CONCLUSIONS |
Aside from the sunken in areas and the snap design of the kit, it is very nicely done. I think it is over-engineered for a snap kit with the small parts included, but if you treat it as a standard glue kit, you will be pleased with the results.
| REFERENCES |
 http://en.wikipedia.org/wiki/Yak-3
June 2012
Thanks to www.dragonmodelsusa.com for the preview kit. Get yours at your local shop or have them order it for you.
If you would like your product reviewed fairly and fairly quickly, please contact the editor or see other details in the Note to Contributors.