| KIT #: | FP 23 |
| PRICE: | 2000 yen |
| DECALS: | One option |
| REVIEWER: | Scott Van Aken |
| NOTES: | This is IT for injected plastic for this aircraft. |

| HISTORY |
The Yokosuka R2Y Keiun (景雲 - "Beautiful Cloud") was a prototype reconnaissance aircraft built in Japan late in World War II.
 Commissioned for the Imperial Japanese Navy after the
R1Y design was cancelled due to its disappointing performance estimates, the R2Y
borrowed from the German pre-war Heinkel He 119 in its use of coupled engines
driving a single propeller. It also featured a tricycle undercarriage giving it
an appearance similar to the Messerschmitt Me 509.
Completed in April 1945, the prototype made a short flight on 8 May, but was destroyed in a US air raid only a few days later, thus ending development.
A proposal was also made to develop the R2Y into a turbojet-powered light bomber by replacing its piston engines with two Ishikawajima Ne-330s. Designated the R2Y2 Keiun-Kai, the prototype was begun but never completed.
| THE KIT |
I saw this kit at the 2002 IPMS Nationals tand knew I
had to have it. I thought it was brand new, but was soon told that it had been
around for five years. Guess I hadn't been paying attention as it was the first
I'd heard of it. Molded in the usual grey plastic, it looks like every Fine
Molds kit I've ever seen. The quality of the molding is quite good and aside
from a bit of flash on a few parts, I
 only found some pesky ejector pin marks on
the inside of the gear doors. Others will disappear during construction. There
are also some sink areas on the long nose gear doors caused by the detailing on
the inside.
The cockpit is adequate and typical of what one gets from Fine Molds. There are seats, a control stick and instrument panel with raised detail. 15grams of ballast will be needed to keep this one on its nose and there is space to put it. The rest of the kit is unremarkable in terms of fancy stuff. It is about as basic a model as one can get. Only a few fiddly bits in terms of an exhaust or two and an intake. The transparent parts are thick but not overly so and clear enough to see what's on the other side.
Instructions are in Japanese as one would expect and a very nice (but unreadable by me) historical background sheet accompanies the kit. Color information is provided with Gunze references, but is basically dark green over orange as was typical of prototypes at the time. Only a set of hinomarus is provided with the white surround as separate decals. The white seems a tad translucent and it is more of an ivory color than pure white.
| CONSTRUCTION |
 After sitting on the shelves for many years, I decided
to give it a go. The kit is not parts intensive and typical of an early Fine
Molds subject, had a bit of flash to clean up. First order of business was to
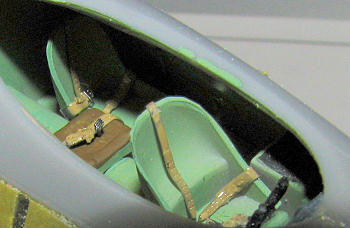
assemble the interior. This consists of two standard seats, a control column
with wheel and a flat pad. The nose gear well attaches under the floorboard.
According to the instructions, the interior is a light green. Well, the closest
I had to a light green is Italian Interior green and so that is what I used,
painting not only the interior bits, but the inside of the fuselage walls as
well.
The gear well was painted aluminum and I prepainted all the other gear bits with this color. Then the instrument panel and consoles were painted black with the central seat painted a leather brown. I installed Eduard IJN belts to spruce things up a bit.
 Moving to the fuselage, the side windows were
installed. These fit quite well and need to be pushed into place once the cement
softens up the surround. I also assembled the wings. Fit is actually very good
so far. The big challenge will come in finding room for 15+ grams of nose
weight! That issue came soon enough. I glued in the cockpit/nose well section
and let it dry. Then taking a half ounce lead weight and a few other bits, I
shaped them best I could and filled up the space in the nose, under the side of
the cockpit and just aft of it. That shou
 ld
be enough. I then closed the fuselage halves. It was a tight fit in the nose,
but overall the fit was good. It does show that not all that much will be
visible in the cockpit.
One does have to test fit the wing several times to be sure that there is clearance. I had to do some additional smishing and cutting on the weights to get a decent fit. Even then, there were small gaps, mostly the aft lower wing/fuselage join and on the upper roots. On the lower rear there was also a step that had to be fixed. These were dealt with using super glue. This also took several applications. Finding the additional hairline seams is pretty easy as once you sand the initial stage, the dust will fill those seams and make them quite visible.
With the wing finally in place and the joins smoothed out, the tailplanes were cemented in place. Next were the lower radiators, then the smaller intakes on the upper fuselage and the large dorsal intake. This did not fit the fore/aft curve too well so I had to hold the back end in place while the cement dried. I would suggest pre-bending the back of this piece prior to installation.
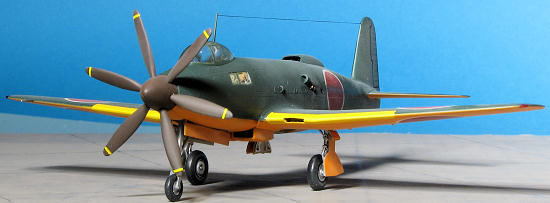
I then decided to paint the wing leading edge ID markings. First a coat of Floquil White and then some yellow. When dry, it was masked off. Then the canopy was masked off and installed. I also installed the small exhaust ejector stacks provided. The kit provides four of these, but only two are actually needed.
| COLORS & MARKINGS |
 I have to tell you that there was a considerable
impulse to do a whiffer with this kit. However, if a plane was built and flew or
at least was near flight status, I like to do it as it really was. As the R2Y-1
did make a test flight, that is how I painted it. By this time of the war,
prototypes were only painted orange on the underside. For this color I used
standard Tamiya orange thinned with lacquer thinner. I also took this
opportunity to paint the prop and spinner using the remnants of my Aeromaster
Japanese primer acrylic.
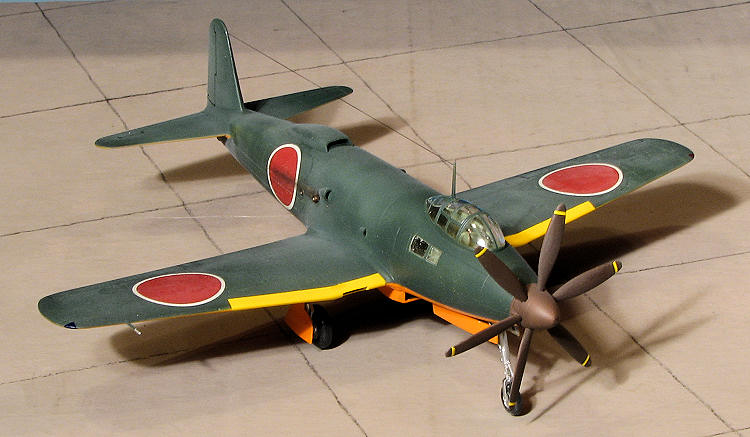
When the Tamiya had been given a day to properly cure, I masked off the orange bits and sprayed the upper surfaces with Nakajima Navy Green from the Colourcoats range. This shade is called out in the Fine Molds instructions, but as Gunze paint is not available in the US, I made the substitution.
| FINAL CONSTRUCTION |
With the colors in place, I then returned to the work
bench and installed the landing gear. The nose gear is quite wobbly so I used
some super glue after the regular glue set to be sure it would stay in place. It
was also gratifying to notice that I had enough nose weight as it did not tail
sit, even without the main wheels installed. I then sprayed on some clear where
the markings would be going using the new Pledge, with Future shine. Seems to
work about the sa me though it does smell different.
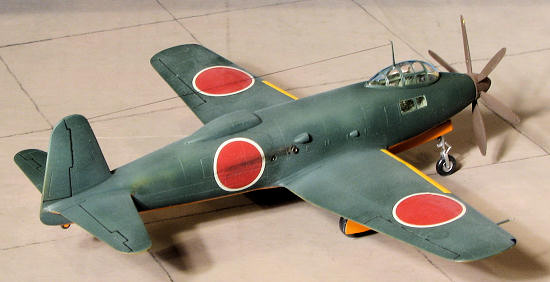
As this is the lone complete prototype, I used the kit markings, which are only roundels and a data plate. The Hinomarus have separate white backings so that it is the builder who is to blame if they are off register! I had to use very hot water to get them to come away from the backing and then after a long soak. They are quite thin and I did have some of the red sections tear. Mr. Mark Softener was used to get them to snuggle down as Microsol did not seem strong enough, especially for the fuselage roundels, which have compound curves to deal with. Once in place and dry, some clear matte was sprayed on everything.
I then went to attach the gear doors and do a bit more touch up painting. The masking was removed from the clear bits and I was pleased to see that the Tamiya tape once again did its job of keeping stray paint off the clear bits. Some EZ-line was used for the radio antenna, a bit of pastel work for the exhaust and the prop was put on the nose. That was it. Total build time about two weeks, which for me, is about right for a relatively trouble-free single engine prop build. I did not grunge it up as it was a prototype and not a combat plane.
| CONCLUSIONS |
 While not a new kit, it is a very nicely molded one
that generally fits quite well. The only other 1/72 kit of this plane that I am
aware of is an Eagle's Talon vacuform kit though there may be a resin one out
there as well. One glitch on my part is that I put the under wing radiators on
in reverse, but had I not told you, I doubt you would have been noticed. I
would like to think that this kit is still available and if so, you should
consider it as it does make into a most interesting looking aircraft.
| REFERENCES |
http://en.wikipedia.org/wiki/Yokosuka_R2Y
January 2012
Copyright ModelingMadness.com. All rights reserved. No reproduction in part or in whole without express permission from the editor. If you would like your product reviewed fairly and
fairly quickly, please
contact the editor or see other details in the
Note to
Contributors.