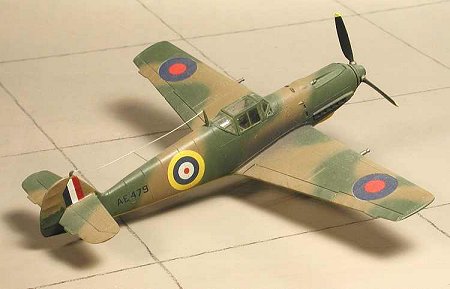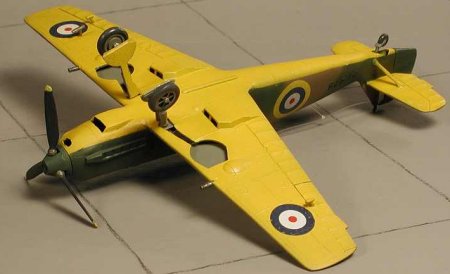
Heller 1/72 Bf-109E
|
KIT # |
234 |
|
PRICE: |
$3.00 or less at swap meets |
|
DECALS: |
One aircraft |
|
REVIEW : |
|
|
NOTES: |
` |

|
HISTORY |
As you all know by now, the Bf-109E was the first Daimler-Benz powered version, replacing the lower powered Jumo engine. It gave the plane a sleeker look and the additional horsepower to keep it competitive with Allied aircraft. The result was a plane that could fight with anything in the sky. With later variants, the inclusion of cannon upped the ante as most Allied aircraft of the time were armed with rifle calibre machine guns. The rather late inclusion of a drop tank (it wasn't available until near the end of the Battle of Britain), and a bomb rack increased the range and usefulness of the aircraft well into 1941 when the much more streamlined Bf-109F entered combat.
|
THE KIT |
 As I may have mentioned before, Heller was at the forefront of model
production in the late 1970's/early 1980's with a number of very interesting and
desired aircraft kits. They managed to produce every major variant of the Bf-109
in 1/72, though some were better than others (stay away from the Bf-109F). The E
model was one of the better kits. Molded in several different colors (like blue
or yellow) as well as grey, it had the then fashionable raised panel line
detail. It also had a nicely detailed cockpit and a three-piece canopy that you
could display open.
Now I must confess that this particular kit is over 15 years in age and I don't recall all the details regarding the inclusion of a drop tank or bombs, but it seems that they were there. The kit itself is a Bf-109E-4 and many were retrofitted with the racks. Heller's instructions were adequate with a single exploded view showing the parts placement and written in French. On the back were English and German translations. All paints were in Heller numbers. The decals that Heller used in their kits seemed to be made yellowed and were not used unless one had no choice of the matter.
|
CONSTRUCTION |
Construction is very straight-forward with no real surprises in store for the builder. The cockpit is an easy build and mine is RLM 02 grey with details picked out in black. The instrument panel is engraved so you can do some detail work if you wish. The prop was trapped between the fuselage halves when they were glued together. I did use filler on the seams as I ALWAYS need filler somewhere. The wings glued together well but needed filler on the front part where they attached to the fuselage. The wing roots also needed some attention, but a more careful builder would not need any filler there.
The canopy parts fit rather well, but not perfectly. The center section is best displayed open, though some careful fitting will get a snug fit in the closed position. The tail struts are the proper length and these fit quite well. Landing gear are a bit simplified with overly large oleo scissors. The wheels have the mounting hole drilled clean through so that you can heat the axle stubs to have rotating wheels (mine do). The aileron balances and pitot tube are oversize, but they are a snug fit and mine have not disappeared over the years. The under wing radiators look a bit odd to me. Not sure where they got that pinched look at the forward section but I don't believe they are shaped that way. Tail wheel is also a bit simplified.
|
PAINT & DECALS |
 I mentioned that the kit decals were yellowed. For that reason, I didn't
use them. Instead, I decided to do a captured version. The underside was painted
in yellow and when dry, masked and the upper surfaces painted with RAF dark
earth and green. I used Gunze Sangyo paints for this as during that period of
time, I used little else. Rummaging through my extensive Modeldecal collection
produced the various roundels, fin flashes and serial numbers to do a captured
version, AE 479. The Modeldecals went on very well and succumbed to setting
solution with no problems. Being a captured version, the prop was painted black
and had yellow tips. Some stretched sprue was used for an antenna.
|
CONCLUSIONS |
OK, so it isn't the most accurate and detailed 1/72 Bf-109E around. The Hasegawa one is more accurate and expensive and the Tamiya one is even more accurate and more expensive. So your choices are expensive Japanese kits that increase in price as accuracy goes up, or an inexpensive French one that is a bit less accurate. The Heller kit builds into a nice model. The rivet counters will avoid it like the plague. The rest of us will buy it, build it and be happy.
Copyright ModelingMadness.com. All rights reserved.
Review kit courtesy of me and my wallet!
If you would like your product reviewed fairly and fairly quickly, please contact me or see other details in the Note to Contributors.
2020