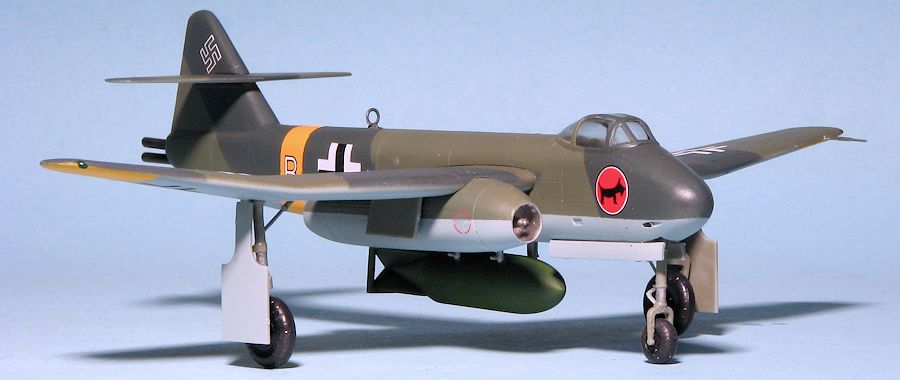
Bronco 1/72 Blohm und Voss BV P.178
| KIT #: | GB7001 |
| PRICE: | $44.00 SRP |
| DECALS: | Five options |
| REVIEWER: | Scott Van Aken |
| NOTES: | New tool kit |

| ALTERNATE HISTORY |
It was fall of 1943. The German army had just won a surprising victory against the rebounding Soviet Army at Kursk and the Red Army was on the run after having expended all their reserves. Much of this was due to quickly developed 'wonder weapons' such as turbojet propelled aircraft. There was little to stop the reinvigorated German army as they quickly regained of their lost ground. Much of this success was helped by the mass purges of senior Soviet army officers after the Kursk campaign, a purge that reached far into the ranks, eliminating most of the Red Army's experienced leadership and NCOs. Uncle Joe was not tolerant of failure. With inexperienced men in charge, the outcome was inevitable.
 Another
amazing event earlier helped as well. Hitler had decided to listen to his
generals and turned the war in the east over to them. It is rare that a dictator
stops meddling in military affairs, but previous debacles, including the near
loss of North Africa brought about an epiphany in the Nazi leader in late 1942
after the British landings. Pushing them back, especially after the Vichy French
in that area had changed sides was difficult to say the least.
A complete rethink of how the war was going resulted in some surprising actions including the invasion and subjugation of Malta, which had always been a thorn in the side of the Axis powers. This revitalized the sagging Italians, and along with German equipment, they had taken over the North African theater and were slowly pushing the British back towards Egypt. This was also helped in part by the increased destruction of British Mediterranean convoys to Egypt, which now had to go the long way around. With the attention of the British on North Africa, the Soviets lost their aid. All this was helped by a strong isolationist movement in the US that stopped Lend Lease shortly after it had begun.
Much of that was the result of the 1940 election of Wendell Willkie who ran an isolationist campaign, and while he had to deal with a Democratic congress, this was changed in the 1942 as Republicans gained control of congress. While not opposing Japanese aggression in Asia and the Western Pacific, the US let it be known that only an attack on US possessions would spark conflict and the Japanese had been judicious about leaving these areas alone. US businesses were also allowed to sell war materials to anyone who had the money to pay for it thanks to a pro-business stance, but the British and Commonwealth nations were told '..the free ride is over.'
All of this German success was helped considerably by the push to get turbojet aircraft into the air. It seemed there was no limit to the resources available, much of the funding coming (covertly) from American businesses, eager to make a profit from new technology. Thus the Luftwaffe underwent a transformation as jets started replacing piston engine aircraft.
 Nowhere was
this more evident than in the war against the Soviets. Thanks to jet power, the
Soviet pilots were unable to catch speeding fighters and jet bombers, such as
the P.178, were able to operate with near impunity. Even anti-aircraft was
unable to properly track the fast jets. Once the Soviet Army had been pushed
back behind the Urals, the oil-rich Caucuses were free to be exploited as well
as the many mineral deposits located there. The rest is (pseudo) history.
Reality:
The Blohm & Voss P.178 was an experimental jet-powered dive bomber designed during World War II by Blohm & Voss. The bomber had an unusual, asymmetric configuration.
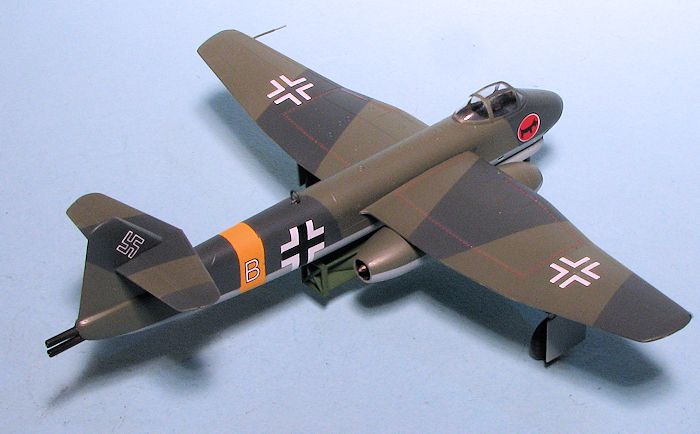
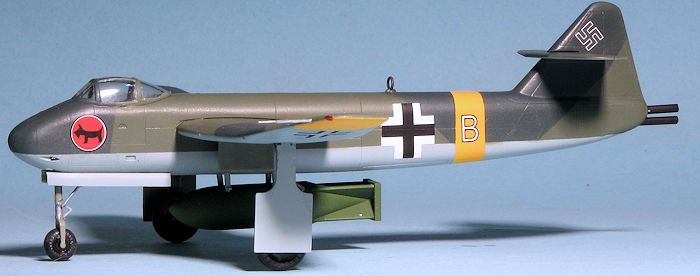
This asymmetrically-designed dive bomber had one Junkers Jumo 004B turbojet located under the wing to the starboard side of the fuselage. The pilot sat in a cockpit in the forward fuselage, with a large fuel tank located to the rear of the cockpit. Beneath the fuel tank, there was a deep recess in which an SC 500 bomb could be carried within the fuselage, or an SC 1000 bomb which would protrude slightly out of the fuselage. Two solid-fuel auxiliary rockets extended from the rear, used for take-off. Two 15 mm (.60 in) MG 151 cannons were located in the nose.
| THE KIT |
There are five grey sprues attached in two major sections along with a clear sprue. Typical of current 1/72 aircraft kits, the interior is well done, but Spartan, with a tub, seat, control stick, rudder pedals and an instrument panel. This sits atop the nose gear well piece. The instructions show 10 grams of weight being needed, but finding room for it will take a bit of work and most will pack weight behind the cockpit.
 The wings are two upper and lower halves and there is some
wheel well detail provided. Main gear is properly beefy with a separate oleo
scissor and retraction strut. Same goes for the nose gear. The model can be
built gear up and separate gear door sections are provided for that option.
The nose is separate from the rest of the fuselage, and this may well mean other similar aircraft will be offered in the future. There is a small bomb bay area in the back with a separate door that effectively seals off this area. A four piece engine will fit under the right wing and both wings have large tabs that go into slots in the fuselage. The main bomb, which looks like a 1,000 kg version, fits under the fuselage. One of the last steps is attaching the forward fuselage piece, but I'd do that prior to gluing the wings in case the seam needs attention. Both a single piece and multiple section cockpit covering is provided.
Bronco instructions are superbly
done with some color coding and 3D drawings to help install parts. There are
fictitious markings for five aircraft. Most are in a splinter scheme using late
war colors and all of them have yellow bands or wing tips as fits for planes
flying on the eastern front. Five nations are covered; Germany, Finland,
Romania, Hungary and Italy. The Hungarian tail colors will need to be painted
on. The Finnish insignia has split swastikas in the wrong color. They should be
a light blue and not black. The decals are superbly printed, so whatever you
choose will look great. Of course, since this is Luft '46, you are not limited
to what is provided in terms of colors or markings.
| CONSTRUCTION |
It has been a while since I've done a Luft '46 kit. Not all
that long ago, I did a lot of them, but once the fad seemed to fizzle, so did my
desire to build these sorts of kits. This kit is just the right kind of weird
for me to be interested so I got to it. The first things I did was to paint the
interior bits with RLM 66 or at least something close to it. The wings were
assembled, as was the bomb and the rear fuselage sections. A few notes on this.
There are pins and sockets fo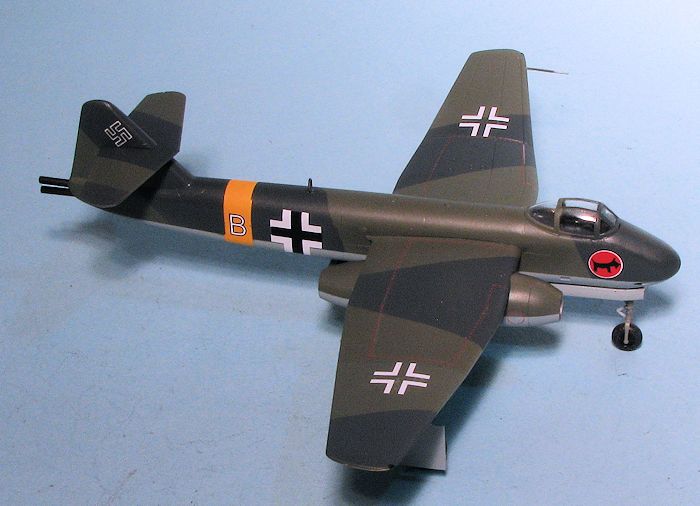 r the bomb, but they are too short so it is like
not having them at all. The rear fuselage has an insert that will fit too far
down into the fuselage so you need to be aware of this when gluing it in place.
Be sure to open the holes for the bomb braces before cementing the fuselage
halves together.
With that done, I built up the interior and then attached the front gear well piece to it. The wings were also cemented together. I also attached the tailplane. Now came the fun part. That is trying to find a way to get enough weight into the forward part of the plane to keep it from tail sitting. Apparently Bronco thinks it is impossible, and perhaps they are right as they included a clear tail stand. However, I crammed as much weight as I could in the various voids in the nose section as well as areas forward of the landing gear legs in the fuselage.
I then attached the nose halves together and later glued that to the fuselage. Actually, the fit of all the pieces so far has been quite good. Next were the wings, which have long tabs that sort of interlock with each other once in place. Be sure to get them overlapping in the right position or the wings will be all crooked. So I basically had a complete airframe in 24 hours of building.
Next I tackled the engine. Even with this piece I put some weight in the forward section of it just to help out. I also attached the oleo scissors to the landing gear. The canopy was then masked and installed. At this time I decided to start applying some paint before the construction went any farther.
| COLORS & MARKINGS |
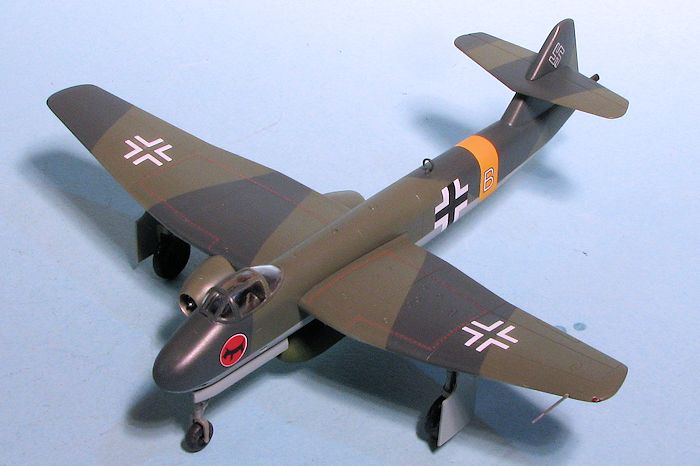
Most of the kit options are RLM 70/71/76. Now bombers should have a 65 underside and interestingly, the painting instructions point at the lighter green as RLM 70 black green. The first color I sprayed was white where the lower wing tips and fuselage band would be and when dry, that area was painted with RLM 04. These areas were then masked off and the underside was painted RLM 76. I masked those areas then went with RLM 71, followed by more masking and then RLM 70.
 Meanwhile, I assembled the landing gear legs and painted them
RLM 02. This shade was also applied to the inside of the gear wells and gear
doors. The gear legs were then installed along with their retraction struts.
These struts are super thin and I did break one removing it from the sprue so be
careful. I also installed the engine at this time. By angling the main gear
struts back a teensy bit, the airplane will not tail sit, but let a fruit fly
land on the tail and it will quickly clunk back.
At this point, I gloss coated the model with Future and then applied the decals. I chose the box art plane as I liked the unit badge. The decals are superb and went on without any fuss. All of the small multi-colored data decals were badly off register so I used only minimal markings. Note that the wing walk decals are reversed with the long one going on the wing with the engine. I then attached all the rest of the various pieces like antennas, pitot tube, gear doors, rocket exhaust and the bomb. The bomb rack pieces were a bit of a problem as I had one go flying off to who knows where so replaced it with a sliver of plastic card. I then sprayed a coate of matte clear, removed the masks from the canopy and after a bit of touch up painting, that was it.
| CONCLUSIONS |

| REFERENCES |
http://en.wikipedia.org/wiki/Blohm_%26_Voss_P.178
P.178 in Deetail and Skale
June 2015
Thanks to www.dragonmodelsusa.com for the preview kit. Get this one at your favorite retailer.
If you would like your product reviewed fairly and fairly quickly, please contact the editor or see other details in the Note to Contributors.