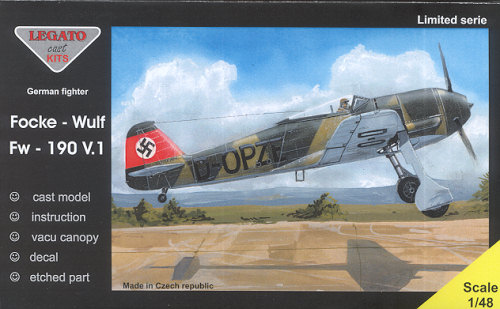
| KIT: | Legato 1/48 FW-190v1 |
| KIT #: | 4822 |
| PRICE: | $65.00 from www.coopersmodels.com |
| DECALS: | One option |
| REVIEWER: | Scott Van Aken |
| NOTES: | Resin with vacuformed canopy and photo etched parts |

| HISTORY |
After the 109 had been in service for a number of years, it was time to look for a supplemental fighter. In 1937 a request was made of Focke-Wulf to start work on an aircraft using either the DB 601 in-line engine or the BWM 601 12-cylinder, twin-row radial. Designer Kurt Tank chose the larger radial engine. While this took many by surprise, it is surmised that this choice was made because the BMW radial, being air-cooled, would not have radiators or other things hanging off the airframe to spoil the aerodynamics. It also was one less thing to worry about being damaged by enemy fire.
The unarmed prototype took off in June of 1939. It had a fan just behind the propeller to help cool the engine and it also had a large, ducted spinner in hopes that it would provide extra streamlining and speed. However, it just increased the engine's propensity to overheat. The second prototype also had the ducted spinner but was fitted with armament of two 13mm and two 7.7mm machine guns. Overheating was still a problem so the big spinner was discarded in favor of a close fitting cowling. While the prototype is easily recognizable as a FW-190, it went through many changes to the first production versions, the most obvious being longer wings and a shorter canopy.
| THE KIT |
 This
is the first Legato kit I've seen. Frankly, it looks to be very nice, though
there are a few things I should mention. First, the lower wing has some deep
scratches and some resin crud on it along with a small chip. A few other parts
also had this surface crud. It will be easy to remove during preparation and the
scratches/chip can be handled in the usual fashion of these things.
The kit is packaged with the fuselage halves in one bag, the rest of the parts in another and the wing unbagged in the bottom of the box. The decal sheet and etched fret are in their own bag with the lone vac canopy taped to the inside of the box. The canopy is fairly clear with a number of pips running along the upper 'spine' of the canopy and on the windscreen frame. I really hope that removing these will not put holes in the canopy as the prototype had a shallower and longer canopy when compared to production aircraft.
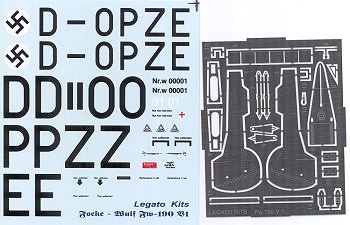
The rest of the parts are all very nicely molded with crisp panel lines and fastener detailing. There is some creative molding with some parts being molded inside of others (like the cowling/spinner). There is a nicely done cockpit, of which little will be seen once building is done (typical FW-190). This includes nicely done instrument panel and console detailing. Rudder pedals, control stick and seat round things off. A set of PE belts is also included. There are separate wheel wells to glue in place to the lower wing section with the centerline piece going with the fuselage. There is a nicely molded set of landing gear with PE for the gear doors. I'm not sure how well these gear will hold up to the weight of the kit after time, but one can rob these from a plastic kit if that is a concern. The rudder and the ailerons are separate moldings as well.
 As the
kit includes PE lower cowl flaps, you are provided with an engine mount and rear
accessory section, which I assume is visible through the cowl flaps. Probably
the most difficult part of the build will be to get the inner prop piece to line
up with the blades in the oversize spinner that was on the v1. The kit provided
grab handles and a canopy release handle. It is expected that the builder will
have the canopy open. For this reason alone, a second canopy should have been
provided.
Instructions are a single folded sheet. there is a parts layout, 13 nicely drawn construction steps that include color info and a decal data location drawing. Colors are all generic. There is a separate camouflage diagram in full color. You have basically two color options for one plane. The first is the initial rollout color of overall RLM 63 grey. The other is in a splinter pattern of RLM 70/71/65. Both have the exact same markings. The decal sheet seems well printed and thin. They are done by AviPrint so will require very careful handling. The red tail band will have to be painted on and I suggest either painting the while circle under the swastika or getting several white dots of the same diameter to prevent bleed-through. This all comes packaged in a sturdy lower box with a near paper thin box top.
| CONCLUSIONS |
I've been bugging Dave to send me one of these for quite some time and I'm glad he was able to provide one. They have been selling well and from the look of the molding I can see why. This is a must kit for any 190 fan and I'm very much looking forward to having a go at this one. Should be fun.
My thanks to www.coopersmodels.com for providing the review sample.
If you would like your product reviewed fairly and quickly by a site that has over 325,000 visitors a month, please contact me or see other details in the Note to Contributors.