| KIT: | Marsh Models 1/43 McLaren Mk. 1A |
| KIT #: | MM 65 |
| PRICE: | around $55.00 |
| DECALS: | One option |
| REVIEWER: | Scott Van Aken |
| NOTES: | Multimedia kit with resin body |

| HISTORY |
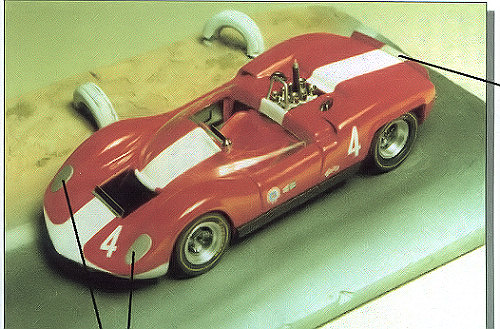
The copyright date on this box is 2001 so I'll assume that is when the McLaren 1A kits were produced. This kit is configured and in the markings for the LA Times GP at Riverside in 1965. At that time, McLaren wasn't the most successful driver around and his cars were getting beaten rather frequently by Lolas and Chaparrals amongst others. However, Bruce McLaren was nothing if not determined and eventually his cars went on to dominate Group 7 racing and the Can-Am to the near exclusion of everyone else.
One thing that McLaren did do was to build cars for customers who also wanted to go racing in big time sports cars. In the beginning, big time meant a V-8 of some sort and most displacements were around 5 liters. Eventually the engines got larger and larger to produce more and more horsepower, but for the M1A this usually meant a smaller engine down around the 300 cubic inch area. McLaren raced for quite some time using an Oldsmobile V-8.
| THE KIT |
 This kit has a resin body and all the rest of the parts
are metal of some sort aside from the vacformed windscreen and plastic tires. The resin body is
well cast with no air pocket and only some gunk on the bottom to remove so that
the metal chassis plate will fit properly. This plate and several of the various
bits are made from cast metal. This includes the seat, instrument panel, outer
lower body panels, engine/transmission block and the downdraft carburetors.
Most of the interior itself is photo-etch as are the various spoilers and some other bits and pieces. The wheels and velocity stacks for the carbs are machined aluminum. Exhaust are cast as are the wheel inserts and the steering wheel and the exhaust. Frankly, fitting the spokes into the steering wheel is a bit daunting. Tires are a somewhat hard plastic. You'll find some parts not used as the photo-etch in particular has little badges for four different versions.
 The instructions are a single sheet with one side
showing color photos of the completed kit (though not the back view). The other
side has a parts listing with a paint chip (Rover Blaze so you can pop down to
the parts store and pick some up), and an exploded view showing where everything
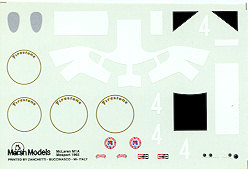
goes. There is a single decal sheet for the #4 car and I've had good luck with
Marsh Models decals. You may want to paint the white areas instead of relying on
the decal and save the decal for touch-ups. The decal also includes the tire
markings.
| CONCLUSIONS |
I've enjoyed every Marsh kit I've built and I know you will as well. The most difficult part is really cleaning the cast metal bits and getting a good paint job. Mine always end up seeming a bit scruffy. This will add one more great 60's sports racer to your collection.
By the way, if anyone knows what that black post sticking out of the engine is supposed to be, I'd be interested in hearing about it.
Thanks to me and my budget for this one (though Marsh has promised several times to send a review kit or two).
November 2006 If you would like your product reviewed fairly and quickly by a
site that has over 300,000 visitors a month, please
contact
me or see other details in the
Note to
Contributors.