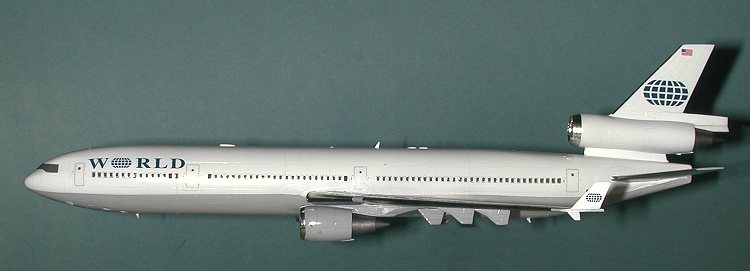
Hasegawa 1/200 McDonnell Douglas MD-11
|
KIT # |
10108 |
|
PRICE: |
$23.95 |
|
DECALS: |
Three JAL aircraft |
|
REVIEW : |
|
|
NOTES: |
'J-Bird' |

|
HISTORY |
If you want a nice history of this aircraft as well as a look at what comes in a representative Hasegawa 1/200 MD-11 kit, I suggest you read this review. This particular MD-11 kit was bought in with a batch of other airliners of this scale. It came with no decal sheet, which was fine with me as I rarely use kit provided decals when doing airliner models, preferring the often superior aftermarket ones.
|
CONSTRUCTION |
Now I wanted to do this kit as a stand model. Since this is sort
of a second generation Love Liner, (as opposed to the all new kits like the MD-90), it is not designed to be displayed with gear up.
This means some constructive filling and card work will need to be done to
it. But first, the simple stuff needs to be done. This consists of gluing
together the wings, engines, tail, and fuselage. Since I was using decals, I
added the canopy to the model at this stage. Fit is acceptable, though it is
obvious that filler will be needed. It is also nearly impossible to fix the
seams in the engine intakes. There are creative methods, but I did none of them
and left them as they were. Anyway, the kit needed a lot of filler. Mostly in the areas of
the stand mount and landing gear wells, as well as around the cockpit where the
canopy fits. This took multiple sessions to ensure proper drying and shrinkage
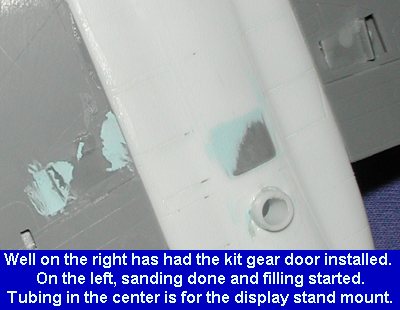
of the filler. What I did for the main gear was to use the kit doors and then
file down the bit that sticks up and fill in the gaps. The center wheel well has
an insert so that was no problem. For the nose gear, I simply cut off the ones
molded in and used them to fill the well. I also managed to lose the insert that
goes into making the stand mount. What I then did was enlarge the hole and
insert a piece of tubing. I'll then insert a section of sprue to fill the tubing
then drill a hole in the sprue when all is dry for the stand. At least, that is
the plan, so we'll see if it works! (It did)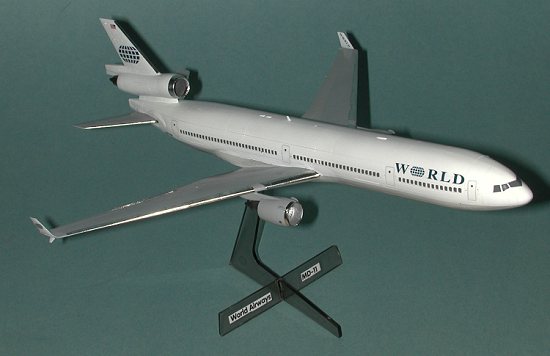 Having built a number of 1/200 Hasegawa airliners in general and
a number of DC-10s in particular, I pretty well knew what to expect from this
one. Unlike the earlier DC-10, this kit is fully engraved and to a higher detail
level than the DC-10, a nice surprise. It is also a longer model. Like the
DC-10, it has basically the same parts breakdown, so there are no surprises.
 Many airliner modelers like to fill in any cabin windows in
preparation for using decals and that is generally the way I like to build them
as well. I decided to buck this trend and left the windows
unfilled. Two reasons. One is that I would have destroyed all the detail around
them and second is that I'm lazy. If it looks horrible later on, I can always go
back and fill them. Some makers nowadays are doing airliner kits with
smooth fuselages so we don't have to fill in the windows! Naturally, you can't
please everyone as there are those who like having holes in the side of
their airliners. :o)
|
PAINT & DECALS |
Once the wing, tailplane, engine inlet
and tail leading edges were foiled (curses, foiled again!), I applied Liveries
Unlimited's corroguard inspar panel decals. These are really made for the DC-10
and not MD-11 so the ends are not exactly the same. However it does not detract
at all from the kit. However, let me give you a bit of warning. Do not use
Solvaset on them. I did and regretted it. Perhaps the key is to dilute it some,
but I ended up with a zillion little bubbles on the corroguard panels. The smart
option would be to remove the old decals and put on new, but this kit is
destined to be a shelf sitter and not to be a contest model so I left it.
Finally, it was on to application of
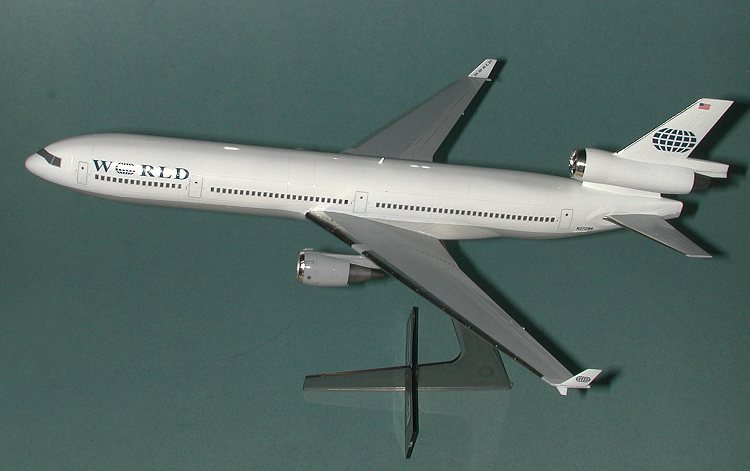
the decals themselves. I used Livery Unlimited's sheet A2-045 for a World
Airways MD-11. This is undoubtedly one of the most unexciting liveries around.
And rightly so as World often leases its planes to other airlines. This saves on
a lot of overpainting. It also makes for a pretty basic paint job on the part of
the modeler as it requires minimal masking! The decals fit
beautifully as was to be expected. The one thing I noticed was that they took
seemingly forever to come loose from the backing sheet. Though I didn't fill in
the windows, I used the kit window decals to cover as many of them as possible
to prevent the see through look. The window pattern for the World MD-11 is a bit
different from that of the molding. There are more windows in the Hasegawa kit
than what was given on the decal sheet, but the overall effect isn't that bad.
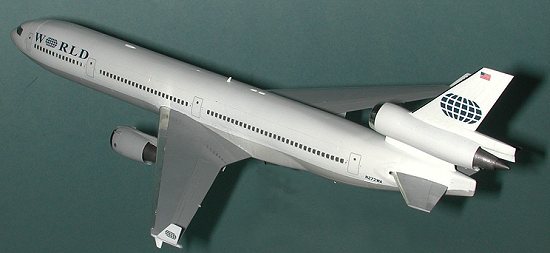 What with the
wings attached and all the puttying now done it was time to add some paint to
it. I had a very nice bottle of gloss grey that looked good. So I sprayed most
of the wings, lower fuselage and tailplanes with this stuff as well as the areas
that had filler. This fills the holes in the filler and smoothes things out very
nicely. Then the grey parts were masked and the rest of the airframe painted
gloss white. I didn't cover all of the wings and tail planes as I would use
corroguard decals for the middle. Once that had dried, went back to touch up the
grey. To my disappointment, the stuff I mixed had dried solid. Very unusual.
Equally unfortunate was the fact that I didn't know where the paint came from so
rather than mix a different color, I just left it and hoped for the best. (I
realize this may be shocking to many of you, but I am basically a lazy modeler
and hate to do things more than once if I don't absolutely have to. No way was
this to be a contest kit so I accept the minor glitches.)
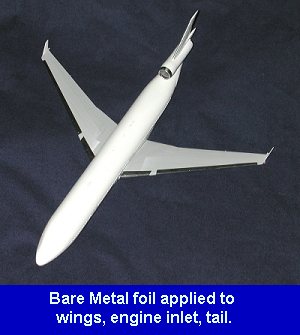 Now
that the kit was basically painted, it was time to add some embellishments. This
means dragging out the Bare Metal Foil. This stuff is perfect for doing the
leading edges of airliner kits. You do waste quite a bit, but the final effect
is well worth it.
|
CONSTRUCTION CONTINUES |
Next things were the attachment of the tailplanes and the flap
actuator arms under the wings. The tail cones were glued into the back of the
engines and the main engines were then glued to the underside of the wing.
Finally, there is a small fairing that gets glued just above the tail engine and
the kit is  Maybe it is just me, but it seems to take over a week to decal
an airliner. I guess it is just me in that I like for one batch of decals to be
totally dry before handling the aircraft and adding more. Anyhow, once they were
on, the next thing to do was to drill out the hole in the bottom for the stand.
This takes a 7/64 drill bit to match the Hasegawa stand.
 complete.
|
CONCLUSIONS |
I made a LOT of mistakes with this kit. More than usual. Not
sure why as the kit itself is not that difficult to build. Disregarding those
glitches, the kit is just as I was hoping it to be. A relatively easy build with
no major problems that were not self-inflicted. Were I a more careful builder, I
think that none of my problems would have occurred. Final
analysis is that this is a kit that can be recommended to all types of builder.
In spite of the relatively small parts in the wheels and such, all skill levels
can produce a very nice model and one they will enjoy November,
2000
Copyright ModelingMadness.com. All rights reserved.
Review copy courtesy of me and my wallet!
Late Note: Liveries Unlimited has been out of business for a considerable time and the sheet used for this article is no longer available.
If you would like your product reviewed fairly and fairly quickly, please contact the editor or see other details in the Note to Contributors.
Back to Reviews Page 2021