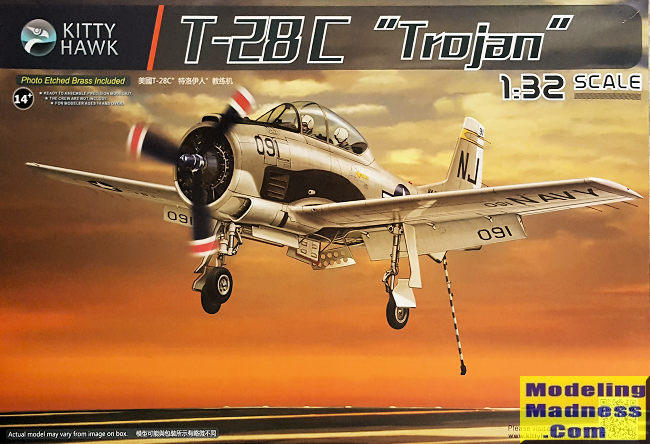
Kitty Hawk 1/32 T-28C Trojan
| KIT #: | KH 32015 |
| PRICE: | $ |
| DECALS: | Five options |
| REVIEWER: | Scott Van Aken |
| NOTES: |

| HISTORY |
After becoming adopted as a primary trainer by the USAF, the United States Navy and Marine Corps adopted it as well. Although the Air Force phased out the aircraft from primary pilot training by the early 1960s, continuing use only for limited training of special operations aircrews and for primary training of select foreign military personnel, the aircraft continued to be used as a primary trainer by the Navy (and by default, the Marine Corps and Coast Guard) well into the early 1980s.
The largest single concentration of this aircraft was employed by the U.S. Navy at Naval Air Station Whiting Field in Milton, Florida, in the training of student naval aviators. The T-28's service career in the U.S. military ended with the completion of the phase-in of the T-34C turboprop trainer. The last U.S. Navy training squadron to fly the T-28 was VT-27, based at Naval Air Station Corpus Christi, Texas, flying the last T-28 training flight in early 1984. The last T-28 in the Training Command, BuNo 137796, departed for Naval District Washington on 14 March 1984 to be displayed permanently at Naval Support Facility Anacostia, D.C. Many T-28s were subsequently sold to private civil operators, and due to their reasonable operating costs are often found flying as warbirds today.
| THE KIT |
 Kitty Hawk has provided quite a bit of detail with this one. Included
in that is a very nicely done cockpit complete with seats, side consoles,
control sticks, instrument panels and braces, rudder pedals and other parts. The
majority of the photo etch provided is used to build up each of the seat
harnesses. Rather than offer a single p.e. stamping, Kitty Hawk provides the
flat bits and one then threads and attaches the harness buckles and clasps to
it. A lot of work for belts, but I'm betting the results are worth it. The
instrument panels and side consoles are
 no longer etched bits, for which I am
glad. Instead, you get nicely raised detail and decals to fit over this detail.
While it may sound lame, this actually works very well. You can still paint the
panels if you so desire.
One then builds up the nose gear well and installs the nose gear. Three different nose wheel options are provided. Two are Navy style with high pressure tires; one having a spoked wheel and the other a steel one. The third is a low pressure tire used on T-28Ds. The instructions do not tell you which marking option uses which wheel, nor are the color and markings pages helpful. You'll need to do some research on the plane you are modeling to make that determination.
A major portion of the parts count goes into the engine and accessory section. This is quite detailed and where the smaller etched fret is utilized. The pushrod and ignition harness pieces are particularly nicely done and having them in plastic makes them easier to install. Once the engine assembly is done, this, the cockpit and the nose gear assembly are mated with the gear well being the common mounting area.
Each of the main gear wells for the fuselage are built up from five pieces and installed in the fuselage. One then attaches the engine/cockpit assembly with two hefty weights fitting in the fuselage halves just behind the engine. A rudder spar is attached when the fuselage halves are glued together.
One can display the engine cowling bits open if one wishes and to do so, there are small cowling panel stubs that are glued on. Conversely, one can hide the engine and accessory section by having the cowling closed. I should mention that it is normal to have the cowl flaps open on the ground and one can see into this area through those open flaps so don't try to shortcut the detail in there. Another item that can be displayed down is the speed brake. Kitty Hawk has taken a short cut on the brake well by putting in spurious framework detail. I can tell you from experience that this well should be more open as there is avionics in there. I can recall r&ring an ARC-27 radio from a transit aircraft at Alameda when I was stationed there, and it was located in this area
Not surprisingly, there is a separate lower tail area. This is to allow the different lower rear fuselage and rudder to be attached for the hooked T-28C. It appears that Kitty Hawk has tried to duplicate the static dischargers on the rudder and elevators. The rudder trim tab is separate as are the elevators, ailerons, and flaps. Each of the main gear wells in the wing is an eight piece construct with separate stringer pieces. There are two different wheel styles for the main gear. One is spoked and the other is not. Again, no information on which is to be used with which markings option. There are also a pair of clear lenses for the wing leading edge and once more, no indication of what option has these or not.
The clear bits consist of a windscreen and the two sliding canopy parts. The instructions show them closed. The prop has a three piece hub with separate blades. Two styles of blades are provided though the instructions would have you use only the thinner ones. The tips of these blades look a bit odd. They are not really the more rounded version, yet they are not really clipped square, but somewhere in the middle. Take the time to search period photos to determine just how these blades are to look. Warbirds are not good references.
Now to things under wings. There is a lot of stuff provided for
weapons. Let me first say that Kitty Hawk has already opened all the wing holes
so those doing straight trainers will have to fill them all as these planes
rarely carried racks. It seems there are more racks than the reference states
were carried. You will need to do some research to see what your plane actually
carried, if anything at all. The C model was mostly used for carrier
qualifications. The kit offers two styles of gun pods as well as rocket pods and a
couple of bomb styles to choose from. Much if not all of this will find use in
your spares bin.
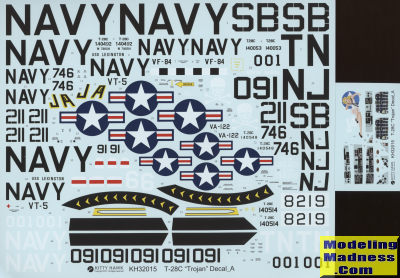
Instructions are very nicely done in Kitty Hawk's usual booklet style with large color foldouts for the color options. Color information is provided throughout the build process. You get several markings options, all of which are colorful, and here lies the rub. Some of these are warbirds as they include N registration numbers. Of course, you can simply not apply that decal and you should be good to go except in two cases. One is in a faux Jolly Rogers scheme and another has a TN tail code and girlie nose art. I'm also not sure about the all yellow one and the SB code on the fin. However, you can be sure that the aftermarket crowd will help to provide options. Besides, there are modelers who like to do warbirds and this kit provides that option for them. The decals are superbly done, very thin, and with minimal carrier. I should add a kudos to Kitty Hawk for not only providing a large decal sheet, but also for providing a zip bag for them. I wish all model companies did this.
| CONCLUSIONS |
Kitty Hawk has provided the large scale builder with an excellent kit. It does have a few areas that could be improved, but other than the missing gun sight and the spurious speed brake well, it seems like everything is there for you to build a nicely done T-28C. If the kit has a downfall, it is the need to fill in the holes in the lower wings for an unarmed plane. I do wish that KH and some other companies would leave those flashed over and provide the modeler with the option. These things are really rather minor in the scope of things, and none of this really takes away from what is a superbly molded and most welcome kit.
| REFERENCES |
https://en.wikipedia.org/wiki/North_American_T-28_Trojan
August 2017
Copyright ModelingMadness.com
Thanks to Glen Coleman and Kitty Hawk Models for the preview kit. You can find this kit at your favorite hobby shop or on-line retailer.
If you would like your product reviewed fairly and fairly quickly, please contact the editor or see other details in the Note to Contributors.