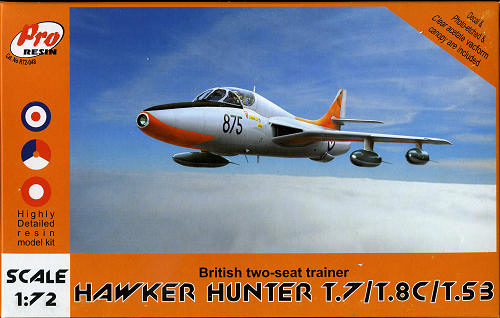
Pro Resin 1/72 Hawker Hunter T.7/8C/53
| KIT #: | R72-048 |
| PRICE: | $60.00 SRP |
| DECALS: | Four options |
| REVIEWER: | Scott Van Aken |
| NOTES: | Resin with etched parts and vacuformed canopy |

| HISTORY |
The Hawker Hunter was a British jet fighter aircraft of the 1950s and 1960s. The Hunter served for many years with the Royal Air Force and was widely exported, serving with 19 air forces. A total of 1,972 Hunters were produced by Hawker Siddeley and under license.
Two-seat trainer versions of the Hunter, theT 7 and T 8 remained in use for training and secondary roles by the RAF and Royal Navy until the early 1990s.
The Hunter was exported to over 20 countries, each nation accepting at least one two seat aircraft for conversion training.
| THE KIT |
 Pro Resin's kit is molded in the usual tan shade that we have come to expect from most resin kits. You notice right away that there are a lot of parts in the bag and with them all hitting each other in transport, it is expected that some would break free from the pour stubs, which is what happened to some of the smaller and more delicate pieces. Most were clean breaks but others were not. Those who build resin kits pretty much expect this sort of thing, but beginners may be put off by it.
Detailing is superb. Molding is very nicely done with minimal voids. The kit's nose section and wheel wells have nicely molded in detailing. The fuselage is in four sections, which is OK, but I'm sure most would have preferred it to be just two pieces to eliminate the additional seam. However, it does offer the possibility of doing other Hunter variations. The kit has a separate nose section as often that is the major difference between variants. Two drop tanks are provided for the inner stations and there are also outer pylons in case you wish to add something there.
The nicely done one piece wings have separate flaps and the intake is molded in one section as well, making for no worries on inside seams. The pylon attachment holes are pre-drilled in the bottom of the wings so if you want to leave any off, you'll need to fill the holes. The cockpit comes with separate rudder pedals and control sticks. The seats are well molded, look to be the proper type and have harness detail molded in place. Photo etch is used minimally consisting of the rudder pedals, instrument panel and  dual windscreen wipers for the vacuformed canopy. Thankfully, two of these are supplied in case you goof on one or want to have the canopy open. I should also point out that there is room in the nose section for weight if you feel it needs it. The instructions don't list any, but I'm always gun-shy when it comes to resin and will put weight in there just in case. The kit is also supplied with nicely done landing gear, doors and wheels. The speed brake can be shown raised or lowered. I should also note that the tail section has the parabrake housing molded in place, which I believe is the norm for all two seat Hunters.
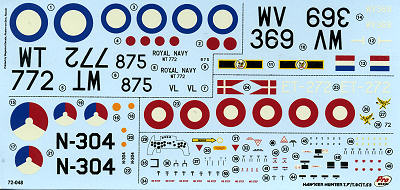
Instructions have seven nicely drawn construction steps that include color information. This is provided with generic, Humbrol, Model Master and Revell color references. There are markings for four aircraft. One is a Dutch T.7 in overall aluminum dope with bright bits on the nose, tail and wing  tips. The color called out is Insignia Red, but I'm pretty sure that is wrong and these bits should be dayglo orange as was the norm back then. Same with the FRADU T.8C in terms of color callouts. This aircraft also has a flat nose tip with a light in it and that nose is supplied with the kit. Third option is a Danish T.53 from 724 squadron in 1963. This and the following aircraft are in standard RAF scheme of gloss colors with an aluminum painted underside. The RAF option is a T.7 from 28 Squadron based in Hong Kong during the mid 1970s. The decals are very nicely printed by Begemont and provide a full stencil suite with the instructions having an excellent stencil placement guide.
| CONCLUSIONS |
A very nice resin kit that will surely appeal to many. There have been conversions in both vacuformed plastic and resin available over the years, but now we have a complete kit with some excellent markings choices.
| REFERENCES |
February 2011
Thanks to Pro Resin for the preview kit. Visit their website for a list of retailers.
If you would like your product reviewed fairly and fairly quickly, please contact the editor or see other details in the Note to Contributors.