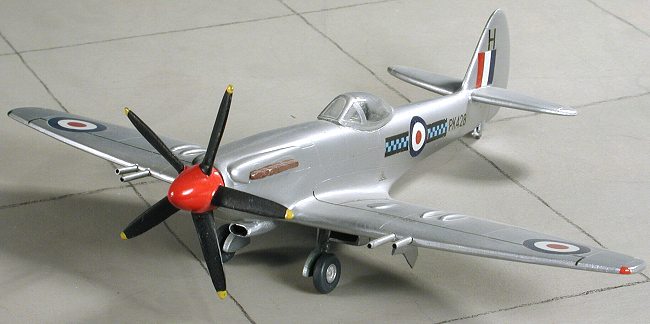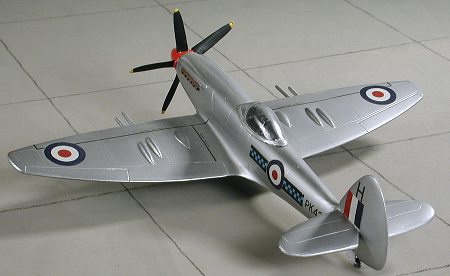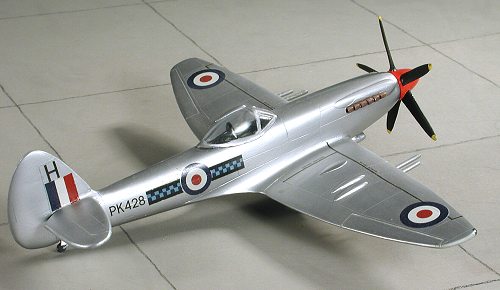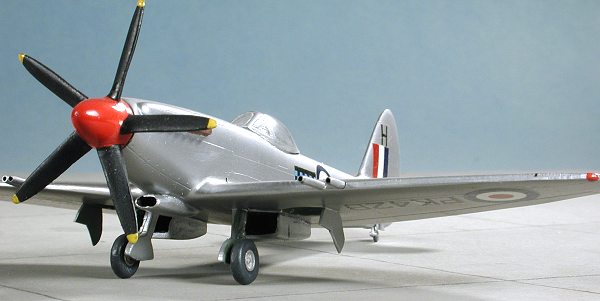
Pegasus 1/72 Spitfire 22
| KIT # | 2001 |
| PRICE: | $10.00 back in 1986 |
| DECALS: | One aircraft |
| REVIEWER: | |
| NOTES: | Short run kit |

| HISTORY |
One of the last production Spitfires for the RAF, the Spitfire 22 was the penultimate Spit, only surpassed by the Mk 24 in RAF Service. So much had the design changed over the years, that there were almost no common parts between this version and the first Spitfire I. Despite being near the end of the line, 278 were built and saw service with several squadrons.
 The difference between the 22 and the earlier 21, was basically that the Spit 22 had a bubble canopy. Initially the engines were the same Griffon 61s driving a five bladed prop. Some later Spitfire 22s had the newer Griffon 85 and had a 6 bladed contra-rotating propeller similar to that as on the Seafire FR.46 and 47. Well over a hundred Spitfire 22 airframes were converted to Spitfire 24 standard. Most of the later mark Spitfires were given over to the Auxiliary Air Force units as the regular RAF was converting to jets as fast as they could. Even as piston powered aircraft, the Spit 22 was among the fastest of the type with a top speed of 454 mph. They were also among the longer ranged Spitfires with a possible range of 880 miles when maxed out on fuel (and, I would suppose, auxiliary fuel tanks).
| THE KIT |
 One now thinks mostly of the Czech Republic when it comes to short run kits, but when I started building them, it was Pegasus that had the first decent kit. My first short run kits prior to this had all been Merlin with their banana-fuselage Ki-32 being the first. Unlike today's short run kits, these were all made from incredibly thick plastic. The wings and tail planes were all molded in one piece with only the fuselage being in halves.
The kit included metal landing gear legs and a few metal interior bits, if memory serves me correctly. Overall, the level of detail wasn't that bad, but you must remember this was the mid 1980s so technology wasn't up to current expectations. Probably the two worst molded parts were the canopy (incredibly thick) and the prop (which had huge areas that needed thinned down). Most of the small bits had to be made, such as the cannon barrels and smaller gear doors.
| CONSTRUCTION |
"....begins with the interior." Actually, there aren't any subassemblies on a kit like this. It is rather minimalist when it comes to total parts count. However, there was an interior to be built up, regardless of the fact that one could see no more than a suggestion of it through the canopy. It really consisted of no more than a floor, stick, seat and instrument panel. Some of those bits were Aeroclub metal accessories as the kit parts were a bit thick and crude. They were appropriately painted (black, I believe), and glued into the fuselage. Then the two halves were joined and the usual filler used.
 One nice thing about these Pegasus kits is that because they are low pressure injection molded, the plastic is quite soft, so getting a good glue join is easy. The carb intake was then glued to the underside of the nose. With the fuselage done, the wings and tail planes were butt joined and the usual slathering of filler took care of the seams. The two large under wing coolers fit without any real fuss, though a touch of filler was needed to smooth them into place.
It was then on to the landing gear. As I mentioned, it was in metal and well formed. Holes were drilled and superglue used to affix them. The main wheels were metal as well, so mold seam was cleaned up and the hub drilled so they would fit to the gear axles. I left them off until after the kit had been painted. As mentioned, no small gear doors were supplied, but the instructions did have a template so that was used and the doors made out of plastic card.
I should have a word on the instructions. They were basically a three view on one side and a written construction sequence on the other. With an aircraft as simple as this, no more was really needed. It does say 'For experienced builders only', so a tyro shouldn't be tackling a kit of this type. We experienced builders had no trouble assembling this one!
Anyway, an additional part that needed made were cannon fairings/barrels. I used Contrail Tubing for this (actually, I bought a LOT of that tubing and still have a significant amount on hand after all these years). The wing leading edges were drilled out (there are dimples showing where they go) and the tubing installed. The canopy was trimmed as well as I could and then glued on. When dry, it was masked and it was time to paint!
| PAINT & DECALS |
 For this particular plane, overall aluminum was the required scheme. No black anti-glare panel or any other real coloration. I don't remember if I was undercoating my metallic finishes back then, but looking at the kit, I'd say not. I did use Testors non-buffing Aluminum Metallizer on it and when it was dry, sprayed a clear gloss on it to dull the metallic look of it.
I then brought it back to the bench and installed the main wheels. I left the hubs in their metal color and painted the tires a black/grey mixture I was fond of at the time. It was then that the decals were applied. Now I don't recall the unit, but it may have been 601 Sq. The decals in Pegasus kits are done by the same people who did Modeldecal and they are really well done. In addition, they stick quite well and do not need any setting solutions. Looking at the pictures, I see that the white was a touch off register, but apparently it wasn't such a bother as to have me replace the roundels.
| FINAL BITS |
 Not much in the way of final bits for this one. The exhaust were painted and installed (at least I think they were separate parts). Wing tip lights were painted and any other touchup painting done. The last thing, after the canopy was unmasked, was the prop. I already mentioned how horrid the kit one was. Fortunately, Aeroclub makes a super Spitfire 5 bladed prop in metal. This was cleaned up, the hub painted red and the the blades black. The kit prop had no prop shaft and, like most of the other kit parts, was to be butt glued to the front of the plane. The small prop shaft on the Aeroclub propeller was enough for me to use and I drilled a small hole to accept it. The prop was then pushed in place. The last thing done was installation of a small whip antenna (which has since broken off) on the fuselage spine.
| CONCLUSIONS |
You know, even today, the Pegasus Spit 22 is a decent model. Old, yes. A bit bare in detail, yes. The only decent 1/72 Spitfire 22, yes. The only other one I can think of is the even older Hawk kit from the 60's. (Late note - 2017: Airfix has come to our rescue in this regard and you can now have a thoroughly modern tool Spit 22 for your shelves)
Review and Photos: November 2002
Kit built: December 1987

Copyright ModelingMadness.com. All rights reserved.
If you would like your product reviewed fairly and fairly quickly, please contact the editor or see other details in the Note to Contributors.