| KIT #: | 127 |
| PRICE: | $4.00 in a bag. no instructions, no decals |
| DECALS: | Supposed to be two options |
| REVIEWER: | Scott Van Aken |
| NOTES: |

| HISTORY |
The C-47 was vital to the success of many Allied campaigns, in particular those at Guadalcanal and in the jungles of New Guinea and Burma where the C-47 (and its naval version, the R4D) made it possible for Allied troops to counter the mobility of the light-traveling Japanese army. Additionally, C-47s were used to airlift supplies to the embattled American forces during the Battle of Bastogne. Possibly its most influential role in military aviation, however, was flying "The Hump" from India into China. The 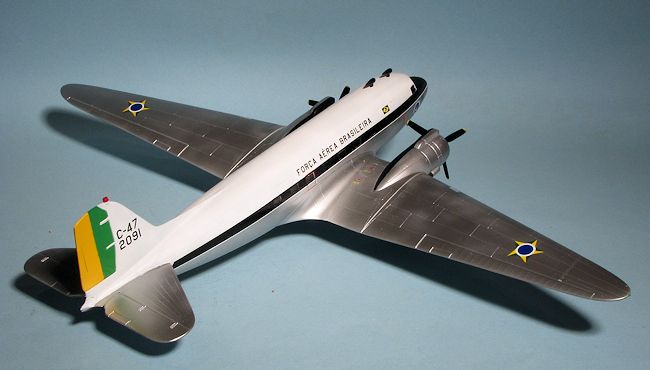 expertise gained flying "The Hump" was later be used in the Berlin Airlift, in which the C-47 played a major role, until the aircraft were replaced by Douglas C-54 Skymasters.
In Europe, the C-47 and a specialized paratroop variant, the C-53 Skytrooper, were used in vast numbers in the later stages of the war, particularly to tow gliders and drop paratroops. In the Pacific, with careful use of the island landing strips of the Pacific Ocean, C-47s were even used for ferrying soldiers serving in the Pacific theater back to the United States.
C-47s (approx. 2,000 received under lend-lease) in British and Commonwealth service took the name Dakota, from the acronym "DACoTA" for Douglas Aircraft Company Transport Aircraft. The C-47 also earned the informal nickname Gooney Bird in the European theater of operations.
Other sources (C-47/R4D Skytrain Units of the Pacific and CBI, David Isby, Osprey Combat Aircraft #66, Osprey Publishing Limited, 2007) attribute this name to the first plane, a USMC R2D - the military version of the DC-2 - being the first plane to land on Midway Island, previously home to the native long-winged albatross known as the Gooney Bird which was native to Midway.
The United States Air Force's Strategic Air Command had Skytrains in service from 1946 through 1967.
With all of the aircraft and pilots having been part of the Indian Air Force prior to Independence, both the Indian Air Force and Pakistan Air Force used C-47s to transport supplies to their soldiers fighting in the Indo-Pakistan War of 1947.
Several C-47 variations were used in the Vietnam War by the United States Air Force, including three advanced electronic warfare variations, which sometimes were called "Electric Gooneys" designated EC-47N, EC-47P, or EC-47Qs depending on the engine used. EC-47s were also operated by the 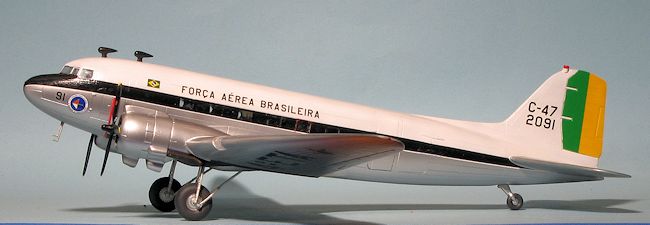 Vietnamese, Laotian and Cambodian Air Forces. A gunship variation, using three 7.62mm miniguns, designated AC-47 "Spooky" often nicknamed "Puff the Magic Dragon" also was deployed.
The Royal Canadian Air Force and later, the Canadian Armed Forces employed the C-47 for transportation, navigation, and radar training, as well as for search and rescue operations from the 1940s to the 1980s.
After World War II thousands of surplus C-47s were converted to civil airline use, some remaining in operation in 2012 as well as being used as private aircraft.
| THE KIT |
This is one of Italeri's older kits, dating from back when the company was known as Italaerie. As such, it has to be one of the earliest of their engraved panel line kits. It comes with no optional parts aside from engine intake scoops and perhaps some antennas. There is a full cockpit/cabin layout with the seats in the cabin already molded in place. Actually, they are simply rectangles molded on the floor, but since the transparencies are small and somewhat thick, you will be unable to tell any detail.
The cockpit has an instrument panel, two controls wheels and a pair of seats. Again, the small and somewhat distorted transparencies will mean that you won't see much at all, but you will need them in place to keep it from looking barren. There are bulkheads behind the cockpit and in the front and rear of the cabin area. No radio room detail is provided and you won't see it anyway.
E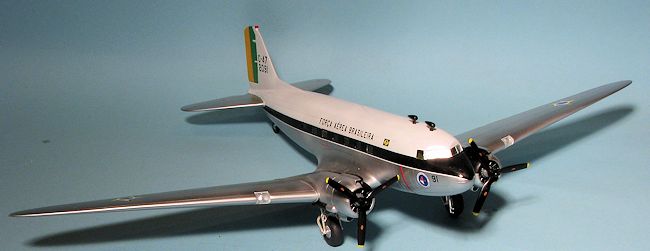 ngines are two rather basic rows of cylinders, but more than adequate for most. Those seeking additional detail are welcome to go ahead and get resin replacements as they are available. The kit provided several different types of carb intake scoop so one needs to either trust the instructions or have a photo of a representative aircraft. Exhaust are somewhat long pipes. There were shorter ones used as well so have your photos ready. This kit is molded in dark green and comes with the earlier, narrower props. The later boxing (usually in olive drab) comes with paddle bladed props. An astrodome is provided that is simply placed atop the fuselage in the appropriate position. The kit also comes with a separate tail cone.
Wings are five pieces with three lower sections and two overlapping upper pieces. The engine nacelles are incorporated into the wing halves. Landing gear is nicely done and looks the part. Main gear legs will have to be spread to insert the wheels. You can also get metal gear from Scale Aircraft Conversions for this kit if you wish. The tail wheel is molded in with the tail gear.
Instructions are well done with generic paint references. Two sets of marking are shown in the instructions. One is a post war plane with the USN that has a shark mouth. This aircraft has an anti-collision light on the tip of the fin. The other is a WWII RAF type in OD with invasion stripes. Can't tell you about the decals themselves as this kit did not come with them.
| CONSTRUCTION |
When I picked up an earlier bagged kit which had instructions, I also picked up this one. The previous owner had removed most of the parts off the sprues and stuck them into a bag. Initial inspection showed that everything was there so I went ahead and picked it up, deciding to build it in conjunction with the other kit. Because I wanted to do a post war aircraft with this one, I had decided to exchange the props with the other kit, which had the paddle blade props which would be more appropriate for a late war/post war plane.
As with the previous kit, I painted all the interior bits with Model Master US interior green. I then started assembly by gluing the wheel halves together along with the engines. The engines have some rather hefty mold seams, but since they will be pretty well hidden, I didn't bother cleaning them all up. I would 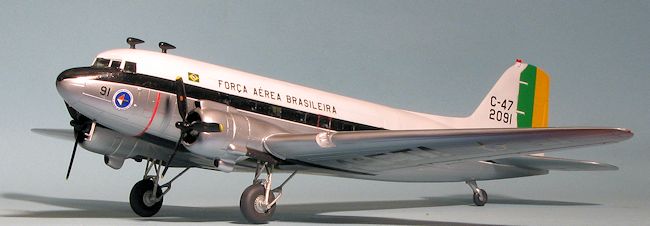 recommend resin replacements if you really want nice looking engines. I also glued the upper and lower wing halves and horizontal stabilizers. These do not meet all the way on the edges so will need filler to take care of that. I used super glue to ensure no shrinking later.
I started assembling the cockpit and realized that this kit was missing its front seats. Not an easy thing to replace, but since they will not be easily seen through the distorted transparencies, I figured any shape that was close would do. Rummaging through the spares box, I came up with a couple of bang seats that looked close. After some careful cutting and shaping, I had some reasonable looking seats so installed those.
I then installed the windows, making sure the right ones went in the right spots. The back set has a smaller pane due to having a door in the row so be sure not to get this in the wrong place or you'll be prying up previously glued sections. The cargo door with the inset passenger door was next. This is a bit of a tenuous fit and not very strong so I backed up all the join lines on the inside with super glue. I also filled in the hole in the left fuselage half where the radar would fit as this plane did not have that feature. I should add that there is a filled in window just near the cargo door goes (this is to be opened for the DC-3 boxing). This area has sink marks and needs filled in.
With that taken care of the interior was installed and the fuselage halves fit together. After the usual filler, the tailplanes, which had previously been glued and cleaned, were installed. These have some pretty hefty seams to fill so that was done. I then glued on the lower wing center section. This had a  pretty good size area behind the flaps that needed several coats to take care of. While that was being attended to, I glued on the preassembled wing sections. The wings have a goodly gap where the roots meet the fuselage. In case you have not realized it, pretty much all of the seams need filler.
I assembled the engine cowlings, trapping the engine and the oil cooler screen between the halves. I used super glue for the filler on these as I find it works best when one has to get the seam at the cowling fronts right. This plane uses the shorter, two piece carb intakes that go almost to the lip of the upper cowling and those were glued in place. Then engines were then glued onto the nacelles and the cockpit glass installed after being masked.
| COLORS & MARKINGS |
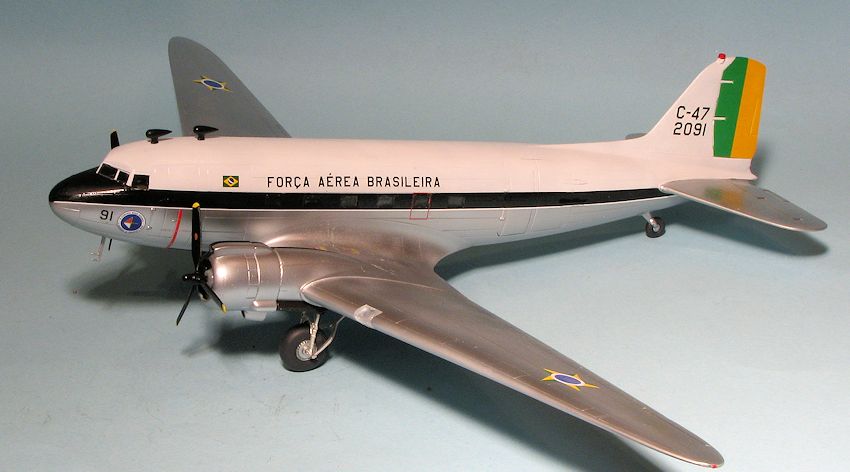
I decided to do this one as a post-war aircraft, in particular, one that served with the Brazilian Air Force. This will make the second Gooney Bird I've built because of a single decal sheet, in this case it is FCM sheet #72-28 which has markings for two different aircraft, one with 4 ETA and the other with 5 ETA. Not sure exactly which one I will use at this time, but both are painted the same. They are white roof and tail with the rest of the plane in aluminum and large black areas around the exhaust and inner upper engine cowlings.
The airframe was first primered with Tamiya grey primer and the white parts painted with Tamiya X-2 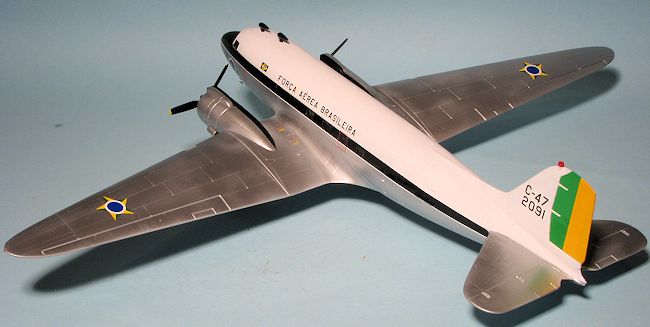 gloss white. This was masked other than the rudder which was painted yellow, masked off and the forward part painted green. I used Model Master insignia yellow and Floquil's Racing Green for the two shades. Then I sprayed on the Alclad II aluminum. The C-47 is not a small airplane that this took quite a bit of paint! The inner engine cowlings as well as the lower wing exhaust areas and a rectangle just forward of the wing on the underside needed to be painted black so those areas were masked off and painted as well.
Before attaching the decals, it was felt that it would be a good idea to put it on its gear. The landing gear for this kit were a mess. The two major strut pieces were broken in several sections and one of the retraction struts was missing. Fortunately, Scale Aircraft Conversions does set 72023 for this aircraft and so that was used instead.
Decals went on without any major issues, though I did get the feeling that these were not designed for the Italeri kit as they were a bit short on the nose. As the fuselage cheatline covered the windows, I had to carefully cut away the decals once they had dried. Naturally I over did it on a few of them so had to touch up the area with black paint.
| FINAL CONSTRUCTION |
 Not really all that much to the last bits. I used the spare DF antenna from a previous build as this plane had two of them on the roof. The landing light lenses were pressed into place and are a tight fit. Last bits to be attached were the exhaust, the fin light, the paddle blade props from an earlier C-47 kit, and the pitot tube on the underside of the nose. I removed the rest of the masking and did some pastel exhaust stains.
| CONCLUSIONS |
Italeri still has this kit released from time to time and while the price has gone up, the kit is very much worth getting. It is not as easy to assemble as many of the newer kits, but any competent modeler should have no problem. To my mind, the most difficult part of t he kit is fitting the windscreen. There are no tabs to prevent it from falling into the fuselage and getting it cleanly removed from the sprue without spider-cracking the clear is not an easy task. Still, the end result is a very nice model that takes up a bit of space compared to the usual single engine prop jobs.
| REFERENCES |
http://en.wikipedia.org/wiki/C-47_Skytrain
September 2013
Thanks to me for the review kit, FCM for the decals and Scale Aircraft Conversions for the replacement landing gear.
If you would like your product reviewed fairly and fairly quickly, please contactthe editor or see other details in the