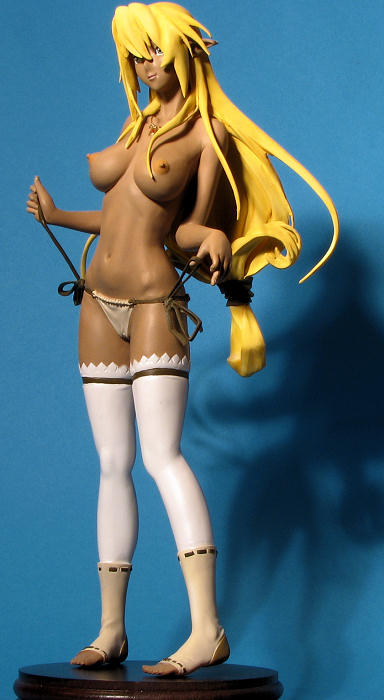
 E-2046 1/6 Sansei Muramasa
| KIT #: | FG 6247 |
| PRICE: | $50.67 includes registered shipping from HK |
| DECALS: | None |
| REVIEWER: | Scott Van Aken |
| NOTES: | Resin. No base included |
 E-2046 1/6 Sansei Muramasa
| KIT #: | FG 6247 |
| PRICE: | $50.67 includes registered shipping from HK |
| DECALS: | None |
| REVIEWER: | Scott Van Aken |
| NOTES: | Resin. No base included |
| HISTORY |
Well, there isn't one. This figure is an elf and a typically Japanese one with long pointed ears. It also has a typical busty and curvaceous Japanese physique.....
There may well be a story behind this one, but a couple of web searches turned up nothing. Not that matters as I found the subject interesting for a couple of reasons.....
| THE KIT |
The
resin kits from E-2046 are a true delight. They are usually superbly cast, have most of
the mold seams already removed, and are virtually free from
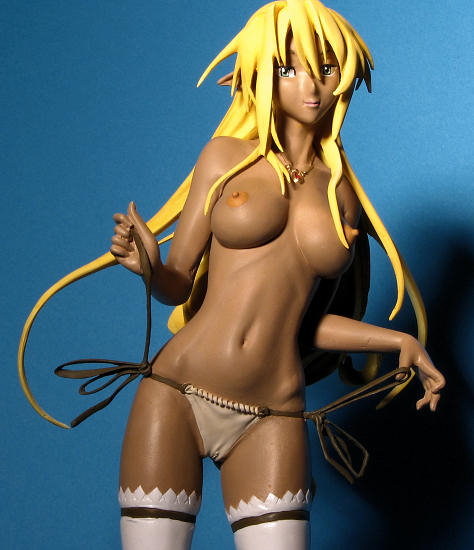 molding defects such
as pinholes or misaligned molds. Of the several dozen I have built over the
years, I have never found a pinhole and have only one time on one part had
issues with mold mis-alignment.
There are fourteen parts in this one with five dedicated to the main body, two for straps and the rest for bits of hair, including a really huge main hair casting.
As is the norm for these kits, there is little in the way of instructions. One gets a parts breakdown and for painting you get a color photo of a build-up. There have been times I have gotten a photo of the unpainted prototype, but usually it is a quality build-up photo. One can, of course, paint the figure any way that one pleases and often folks do.
I would be quite remiss not to mention E-2046's superb packaging. The kit pieces are all in poly bags or zip bags with the bits also wrapped in bubble wrap. Then they are placed in a bubble wrapped lined plastic container. This is then wrapped in several layers of bubble wrap. Newer kits are even better protected and I will cover that when I build one. In several hundred kits, only one time have I had a part broken during shipping. That was a finger and it was easily repaired.
| CONSTRUCTION |
 As with all resin figures, the initial work requires the
removal of all the unwanted resin bits. This includes the small pour stub
remnants as well as any flash and other molding assistants. Often times delicate
pieces will be attached by a rod of sprue to ensure a full mold and this helps
keep them from breaking during transit.
Once those are removed with cutters, then the bits are sanded with a coarse sanding stick, followed by a finer one. It is inevitable that there will be bits of unwanted resin in areas to be joined. This kit was no exception and so those bits were removed either by sanding or using a motor tool. Unusually, this kit had a glob of resin in a seam that was where the arm and body met. This required some additional care and grinding to remove the detritus. Something that is unusual for these kits.
Also unusual was the general fit of the parts. I found that
even after the usual cleanup, the parts did not fit as well as I would have
liked. This required filler and more sanding. For filler, I tend to use super
glue because it does not chip when being sanded like other fillers. It also
carves cleanly. All the body joins ne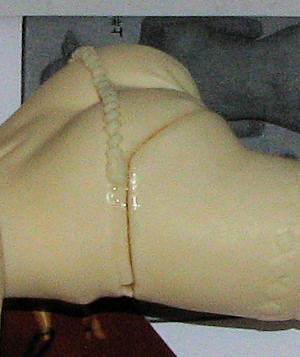 eded
filler and sanding down with the torso to leg joins having the largest gaps. The
legs seemed to have a larger than needed attachment points so these areas were
also sanded down quite a bit so they would not bulge out so much.
With all that done, I wiped down the body with lacquer thinner to remove any oils and sprayed the entire project with Tamiya fine white primer. This will give a nice base for the skin tone and will show up any areas that need attention.
The first
color I used is some Tamiya Pearlescent White for the stockings. This has a
rather complex diamond pattern at the top that I wanted to retain so that was
carefully masked with little squares of tape before masking the rest of the
stockings with that masked, the panty was painted using Testors ANA 618 Sand, as
were the sho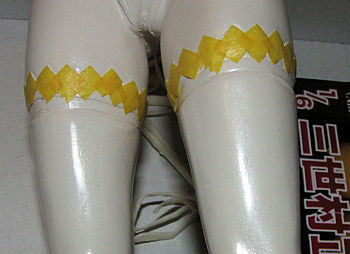 es. These were then masked and the heel was painted a darkish brown
that I had already mixed up. Then the rest of the figure was sprayed with Badger
Suntan Flesh.
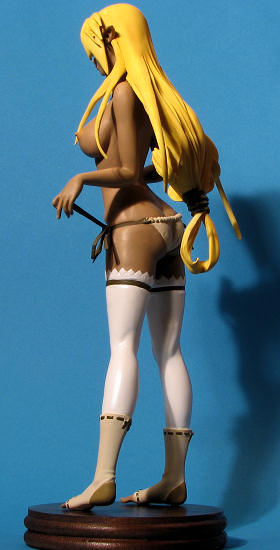
When dry, I painted the eye areas with Citadel Gloss White and the chain with Testors Gold. Nipples and lips used Badger Rose Flesh, but found it too close the actual skin color. I tried several other shades and ended up with a mix of paint to provide what I thought looked the best. The hair is shown in the photo that accompanies the kit as being white, but I already had white stockings so went with a light yellow. In this case Humbrol Linen was chosen. I ended up doing a wash with Vallejo Light Orange to darken things up a bit. The ties for the panty were painted Vallejo English Uniform color. All of this detail work was done with a brush. The gem inside the necklace was painted Vermillion using Tru-Color paint.
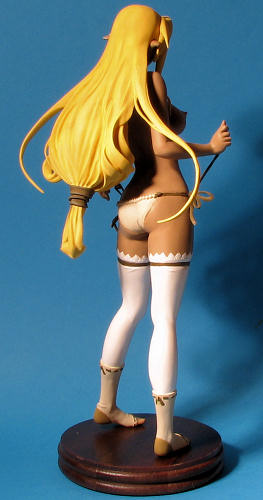 Back at the eyes, these were painted using Vallejo Sky Green.
The iris and upper area used Citadel Black with the fine stuff done using a
Rapidograph pen, followed by white for the life lights. This was later painted
gloss clear. For the leather straps and other similar trim on the foot
coverings, I also used Vallejo English Uniform. All of the 'leather' bits were
later drybrushed with Vallejo Khaki to get rid of the sameness of the color. The
heels of the coverings were painted Olive Drab.
Before attaching the hair, I drilled holes in the bottom of the feet and inserted sections of wire. Using the same drill size, I marked the locations on a nice wooden base and drilled holes there as well. The figure was then attached using super glue. Once that was dry, the hair was glued on. There are two strands that are supposed to fit on the top somewhere, but there is no attachment point and the instructions are rather mum on specifics so I left them off. There was the usual raft of touch up painting required, which is pretty typical for figures. At least when I build them. And that was it.
| CONCLUSIONS |
As usual, I pretty much enjoyed building this kit. The standards of fit were not up to what I have come to expect from E-2046, but they were not insurmountable. It may be that I got a kit from near the end of a production run, where the molds are frequently less 'tight' than the first runs. Whatever, the case, the end result is pleasing and if you like this sort of thing, then it is one that I have no issues recommending at all.
December 2012
If you would like your product reviewed fairly and fairly quickly, please contact the editor or see other details in the Note to Contributors.