Zvezda 1/100 Panzer II
| KIT #: | 6102 |
| PRICE: | $4.95 SRP |
| DECALS: | No options |
| REVIEWER: | Scott Van Aken |
| NOTES: | Snap kit designed for wargaming |

| HISTORY |
 The Panzer II was the common name for a family of German tanks used in World War II. The official German designation was Panzerkampfwagen II (abbreviated PzKpfw II). Although the vehicle had originally been designed as a stopgap while more advanced tanks were developed, it nonetheless went on to play an important role in the early years of World War II, during the Polish and French campaigns. By the end of 1942 it had been largely removed from front line service, and production of the tank itself ceased by 1943. Its chassis remained in use as the basis of several other armored vehicles.
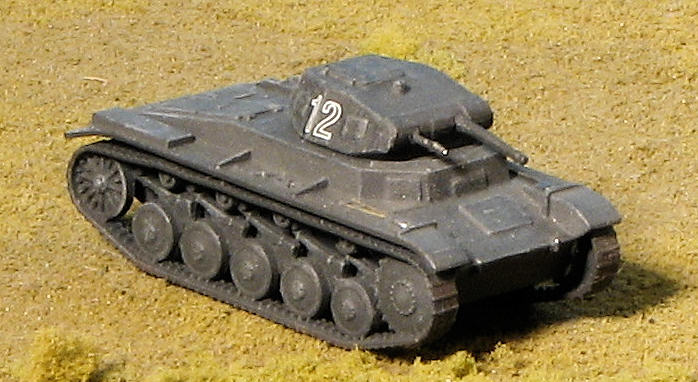
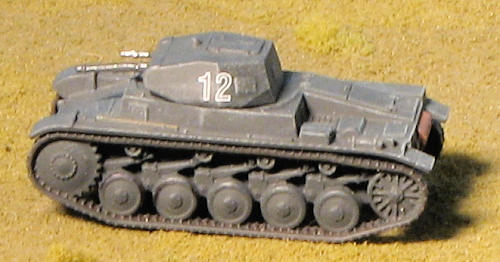
Though the box doesn't state it, from the looks of things, this is the ausf C version. The F was a recce tank and the D that followed the C had only four road wheels.
| THE KIT |
 way, there is one very glossy sprue of plastic and a movement card included in the square box. The packaging shows that these kits are designed to hang from a display rack in stores.
 | CONSTRUCTION |
 I have to tell you that I'm almost embarrassed to consider this a kit review, but it is a kit and I did assemble and paint it so it does qualify.
Well, the parts are very well molded and so there is minimal clean-up needed, but what was there was done, and this was basically the sprue attachment points and a few mold seams. I next snapped the parts together. Yes, there is no glue required and it takes all of about five minutes to get yourself a complete tank. I had thought about painting the parts separately prior to doing this, but really, in a model that is barely 2 inches long, I don't think it makes a ton of difference.
| COLORS & MARKINGS |
Opening up an old tinlet of Humbrol Panzer Grey, I mixed enough to paint the tank and the movement flag that fits into a hole in the bottom of the hull. I was somewhat concerned that the paint may not stick to the styrene as this is somewhat flexible stuff, but  it seems to have worked just fine and took the paint without any problems.
There is more detail on this than one might suspect and using both light grey and white, I dry-brushed the entire tank. It was successful in its job and details became a lot more visible. Using some Trackbase acrylic Track Color, I then painted the tracks. Even when mixed, this paint is a bit thin as I believe it is designed to be air brushed and I used a standard paint brush for all the detail stuff. Two coats were necessary and I'm thinking that it probably needs a primer as well, which in this case was provided by the Panzer Grey.
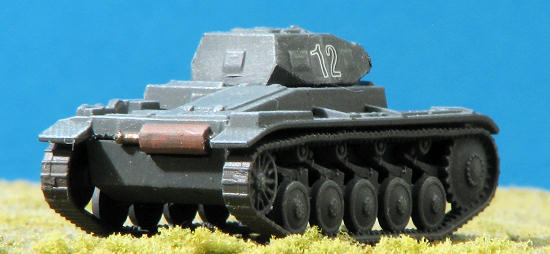
In the back I used some rust brown for the muffler and some Vallejo Tinny Tin for the exhaust pipe. Steel was used to highlight the spade, pry bar, cutters and other metal bits. Some Testors Wood was lightly applied to the handles. I debated on whether or not to attempt to paint the road wheels black,
| FINAL CONSTRUCTION |
Actually, there wasn't much. I was able to find some properly sized decals for this by searching the internet until I came upon a company selling Decal Details, which I bought from I-94 Enterprises after e-mailing the owner and asking for recommendations for a 1/100 panzer. They arrived quickly and once applied with some setting solution, worked very well indeed.
| CONCLUSIONS |
This is one of those kits that if you are not a wargamer, will provide a pleasant diversion from whatever you normally build. They assemble quickly and though the lack of proper decals may be an issue with some, you can find something that will work without too much trauma. Makes into a pretty neat little model and won't break the bank.
May 2011
Thanks to www.dragonmodelsusa.com for the review kit. Get yours at your local retailer.
If you would like your product reviewed fairly and fairly quickly, please contact the editor or see other details in the Note to Contributors.