Fujimi 1/72 F-4E Phantom II
| KIT #: | ? |
| PRICE: | $15.00 when it was new |
| DECALS: | Three options |
| REVIEWER: | Scott Van Aken |
| NOTES: |

| HISTORY |
Those who know little about the F-4 Phantom II really need to read a lot more and that includes the many fine reviews on this site. I will go into more detail on the F-4E variant. After realizing that missiles of the day were not as good as they'd hoped, the Air  Force directed McDonnell to add a gun to the next generation of F-4. The 20mm Vulcan cannon was the latest and greatest so that is what was installed in the nose of the F-4E variant. The basic systems in the plane were quite similar to the F-4D, but new engines were part of the fit as it never hurts to have a bit more thrust.
The F-4 was then able to actually have a back-up to the unreliable 'dog-fight' missiles that it was carrying in combat over the air in Vietnam. The Falcons were hopeless and the Sidewinders had a very small angle of lock. Sparrows worked quite well, but with the rules of engagement requiring visual contact before firing, the enemy was often inside the minimum range of the Sparrow when the fight began. I don't think the gun was really used in all that many MiG kills, but at least it was there.
No one could call the Phantom a dog-fighter. It worked best in vertical maneuvering as it had a ton of thrust. In order to help it turn a bit better, modifications were made to add slats to the outer wing panels. The inner slats were also changed in the way they  worked when compared to the C and D versions. This increased the wing area and allowed a smaller turn radius compared to unslatted F-4s. It came at a price and that was a minor loss in speed. In order to handle that 'visual sighting' thing, a TV camera was installed in the right wing. This allowed crew to spot an enemy at a longer range and it also had some low light level capabilities. A similar item was installed on F-14s. Finally, there were problems with cracking on the rear stabilators and so a metal reinforcement in the shape of an arrowhead was placed on the stabiliators to offer greater strength. Apparently the Luftwaffe didn't have this problem as their nearly identical F-4Fs did not all have this reinforcement.
For those who are camo freaks, the F-4E wore all of the Phantom's camo schemes except for the light gull grey and white scheme carried by early F-4s. Only a few F-4Cs and RF-4Cs were ever to have the honor of wearing all the different schemes the F-4 used in its career as often times the planes went from SEA wrap to Hill Grey or from standard SEA to Euro 1. The standard SEA, SEA wraparound, Euro 1, and Hill Grey II schemes were all used by the F-4E. In actuality, the F-4E may have actually been in service with the USAF longer than the G model if you include the 20 FS. This was the German F-4 Training Squadron at Holloman AFB. They used F-4Fs in the last years of the unit's existence, but did have F-4Es for a long time. Now, the only place you'll see an F-4E in the US is one of the remaining drones that are used by USAF at Holloman and Tyndall. Even those are nearly gone as the USAF has decided to use the QF-16 as their next full scale target aircraft. Good luck with those weak landing gear!
| THE KIT |
 There are currently two major companies that produce F-4E kits; Fujimi and Hasegawa. One can add the Airfix kit into that, though it is rather crude by comparison. Hasegawa's kits are very pricey at the moment and while excellent kits, can be rather fiddly. This is due to Hasegawa's use of many inserts to get the variant exactly right. For those who want something a bit less fiddly, then Fujimi would be a good choice.
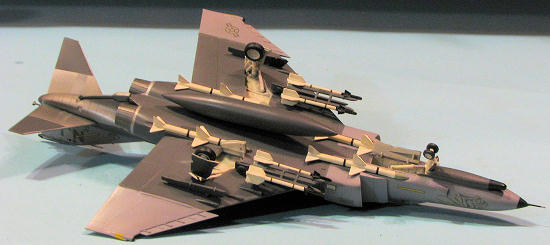
Unlike Hasegawa's offerings, the Fujimi kit comes with a full load of air to air missiles. There are a lot fewer inserts and the detail is not as great in the wheel wells or in the cockpit. Not bad, but just not exactly the same. The kit includes both wing and centerline tanks. The cockpit is rather basic with decals for the instrument panels and side consoles. The seats are OK, but best replaced with resin ones if you wish to have more cockpit presence on your kit. This particular boxing included both a single-piece and multiple piece canopy/windscreen.
| CONSTRUCTION |
As with most kits, I started by looking for subassemblies. For this case, it was the cockpit, followed by the centerline tank. This kit had Fujimi's 'improved' cockpit. The original few boxings had rather large gaps at the back and front of the cockpit tub so new plastic bulkheads were included to fill these open spaces. Still pretty basic stuff for the cockpit, but nothing that could not be improved by the modeler. I built it stock using Dark Gull Grey for the interior bits.
Though probably not needed, I installed a bit of nose weight and then trapped the interior in the fuselage halves. Installing the intakes was next and like just about every F-4 kit I have built, some filler was needed for a smooth transition. Intakes were painted white on the inside.
Next major assembly was the wing. This is a slatted version as is appropriate for the later F-4E. One has to open holes for the pylons and for the inboard slat actuators. This was cemented in place and the fit is fairly good. Again, filler needed just aft of the wings as this is another area in which all F-4s need filler. I am sure that a real pro could build this without filler, but not me. The electronics bay intakes were glued on and sanded to shape. I did not want the chaff/flare doors open so those were also glued in place. The canopy was glued on and this was about the time I decided to start in on painting.
| COLORS & MARKINGS |
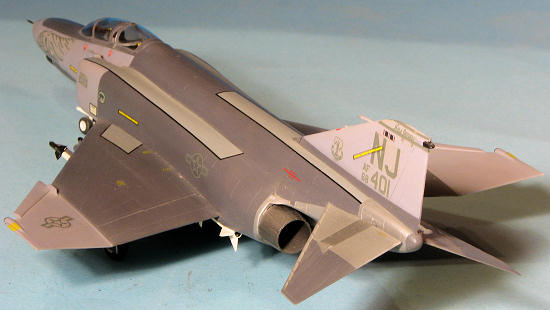
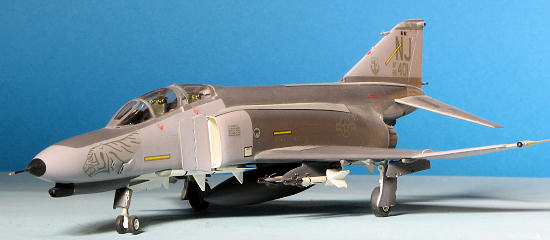
I had chosen the 141 TFS, New Jersey ANG option as I had seen the tiger head markings close up at Phan-con 1990 held at McConnell AFB and so really liked that scheme. This was to be in the Hill Grey II scheme of a dark and a lighter grey. There are subtle variations on the theme, but most are quite similar. I masked all of the demarcation lines for this as often the spray pattern is very tight.
 Now for a bit of admission. This kit was built in late 1990 and at that time I was using Gunze acrylics almost exclusively. That was the reason I masked as I was unable to provide a convincingly tight demarcation line with the paints. Typical of Gunze, it went on quite well. For the metallic bits I used various shades of non-buffing Metallizer. This also required quite a bit of masking. The wheel wells had been painted white and filled with tissue. I also painted all the landing gear bits, wheels, missiles, pylons and drop tank at this time. Basically, all I had to do was start gluing bits in place.
But first, I glued on the landing gear. I find this makes applying decals much easier. The kit was given a coat of Future and the kit decals put in place. I have to say that I found the Fujimi decals to be excellent. They gave me no issues at all and did not silver after the semi-matte was put over them. There are quite a few markings for the F-4 and that included the walk areas on the wing, intakes and upper fuselage.
| FINAL CONSTRUCTION |
I then attached all the rest of the bits like the pitot tube, gear doors, wheels and wing pylons. Stabilizers were a bit loose, but I used super glue on these. I should mention that the main gear on the F-4 should not be vertical from the wings but be slightly bowed inward.
| CONCLUSIONS |
 I realize that the Hasegawa kit is the darling of 1/72 F-4 builders and for good reason as it is an excellent kit. However, if you want something that looks almost as good with less effort, then I highly recommend the Fujimi versions. These can still be found at a reasonable price from swap meet vendors.
February 2012
Thanks to me for this one.
If you would like your product reviewed fairly and fairly quickly, please contact the editor or see other details in the