Fujimi 1/72 A-7B Corsair
Kit Number: F10
Price: $10.00
Decals: Two versions, CAG for VA-56 and Bicentennial for VA-215
Review and photos by: Scott Van Aken

The A-7 series of aircraft were designed to replace the venerable A-1 Skyraider in Navy service as a carrier-borne medium attack aircraft. Often called the Sluff (short little ugly fat fellow), it was capable of doing its job and doing it well. It was even purchased by the USAF in the A-7D version and was used for a number of years, mostly by the ANG, until phased out in the early 1990s. The Navy versions last saw squadron service during Desert Storm and were then retired. A number of foreign countries, including Greece, Portugal and Thailand have bought surplus A-7s, all of them Navy versions.
Fujimi's kit of the A-7 is still the best you can get in 1/72. As with many Fujimi kits, these are designed in such a way as to allow all the A-7 single seaters to be made from the same basic mold. When I built my Fujimi A-7s about 10 years ago, I managed to do the entire family. The two-seaters, the C and K, can be done using Maintrack's conversion. They are molded in medium grey plastic that is fairly hard and come with a great selection of stores and thin, clear transparencies. In fact, the transparencies are so thin, that most of the kits I built had windscreens that were broken in two from the weight of the other parts. I had zero luck getting replacements from either Fujimi or their importer, Marco Polo.The rest of the kit has fine engraved panel lines and raised details in the cockpit on the instrument and side panels.
When building the interior, I placed the decals over the raised detail. There wasn't much of a match, but in 1/72, it looked good enough, especially as you can see inside even with the canopy closed. No rudder pedals, but a nice seat and control stick. The most difficult part of the kit is the intake. You get one that goes back quite a ways, a nice touch for something so large. The problem is that there is a huge seam running right down the middle. It is even v shaped so requires many putty sessions to get it right. There is sufficient room above the intake for weight. The rest of the parts fit with little fuss. One thing about doing many versions are all the fiddly parts that have to be added on. One is a set of ducts that run outside the airframe. No matter how I tried, I always broke this part getting it off the sprue. Same for the nose pitot tubes and a number of other fine bits. It is a problem when the attachment points are five times thicker than the part!! The instructions are quite good and show where all the parts go.
As I mentioned, there are lots of stores to go on those six wing pylons. Depending on the kit, you get different stores. All come with MERS and TERS and iron bombs. Some come with Shrike or Maverick missiles. I showed my ignorance on this kit by putting Mavericks on a Navy plane. Well, they look nice. Also included are drop tanks, an item almost always carried. Care needs to be taken installing the pylons as there is no firm attachment to the wings, just some marks showing where they should go.
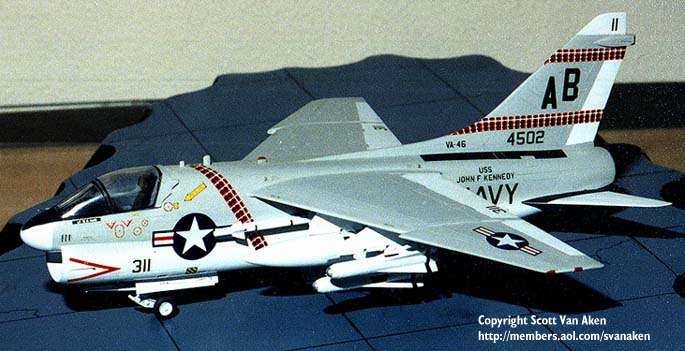
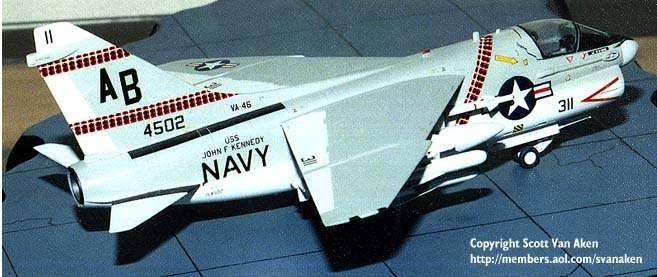
 Once it was built, it was time to add the decals. The kit ones are
not that good, mainly because they are a bit transparent, the white is actually
a cream color and the reds are far too brilliant (typical faults of pre-90s
Japanese decals). So I went to Microscale for one of their many sheets
on Navy A-7s and picked one from VA-46, the Clansmen. VA-46 has had
at least four different styles of markings similar to that shown on this
model, and Microscale's sheet can be used to do a couple of them if cut properly.
The kit is recommended, especially for A-7 fans who are willing to put up with the rather fussy build. There are lots of very colorful markings to be applied to this aircraft and you could easily do dozens of them in their various livery.
January 1998
Copyright ModelingMadness.com. All rights reserved.