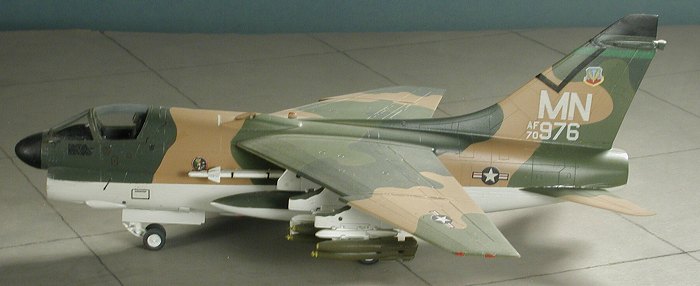
Fujimi 1/72 A-7D Corsair II
| KIT # | F-11 |
| PRICE: | $14.98 when new |
| DECALS: | Three options, all ANG |
| REVIEWER: | Scott Van Aken |
| NOTES: |

| HISTORY |
 they could do it). These were all used by the test squadron at Edwards for the various test programs that those folks do. Afterwards, these aircraft were used as instructional airframes at various schools.
Though a tad late for any real use in Vietnam, those that were being utilized proved that they were quite capable. Though able to carry nearly as much as the fabled SpADs, their high speed made them somewhat less useful in escorting Jolly Green's and covering them when rescuing downed pilots in unfriendly territory. They also didn't have the same endurance as the A-1, but that was somewhat overcome by the ability to refuel and return, assuming they still had ordnance to expend. No one has come up with a way to rearm aircraft in flight.
The A-7D or SLUFF (Short Little Ugly Fat, F***er) was operated by two wings in the regular USAF at Davis-Mothnan in Arizona and Myrtle Beach on the east coast before being hurriedly handed over to the ANG once the A-10 came on line. Well over a dozen ANG squadrons flew the A-7D and two seat A-7K before they were retired in the late 1980s, early 1990s, with most units going to F-16s.
| THE KIT |
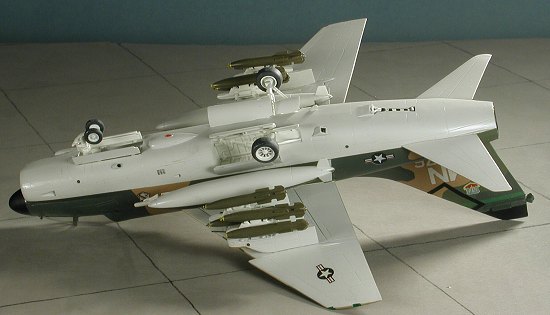 Though I can't show you the guts of this kit as it has been on my display shelf for well over a decade and a half, I can tell you that despite being nearly 20 years old, it is the finest 1/72 A-7D around. Fujimi's Corsair IIs all come with a good cockpit with raised detail on the instrument panels and consoles. The bang seat looks good as well. It also had nicely detailed wheel wells, and comes with enough stuff to fill the underwing pylons, which in this case was a pair of drop tanks and a slew of Snakeyes. There were other options that I don't recall, but didn't use. What is even nicer is that the bomb racks are actually well done and can be used on other 1/72 modern jets. Markings were for three ANG units and Fujimi decals have rarely been a real problem. Sorry to be brief, but this comes from memory! Needless to say, if you run across these kits and want a good A-7, pick them up as they are still the best in this scale.
| CONSTRUCTION |
Gazing at the completed model, I can tell you that most construction is pretty straight forward with little real trouble. However, there are areas of real concern. First is the intake. Fujimi gives you a great intake that is nice and long, unlike ESCI 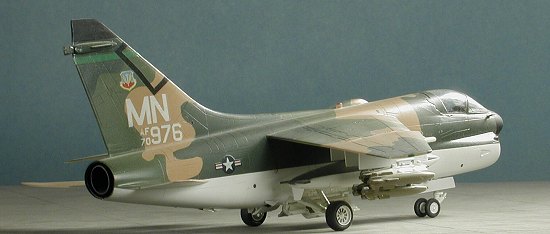 and Hasegawa. However, it is a nightmare to eliminate the seam. It takes multiple applications of filler and you have to be real creative about sanding off the excess as it isn't easy to get to. Best results are from rolling a tube of sandpaper around something like a paint brush handle and using thin sanding sticks.
Another area of concern is the canopy and windscreen. These are very thin and I've broken more than my share as they are rather brittle and can't take much stress. Adding the RWR antenna on the tail tip is also not an easy fit, being a bit too large and either needing filler once attached or some gentle sanding to make it narrower. I also ran into some trouble with the wing pylons in that I don't recall them having any positive locator pins, just some outlined areas on the underside of the wing for a butt join. Since one almost never saw this plane without all three pylons, it is imperative that they fit well and are properly aligned, not an easy task for most. Fit of the ordnance is also a butt join, making things even more complicated. No nose weight is needed, but it doesn't hurt to have a bit installed!
| COLORS & MARKINGS |
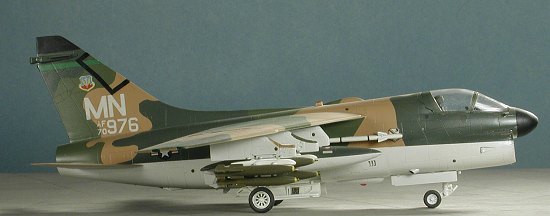
All of the schemes in the kit are in the SEA colors of two greens and a tan upper and light grey undersides (FS 34079, 34102, 30219 over 36622). The aircraft later went to a wraparound scheme without the underside color, then to a modified Euro 1,  and finally ended its career in a two greys scheme, also a wrap around like the Euro 1 scheme. As I was heavily into Gunze acrylics at the time, those are the colors I chose. I was unable to get a nice tight line free-handing the scheme (a problem I still have with acrylics) and so masked all the colors. It was the usual hour of masking for five minutes of painting deal, the Gunze doing an excellent job as it always does.
For markings, I went to an old ModelDecal sheet that had one of the early Myrtle Beach schemes. Basically, the only difference between this plane and the hundreds of others was the tail code and the unit badge. But it was something different from the norm. I note now that the decals were a bit off register as you can see with the insignia. I didn't clear coat the model ahead of time as Gunze dries semi-gloss anyway and Modeldecals are not as prone to silvering as some others, despite their being a tad thick. I did flat coat it somewhat at the very end of construction, though not as matte as I'd have liked and it seems I forgot to mask the canopy when I did it. Well, I was young(er) and cranking out about a dozen models a month at the time so was in a hurry to get on to the next subject.
| FINAL CONSTRUCTION |
As you can imagine, I left off the pylons, ordnance, gear doors, wheels, pitot tubes and other 'fussy' stuff until after all the painting and decaling had been completed. I used super glue for the gear doors and other things that might break off and good thing too, as much of that was broken off during the several moves that this kit has made since inception. Last bits were the usual paint touch-ups and replacing stuff that I knocked off handling the kit.
| CONCLUSIONS |
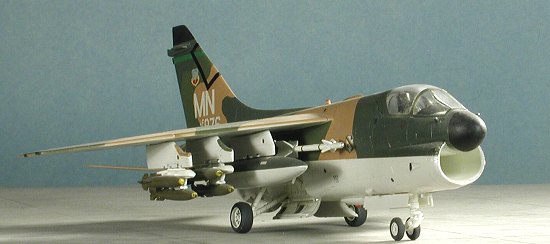 Though I did mention that this is the best A-7D around in 1/72, it bears repeating. I still have one of every variant produced by Fujimi in my 'to be built sometime in the future' pile. I've not built one in well over 15 years and should pull one out and give it a go. They really are great kits and still can be found.
June 2004
Copyright ModelingMadness.com. All rights reserved.
If you would like your product reviewed fairly and fairly quickly, please contact the editor or see other details in the